Updated: 2026.5.3
| Contents |
What We're Testing This Time
 |
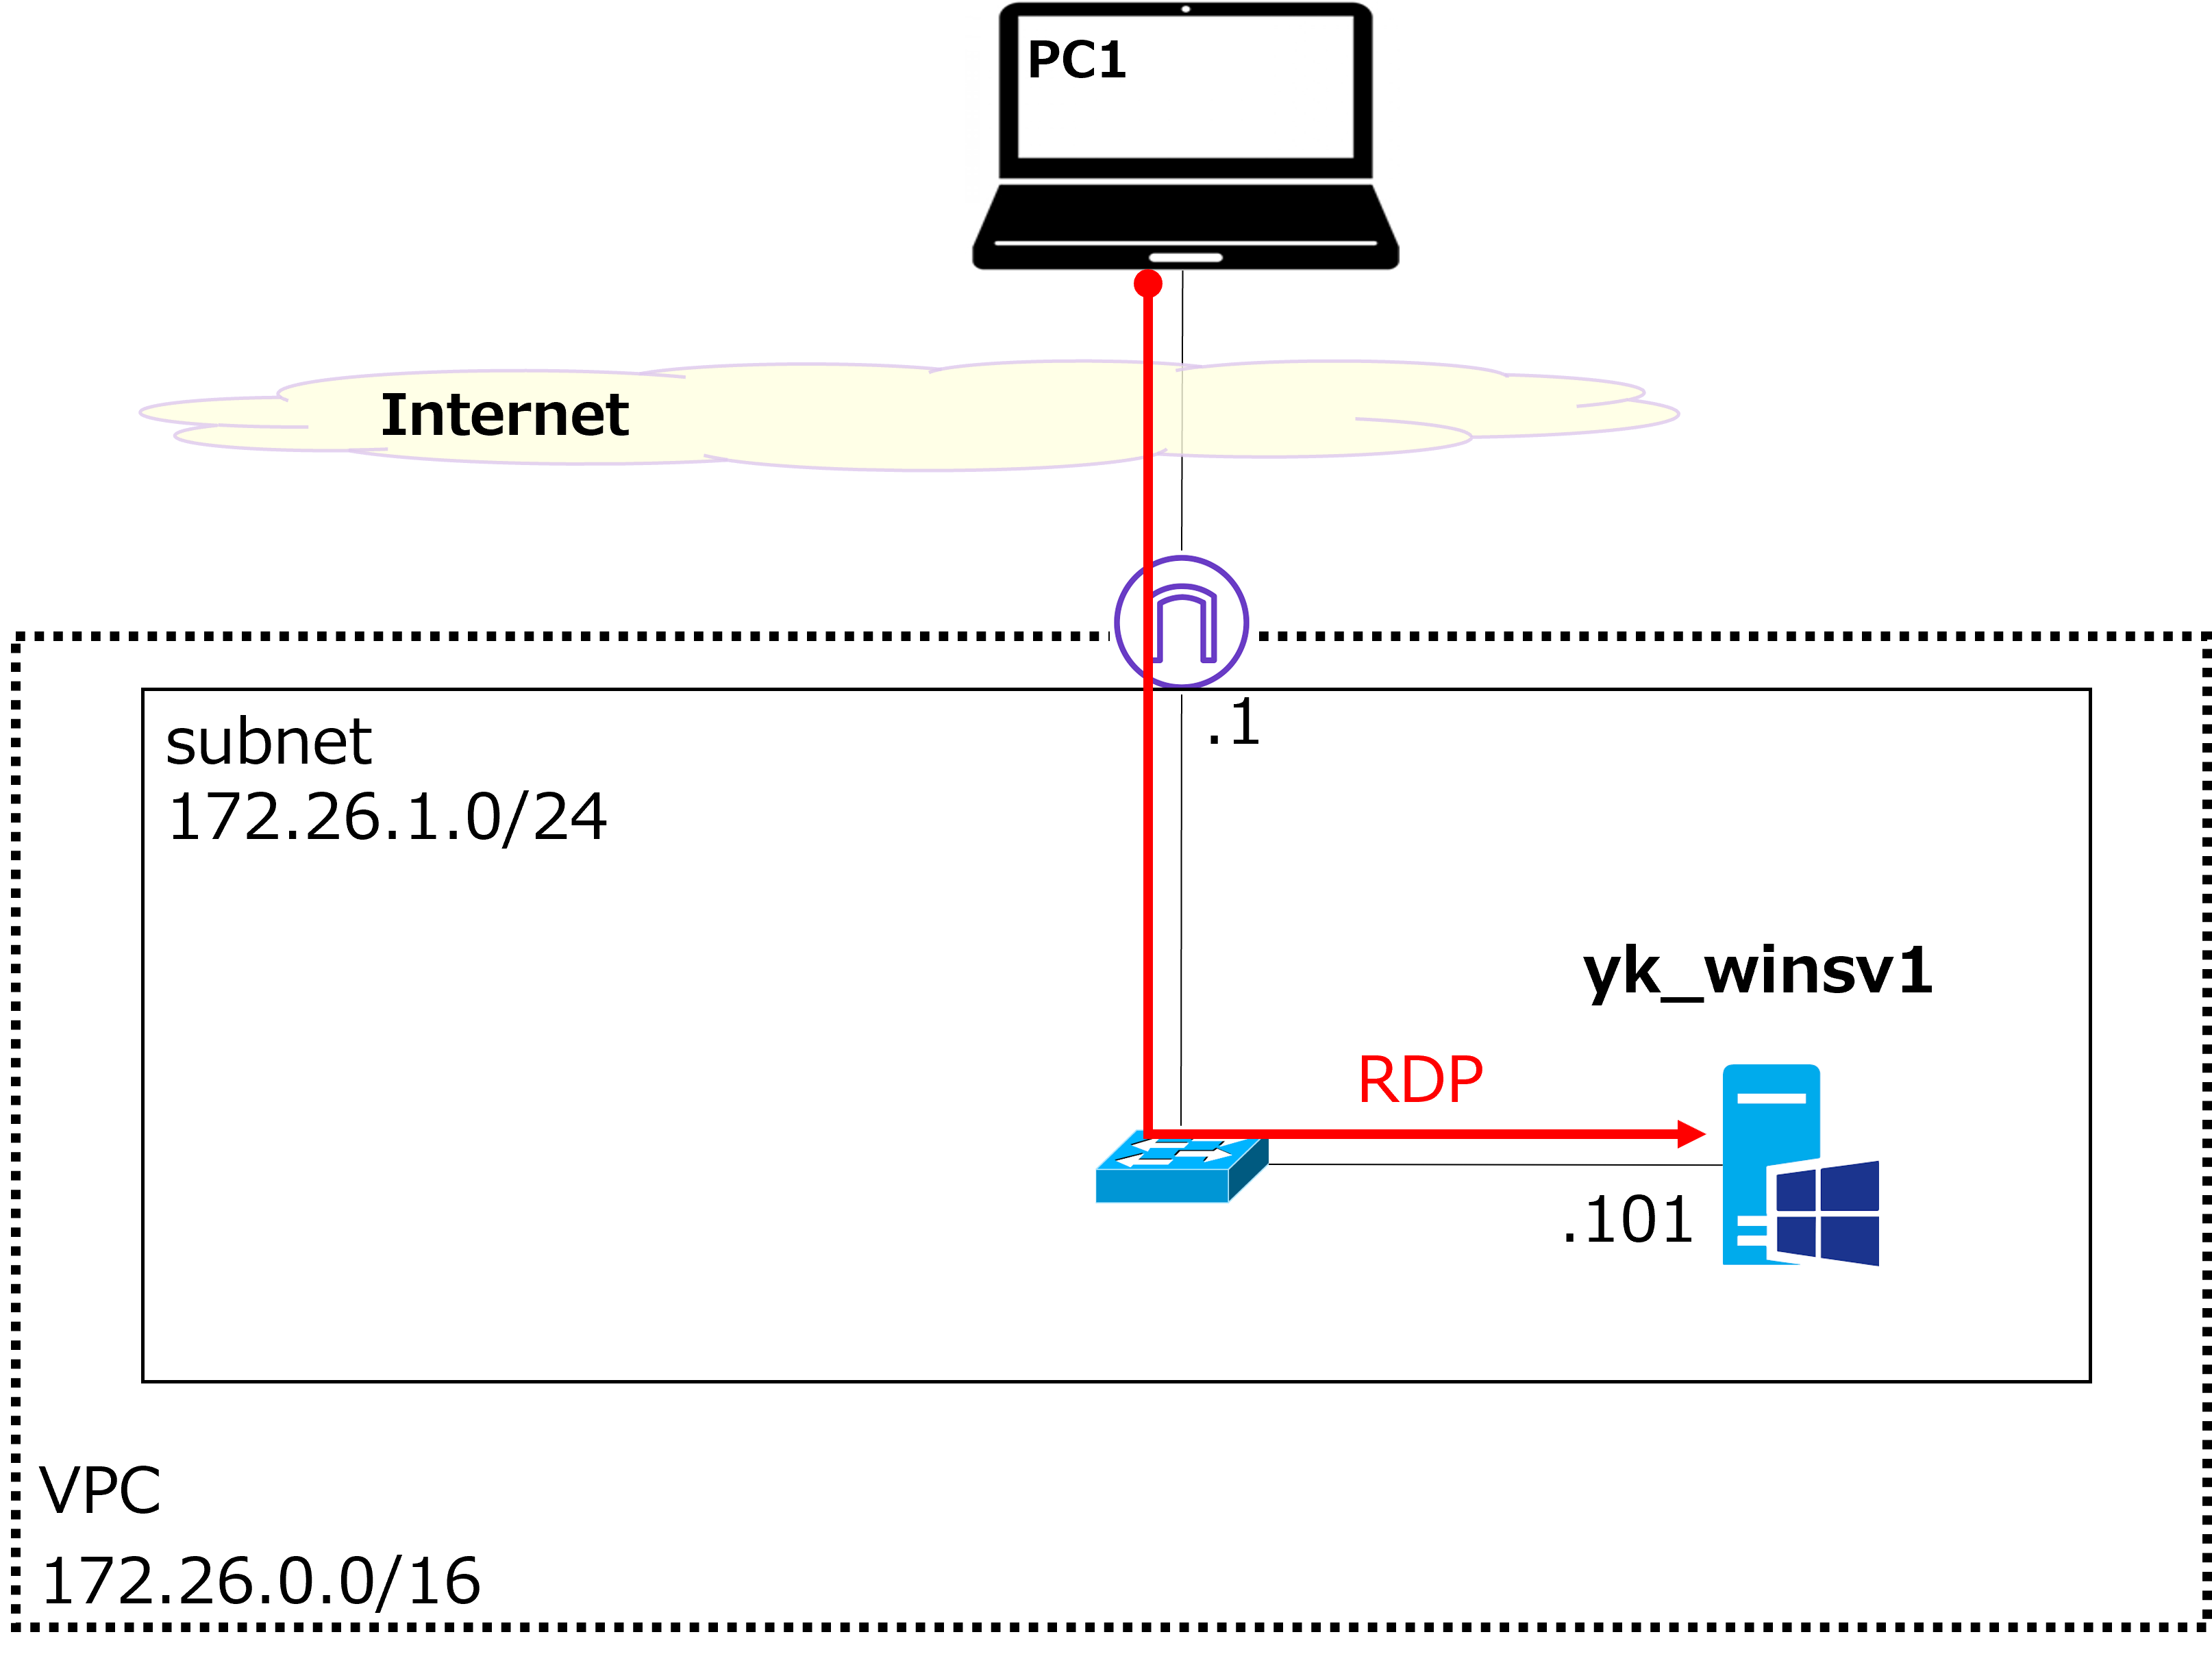
Last time, we successfully connected to the Windows VM (yk_winsv1) from PC1 via RDP, as shown in the diagram above. Today, let's try ping in addition to RDP. |
 |
Hmm? If RDP works, shouldn't ping work too...? Let me try it. I started yk_winsv1 from the Instances screen, and the instance state is now Running as shown in the red box. The dynamic GIP (Global IP address) — the public IPv4 address — has been assigned as 15.152.92.93.  RDP connected successfully!  Now let me try ping. C:\Users\USER>ping 15.152.92.93 Hmm, it's not going through... |
|
That's a tricky one — can you think of any reason why? |
|
Oh, maybe Windows Firewall is blocking ping. Let me allow it.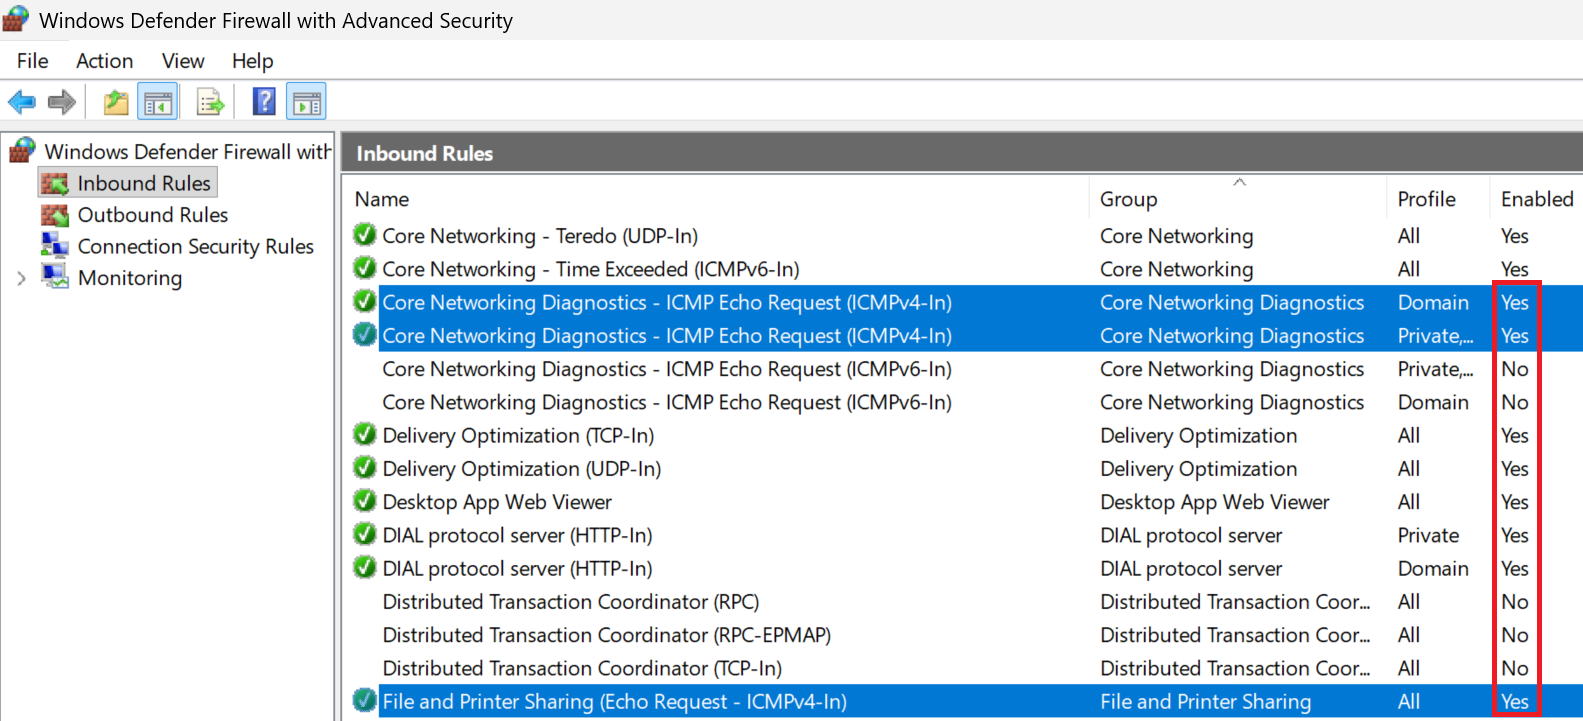 Okay. Let me try ping again. C:\Users\USER>ping 15.152.92.93 Still not going through... |
|
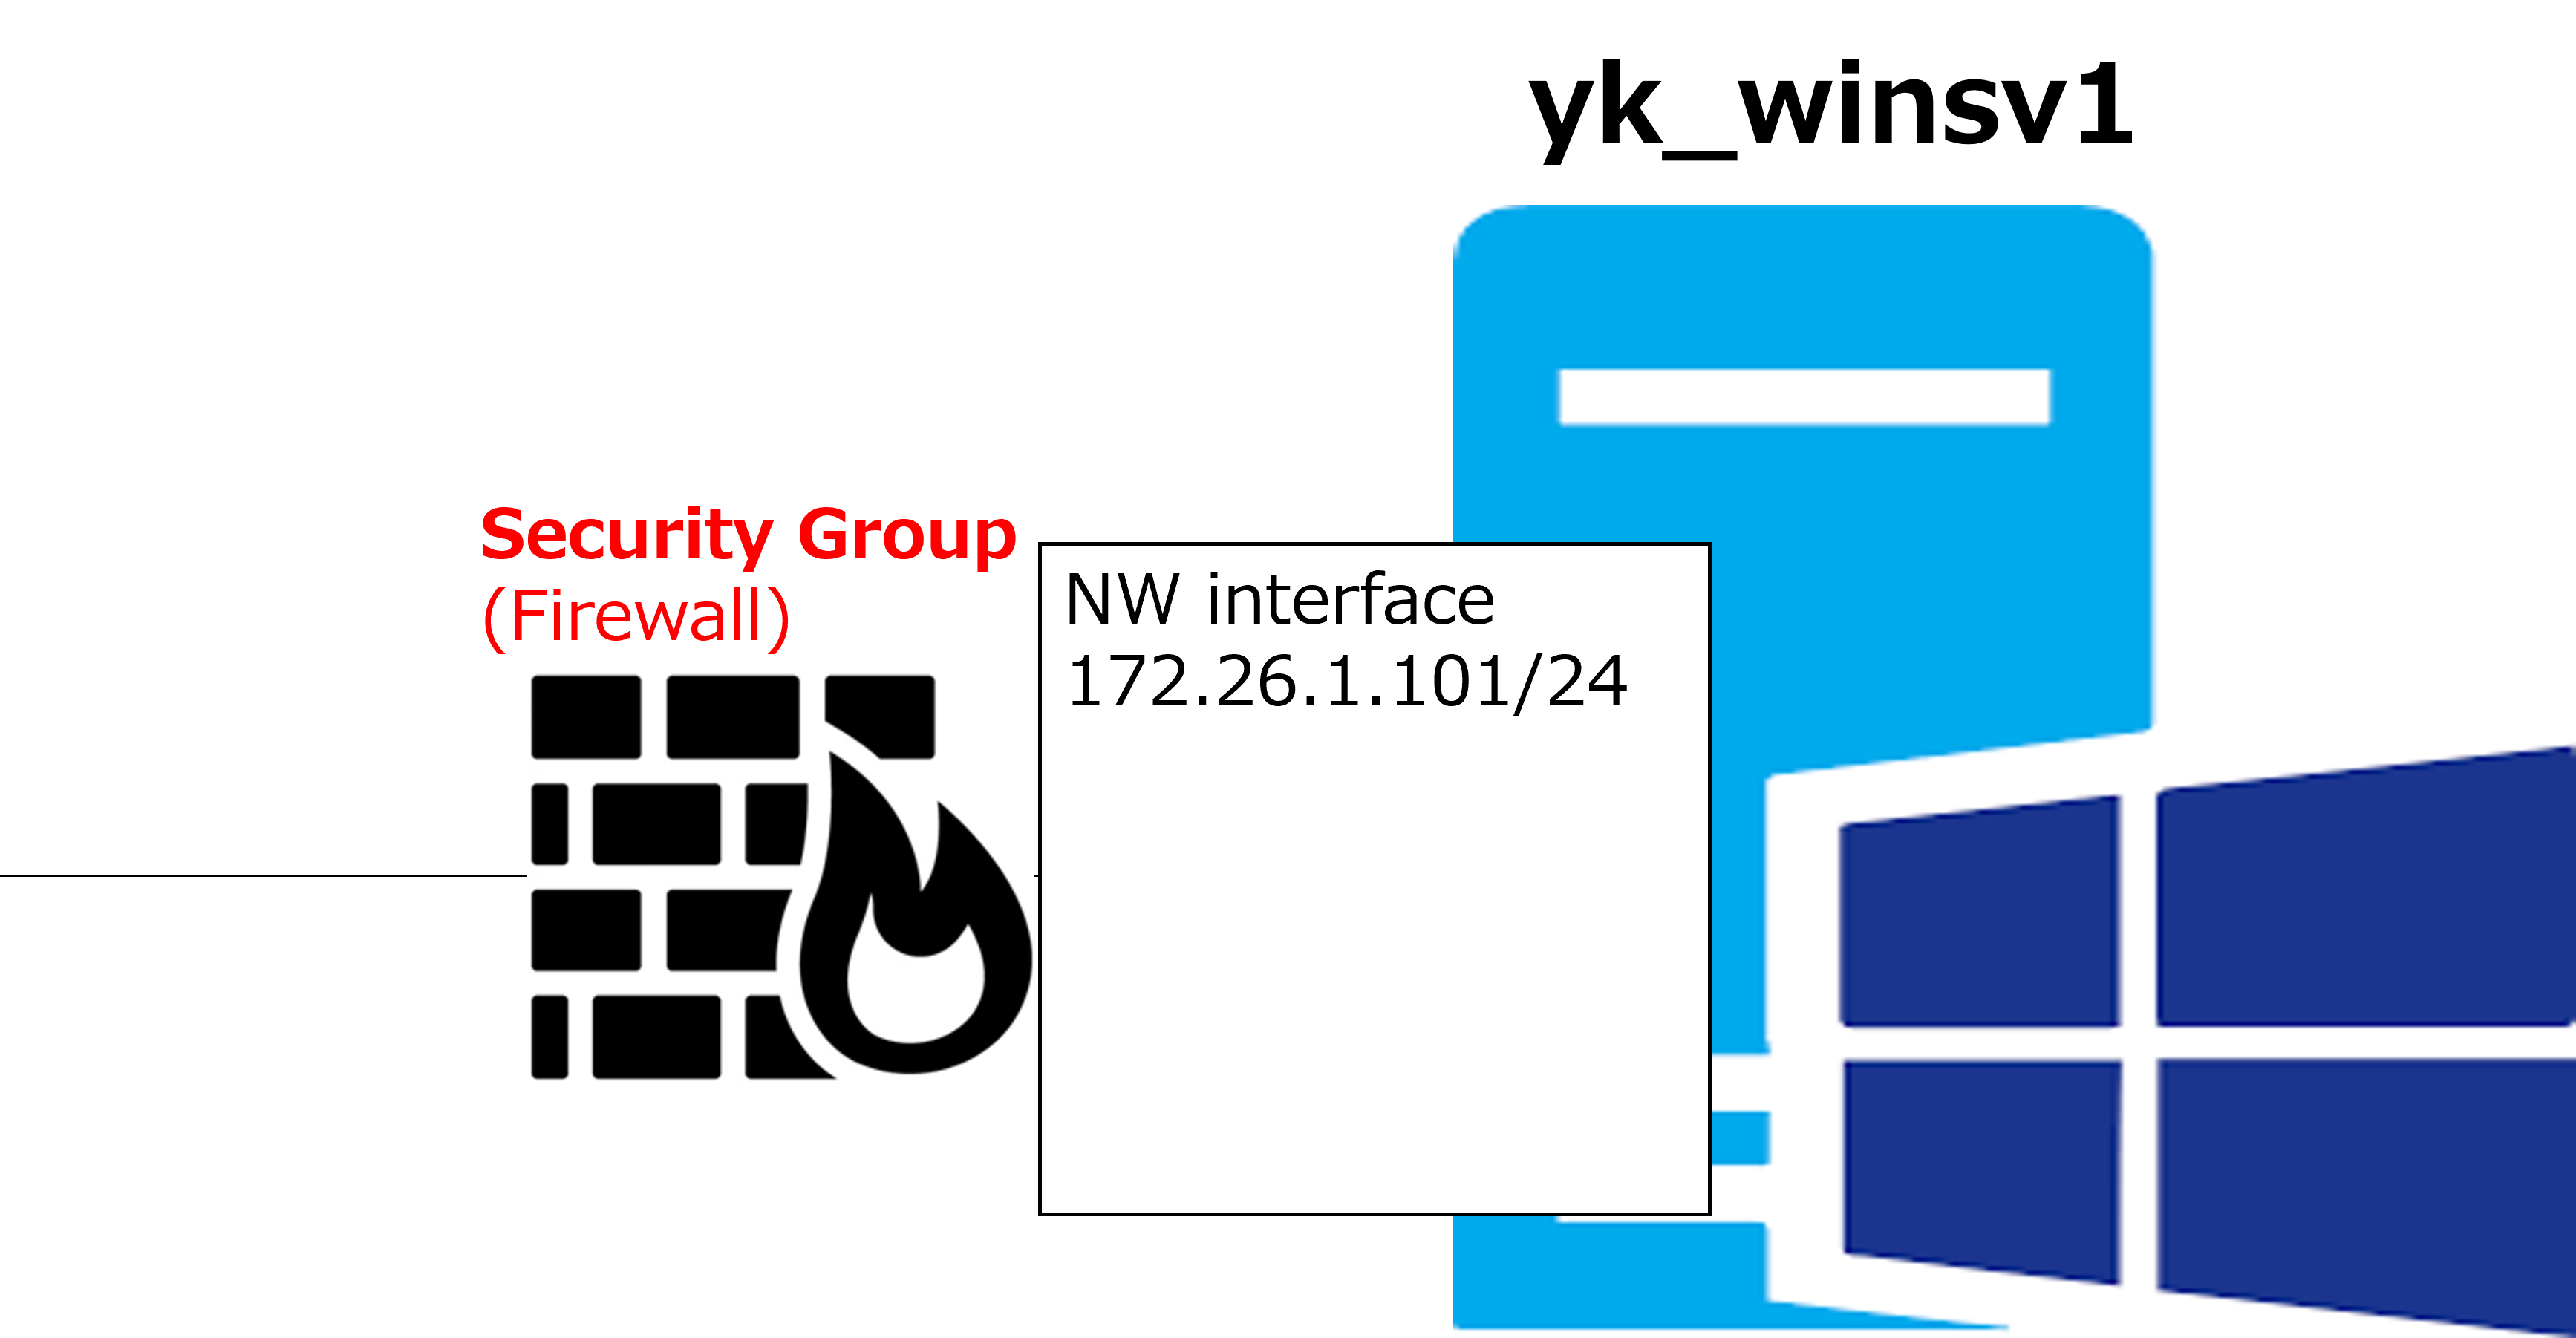
Sorry for putting you through that — ping not working here is actually the expected behavior. Just like a physical machine, a VM has a network interface for connectivity. Each interface has a SG (Security Group) — a firewall (FW) feature — forcibly associated with it, as shown in the diagram below. That's what's blocking ping in this case. |
|
I see. "Security group" is a confusing name though — it's easy to mix up with Security Groups in Active Directory or Entra ID... |
|
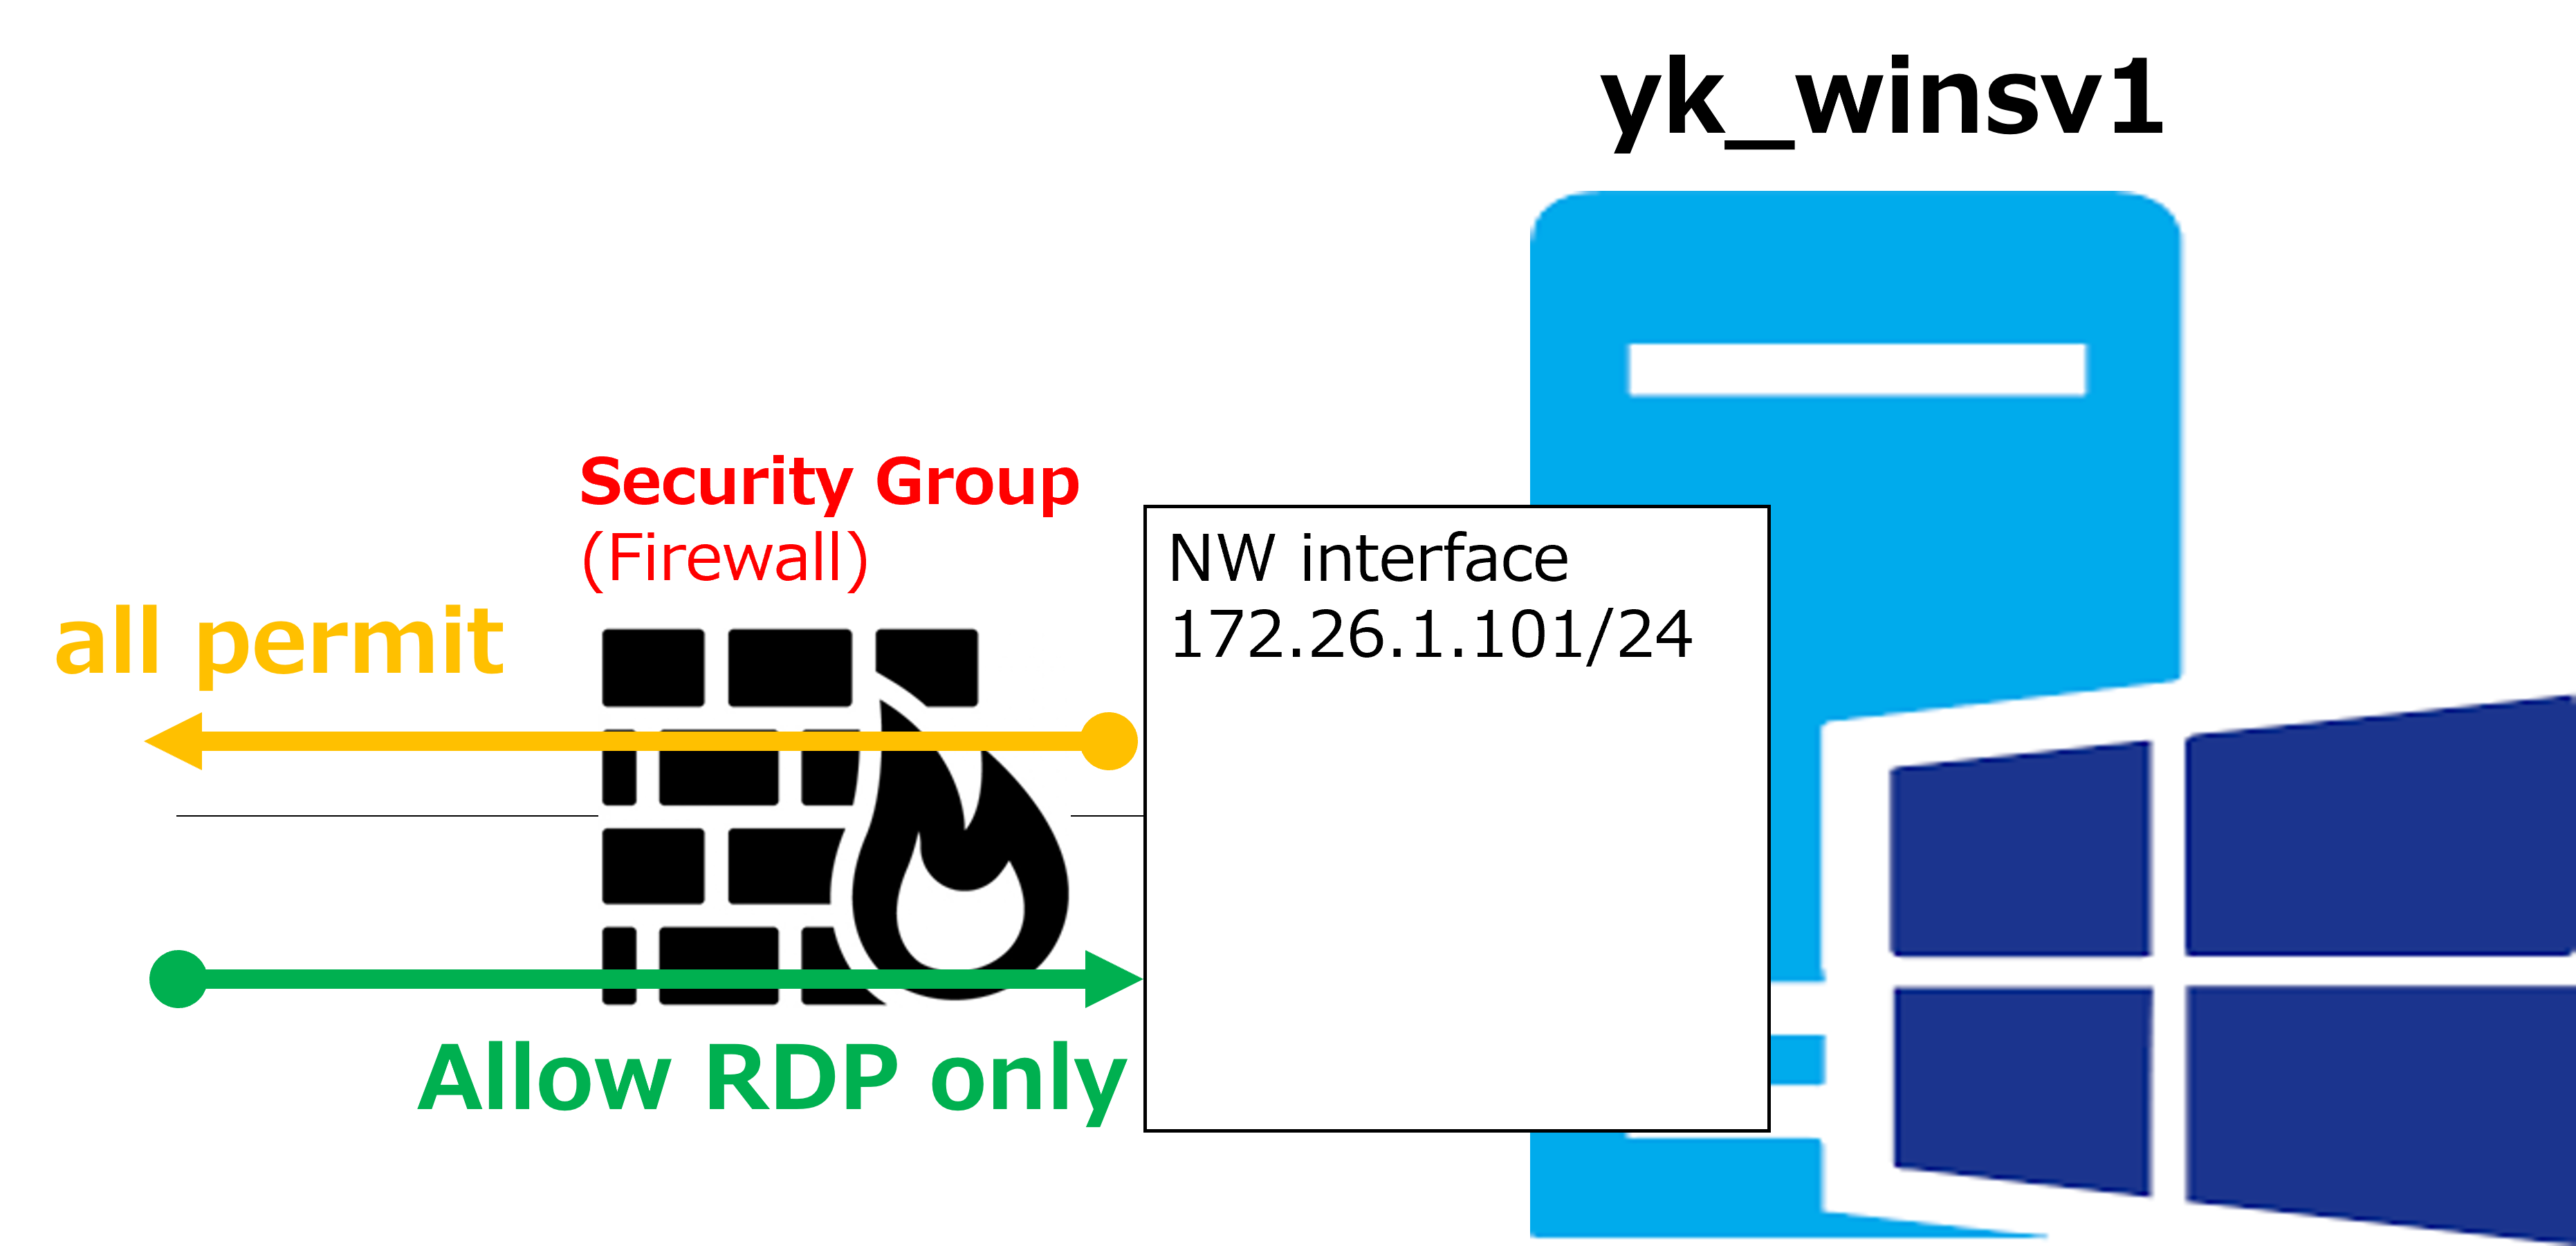
Fair point... By the way, when you create a VM and leave the SG settings at their defaults without changing anything, a vendor-recommended SG gets associated automatically. In that case, outbound traffic from the network interface is typically allowed in full, but inbound traffic is only allowed to a minimal extent. The SG that was associated when we built the Windows VM was configured to allow only RDP inbound, as shown in the diagram below. |
|
Right — so that's why ping doesn't work. |
|
Exactly. |
How to Edit a Security Group
|
Here are the steps to allow ping as well. |
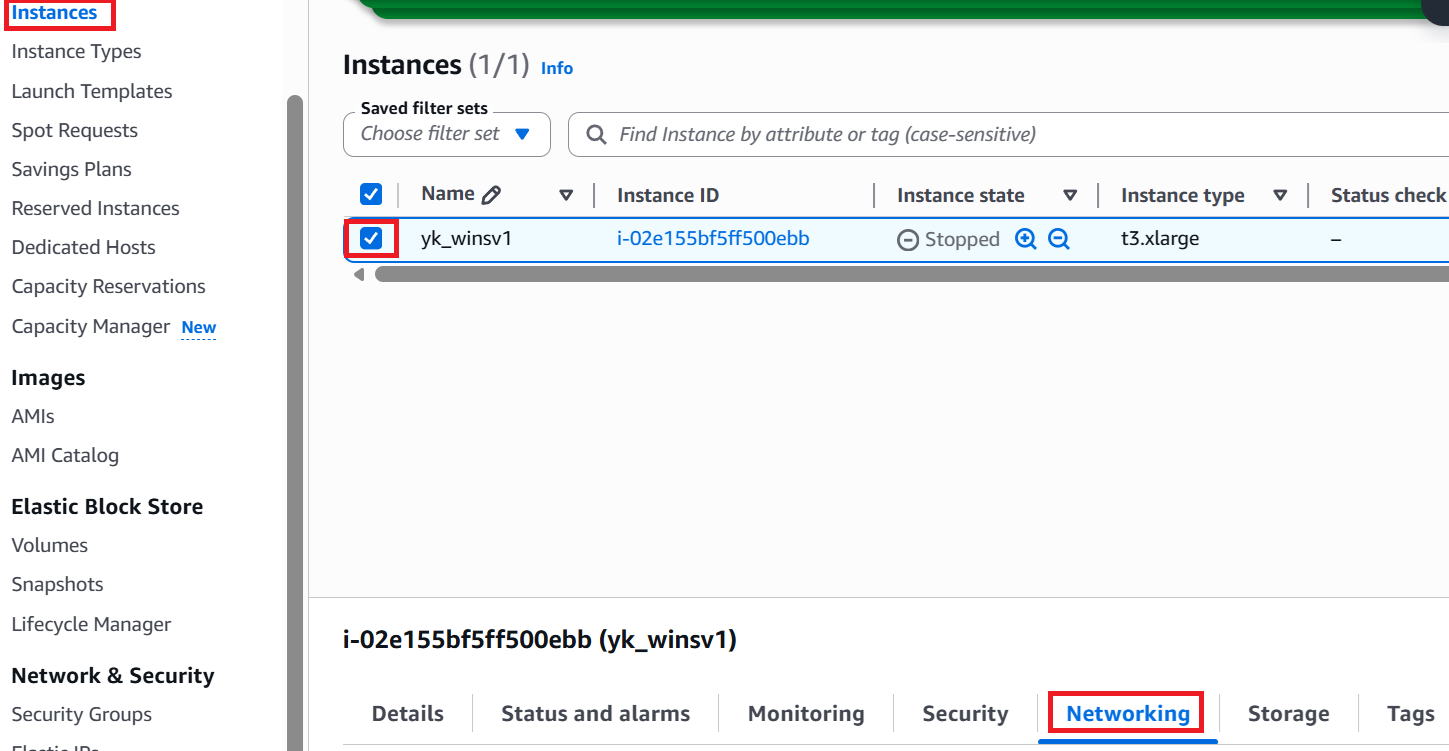
① Check the target VM in the Instances screen, then click Networking in the lower panel.
※ Opening the Security tab would actually get you to the Security Group edit screen faster, but here we're intentionally going through the Network Interface for learning purposes.
② Scroll down to find the Network Interface ID of the Windows VM shown in the red box, and click it.

③ The Network Interface detail screen appears. The red box shows the Security Group associated with this interface. Click it.

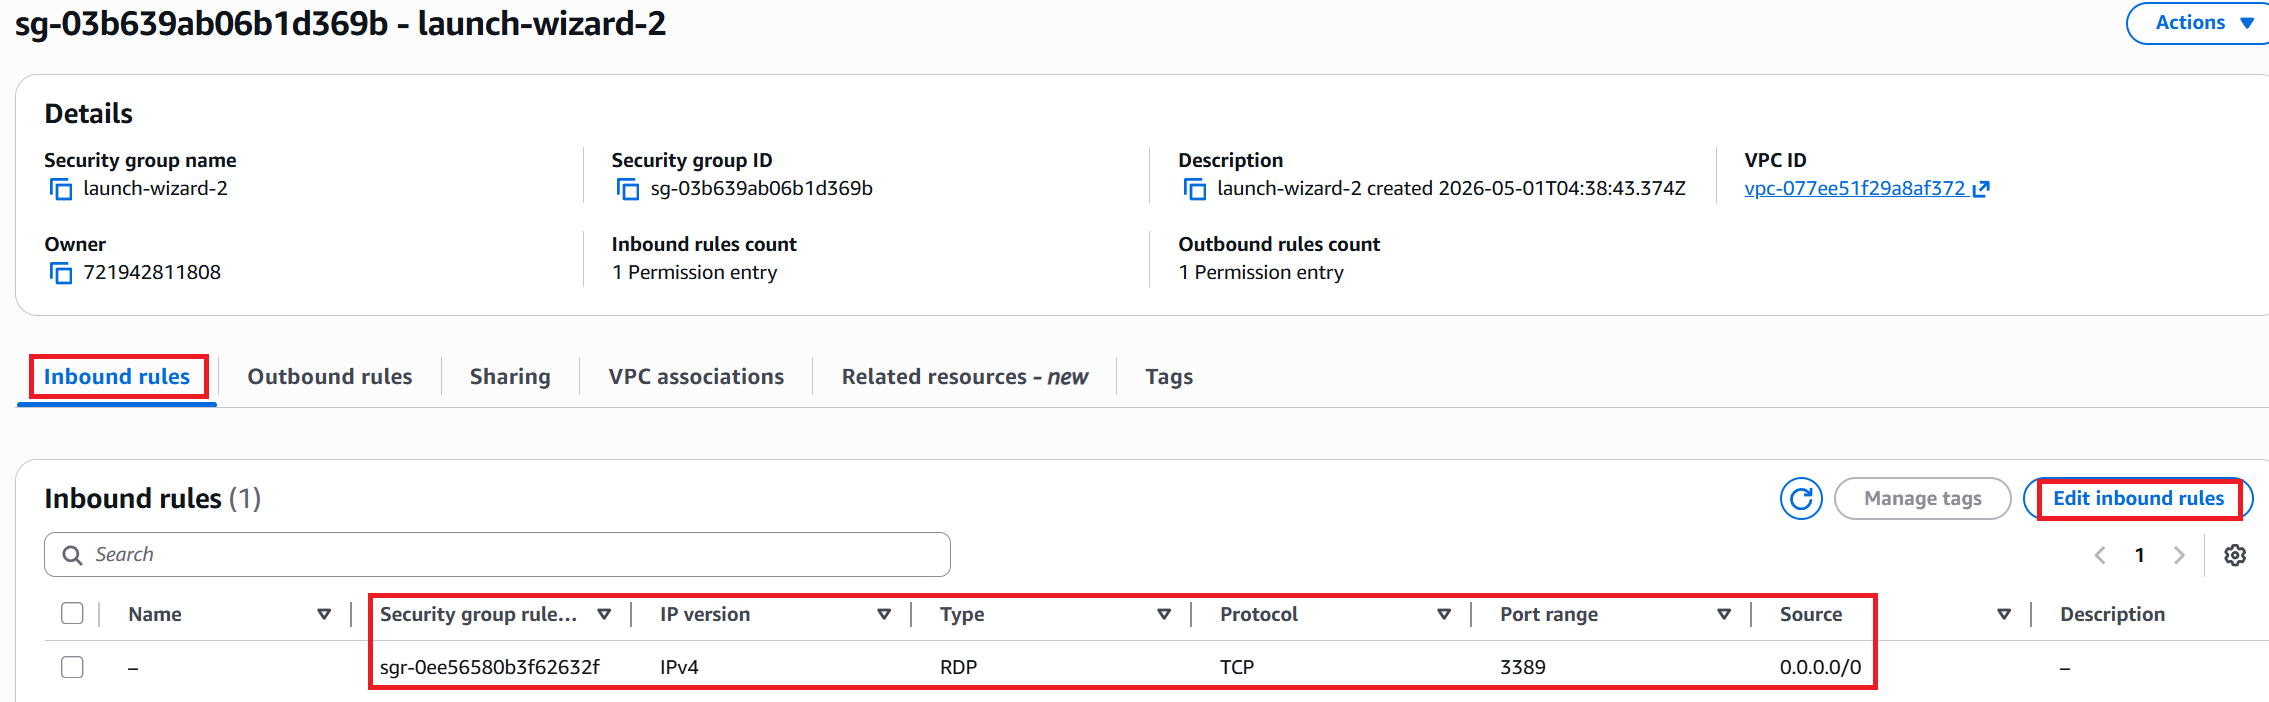
④ The detail screen appears. Looking at the Inbound rules, you can see that only TCP 3389 (RDP) is allowed. Click Edit Inbound rules in the upper right.
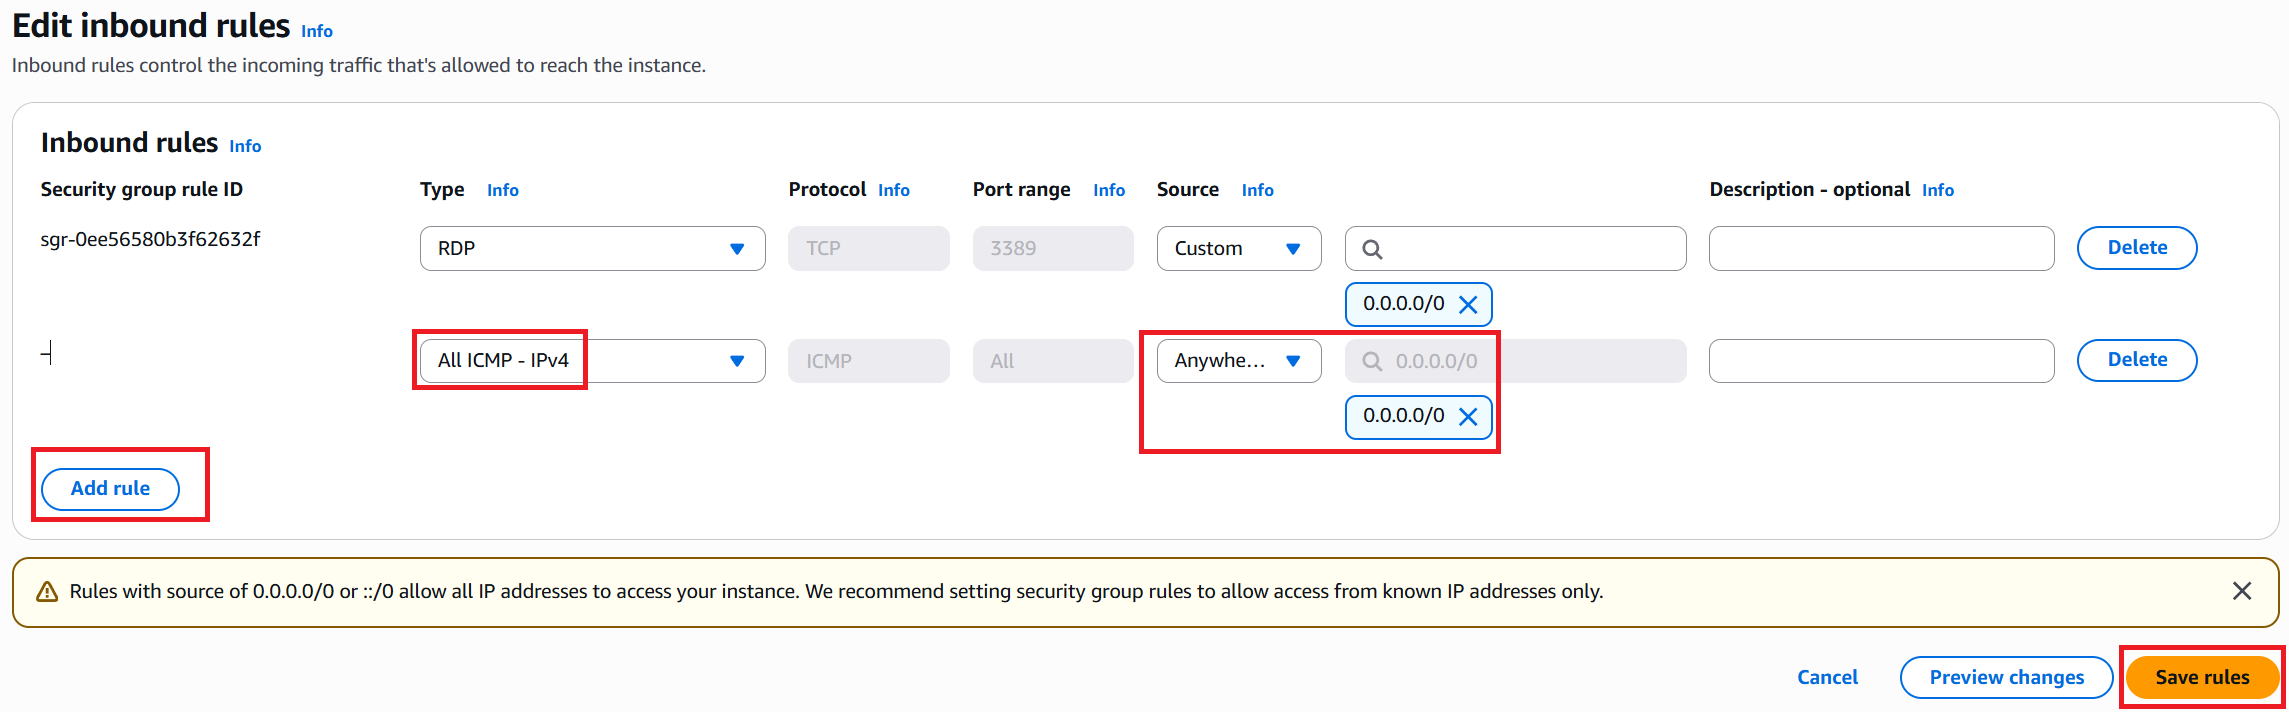
⑤ Click Add rule at the bottom left. Set the type to ALL ICMP - IPv4 and the source to 0.0.0.0/0, then click Save rules in the bottom right.
※ Ideally, you'd restrict the source IP for both RDP and ping, but since this is for testing, we're skipping that for now.
⑥ "Edited successfully" is displayed.

Verification
|
Go ahead and try ping again. |
|
Sure. C:\Users\USER>ping 15.152.92.93 It works! |
|
Great job. |
|
Glad that worked! But this really does seem like an easy thing to get tripped up on... |
|
It really is. I've lost count of how many times I've gone "Oh no, I forgot to open that port!" One more thing — it's a good idea to give your Security Groups and Network Interfaces proper names, as shown below. |
To find Security Groups, go to the VPC dashboard → click Security Groups in the left menu to see the list.
We named the Security Group for yk_winsv1 as yk_SG_winsv1.

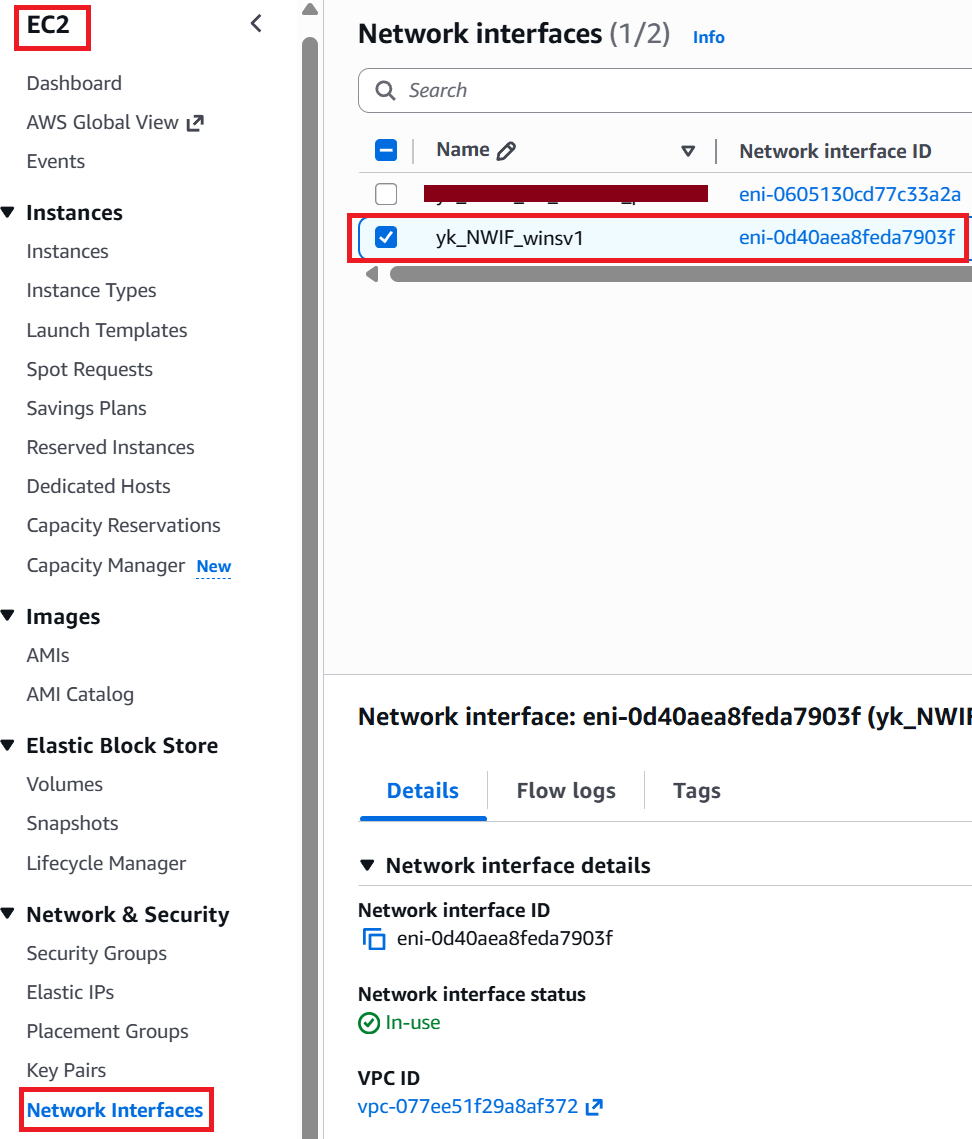
Note that Network Interfaces are found in a slightly different location — not under VPC, but under Network Interfaces in the left menu of the EC2 dashboard.
We named the Network Interface for yk_winsv1 as yk_NWIF_winsv1.
|
That's all for this session. Thanks for reading! |