Updated: 2026.5.5 FortiOS: 8.00
| Contents |
Configuration Overview
 |
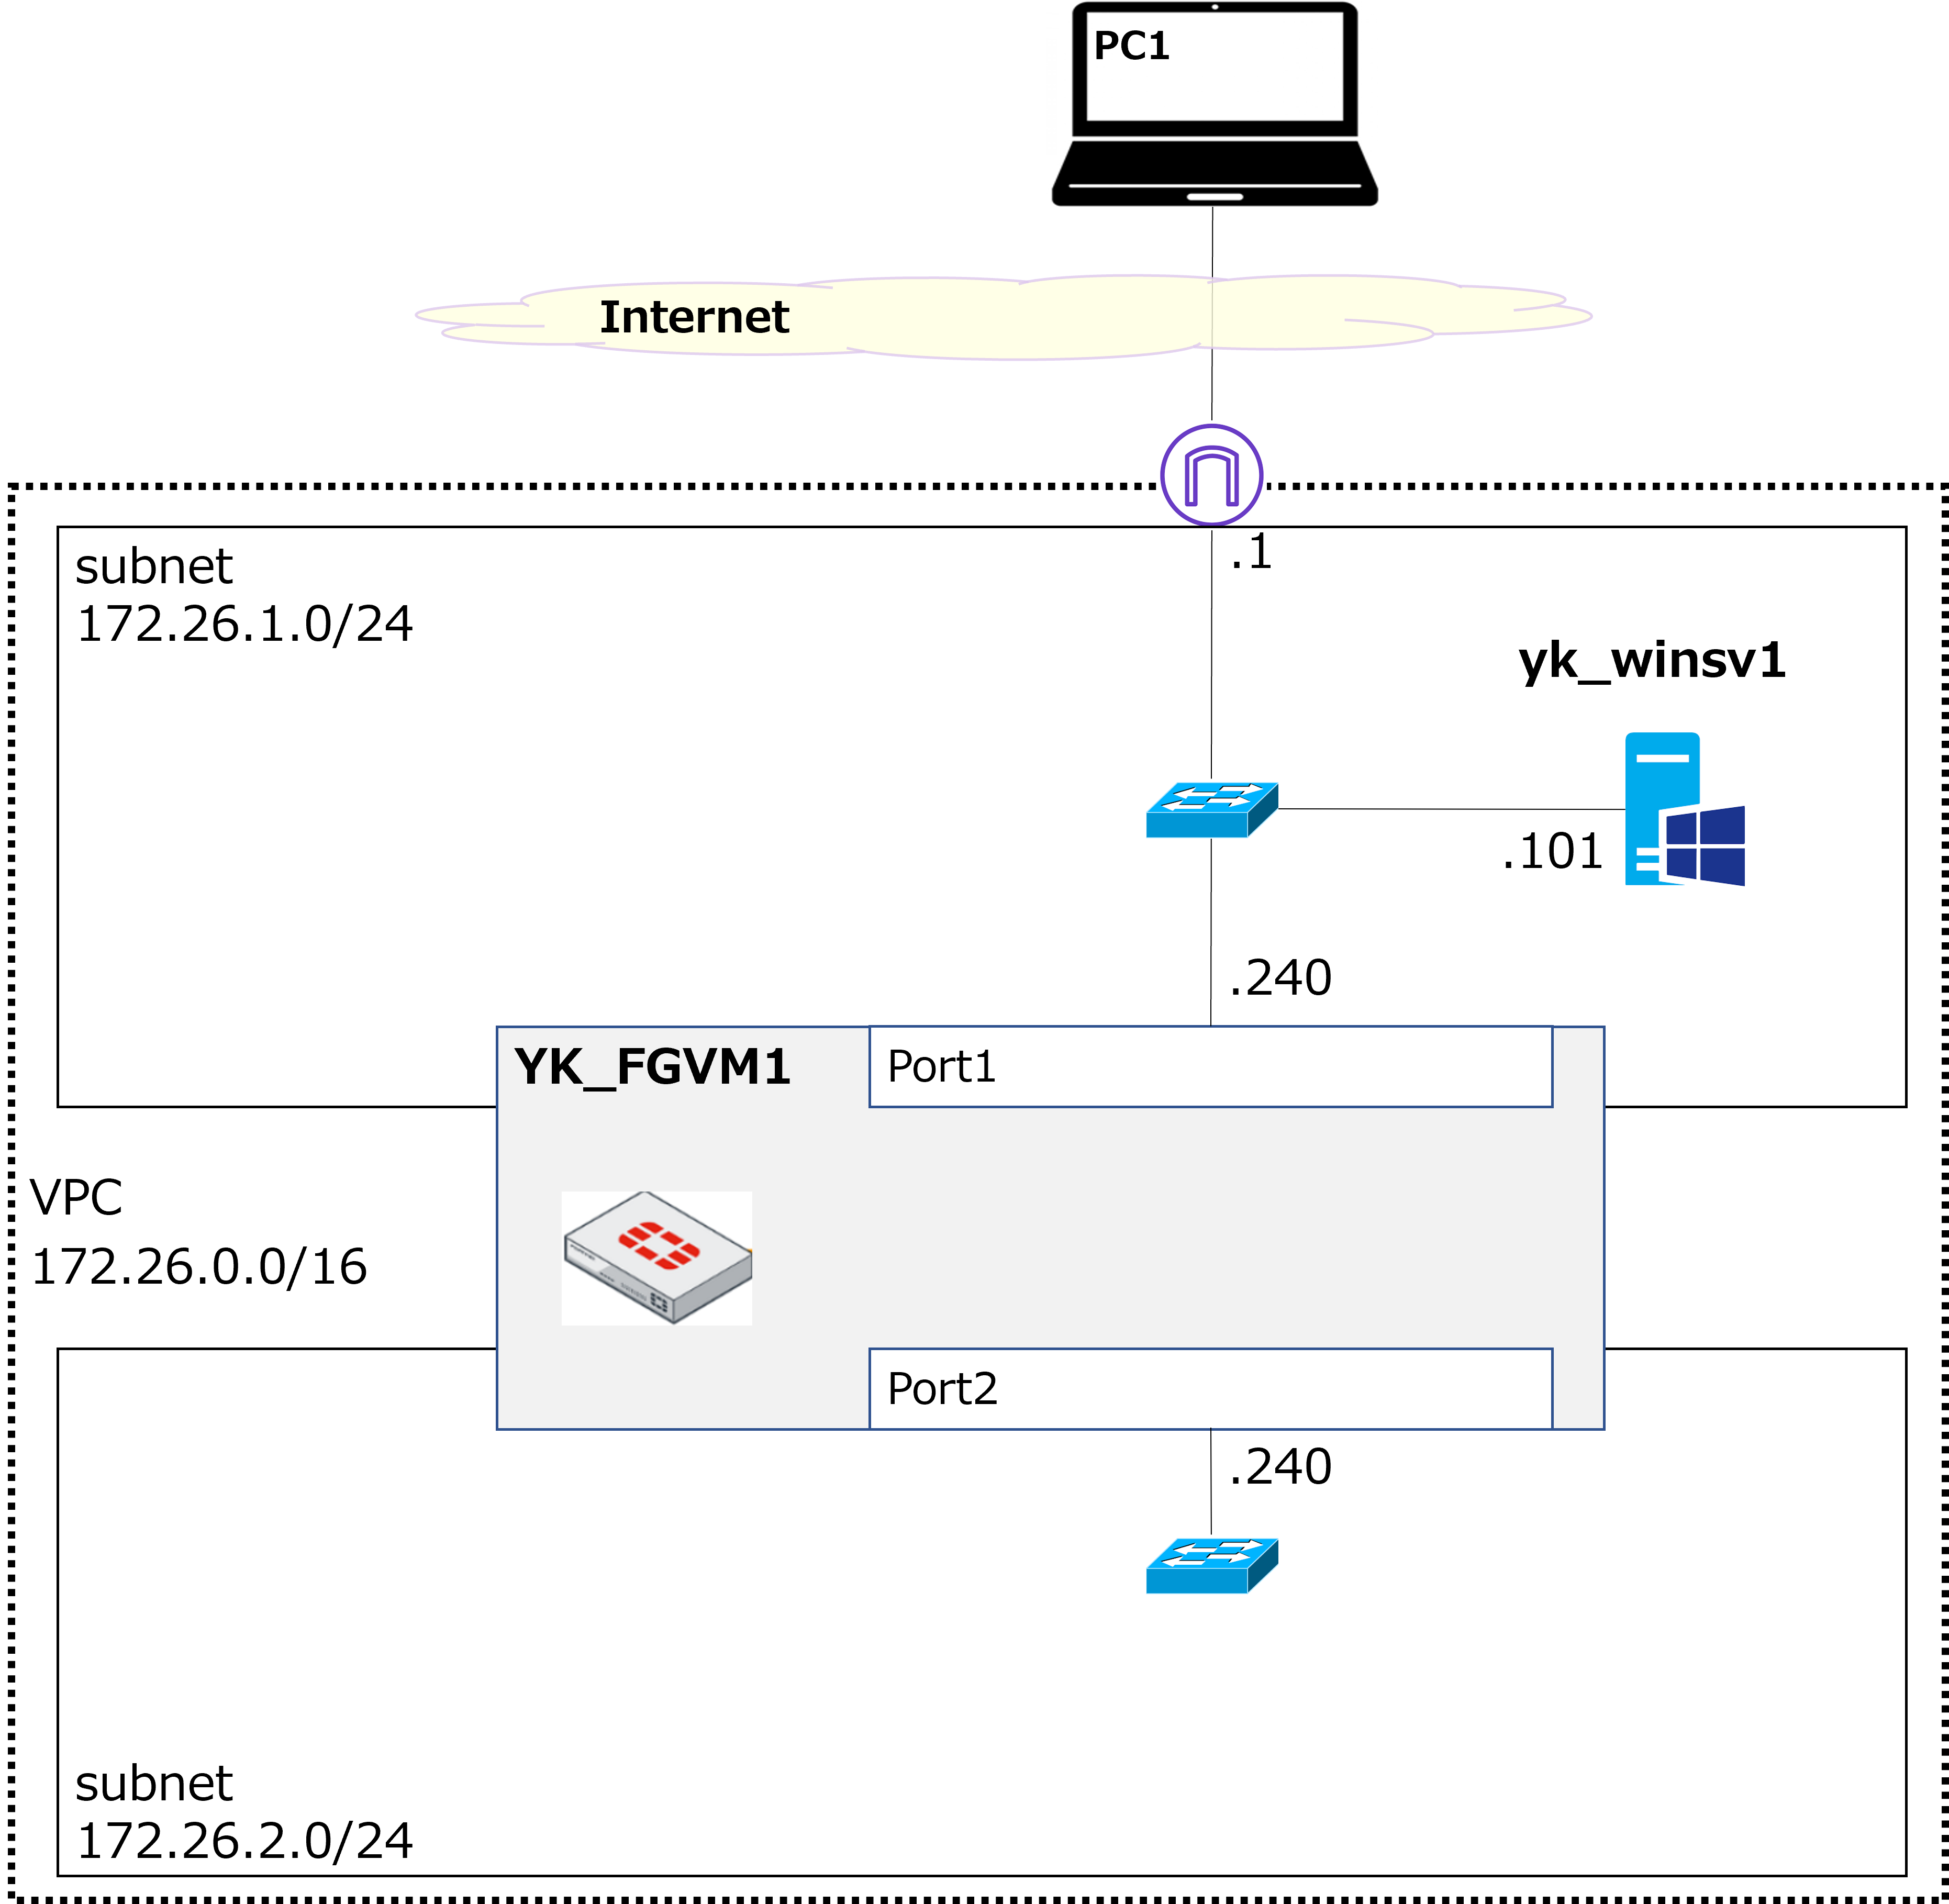
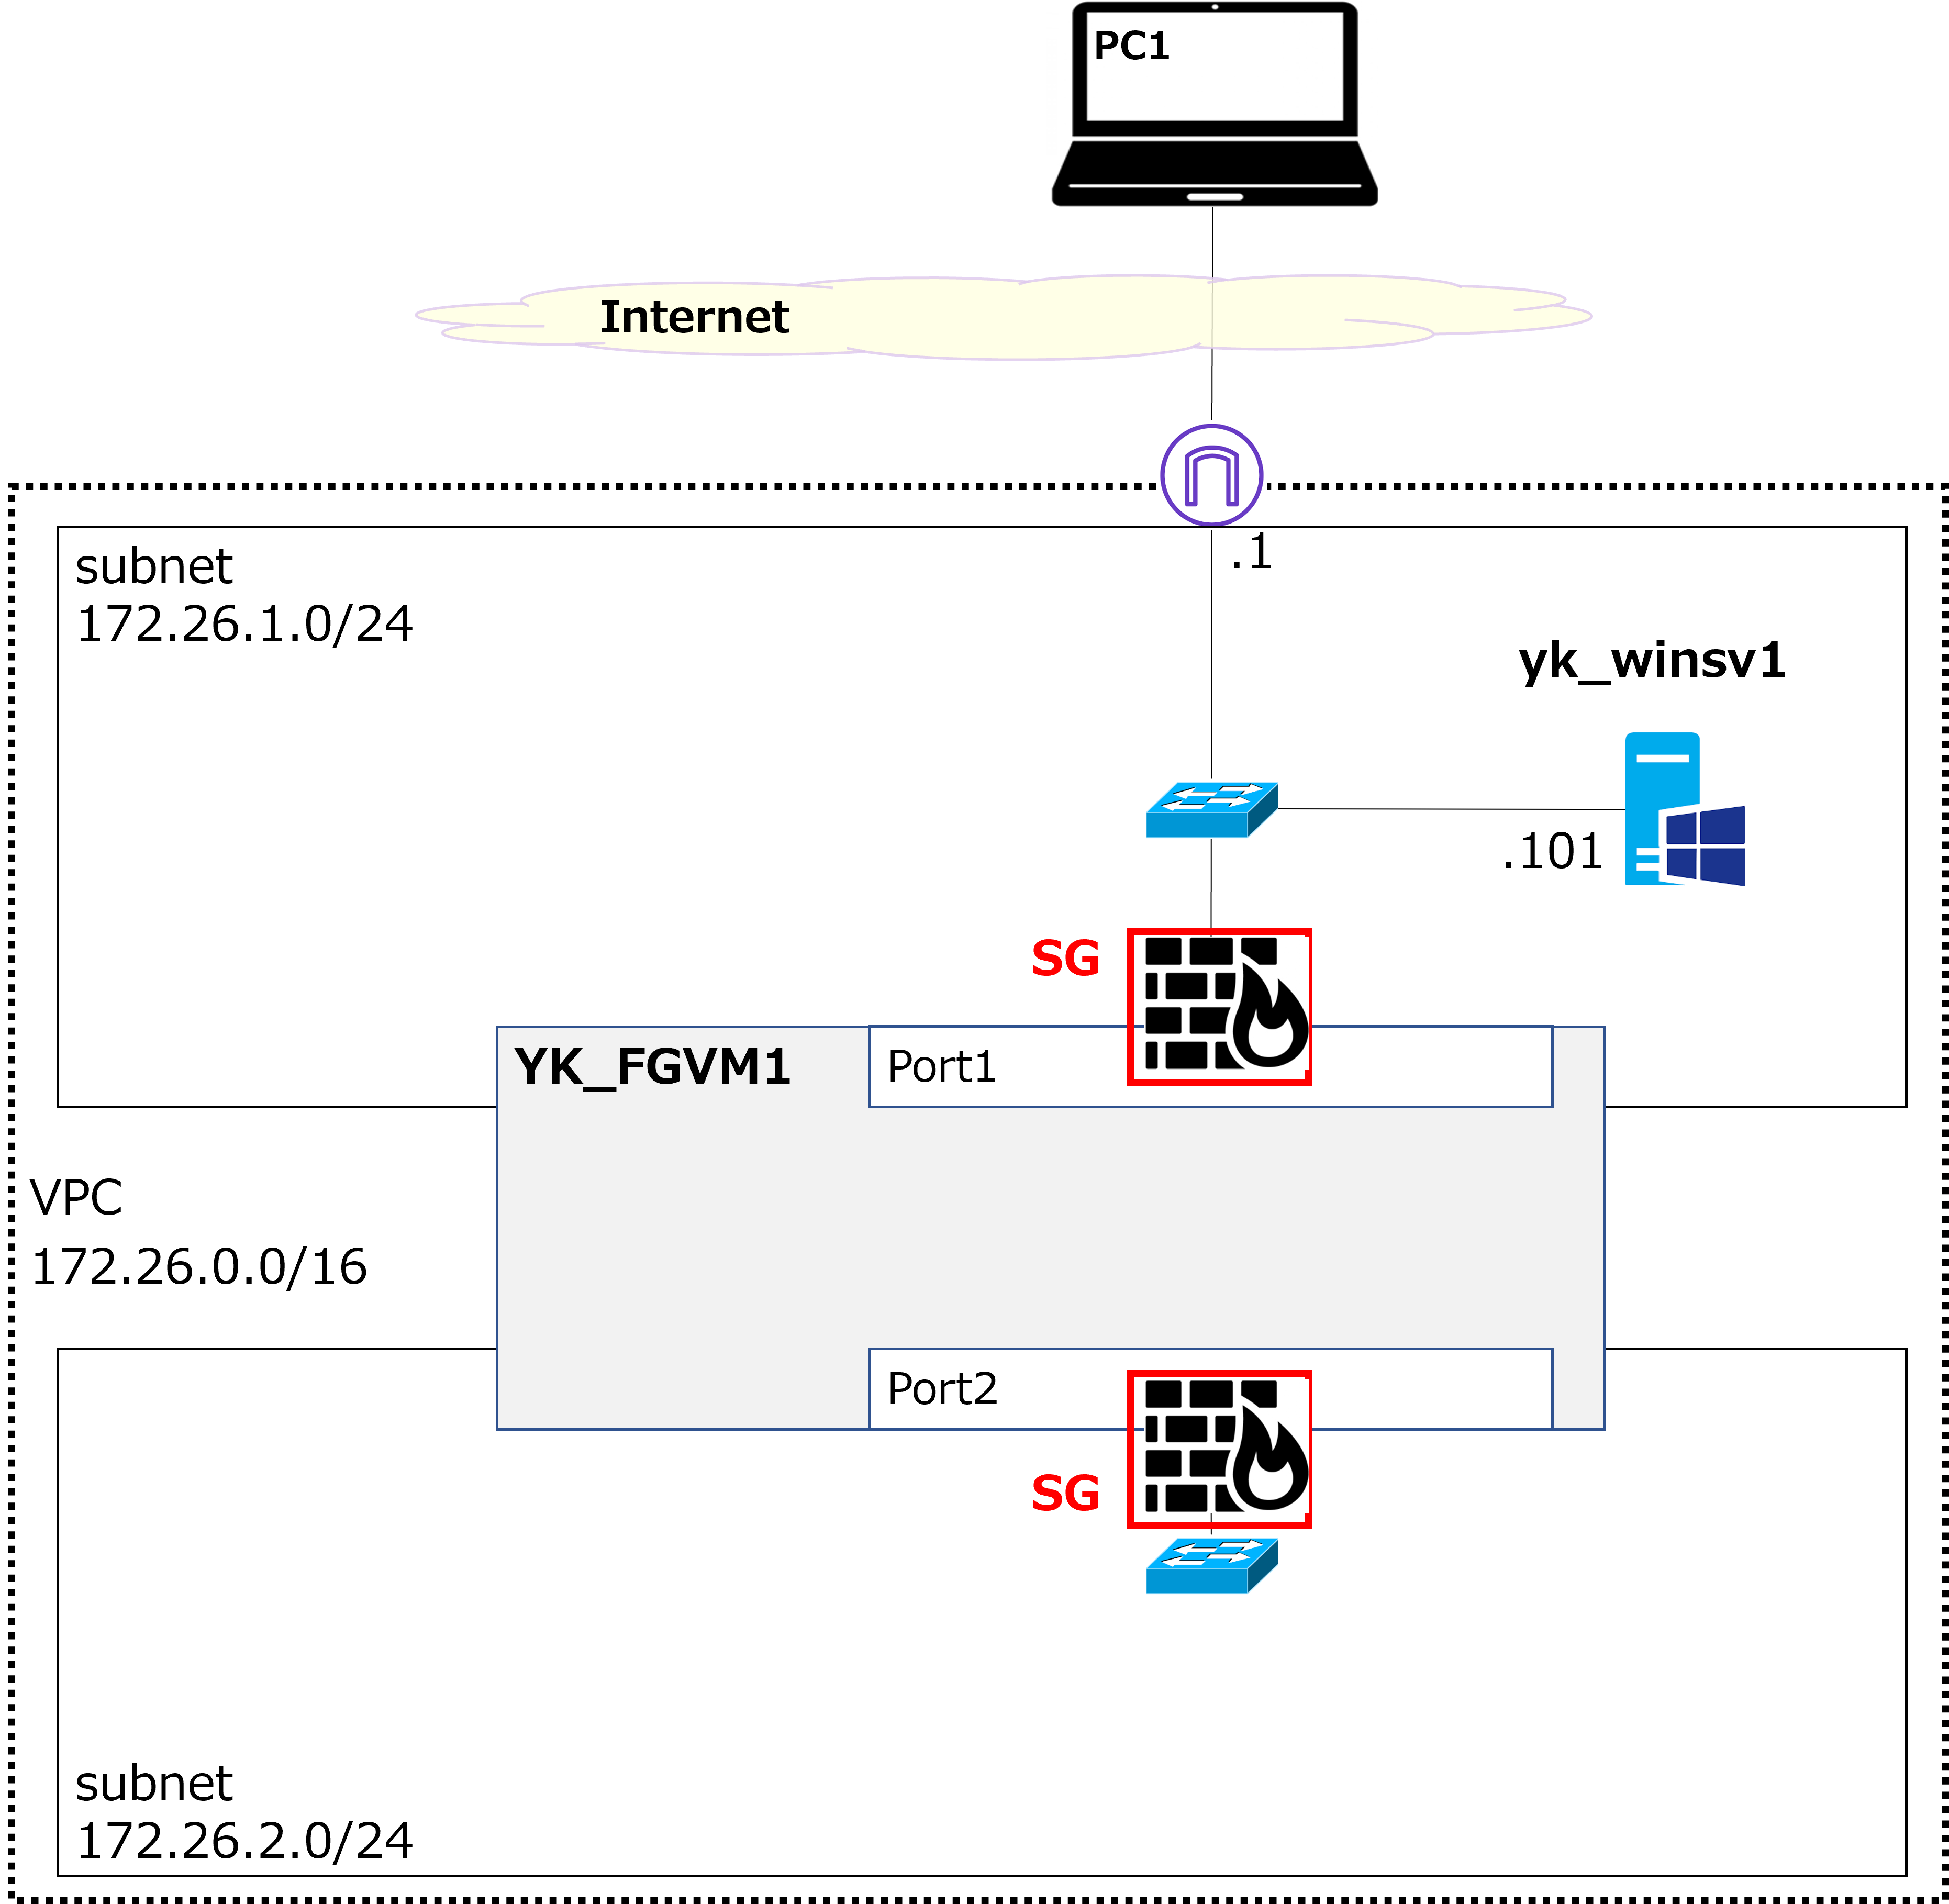
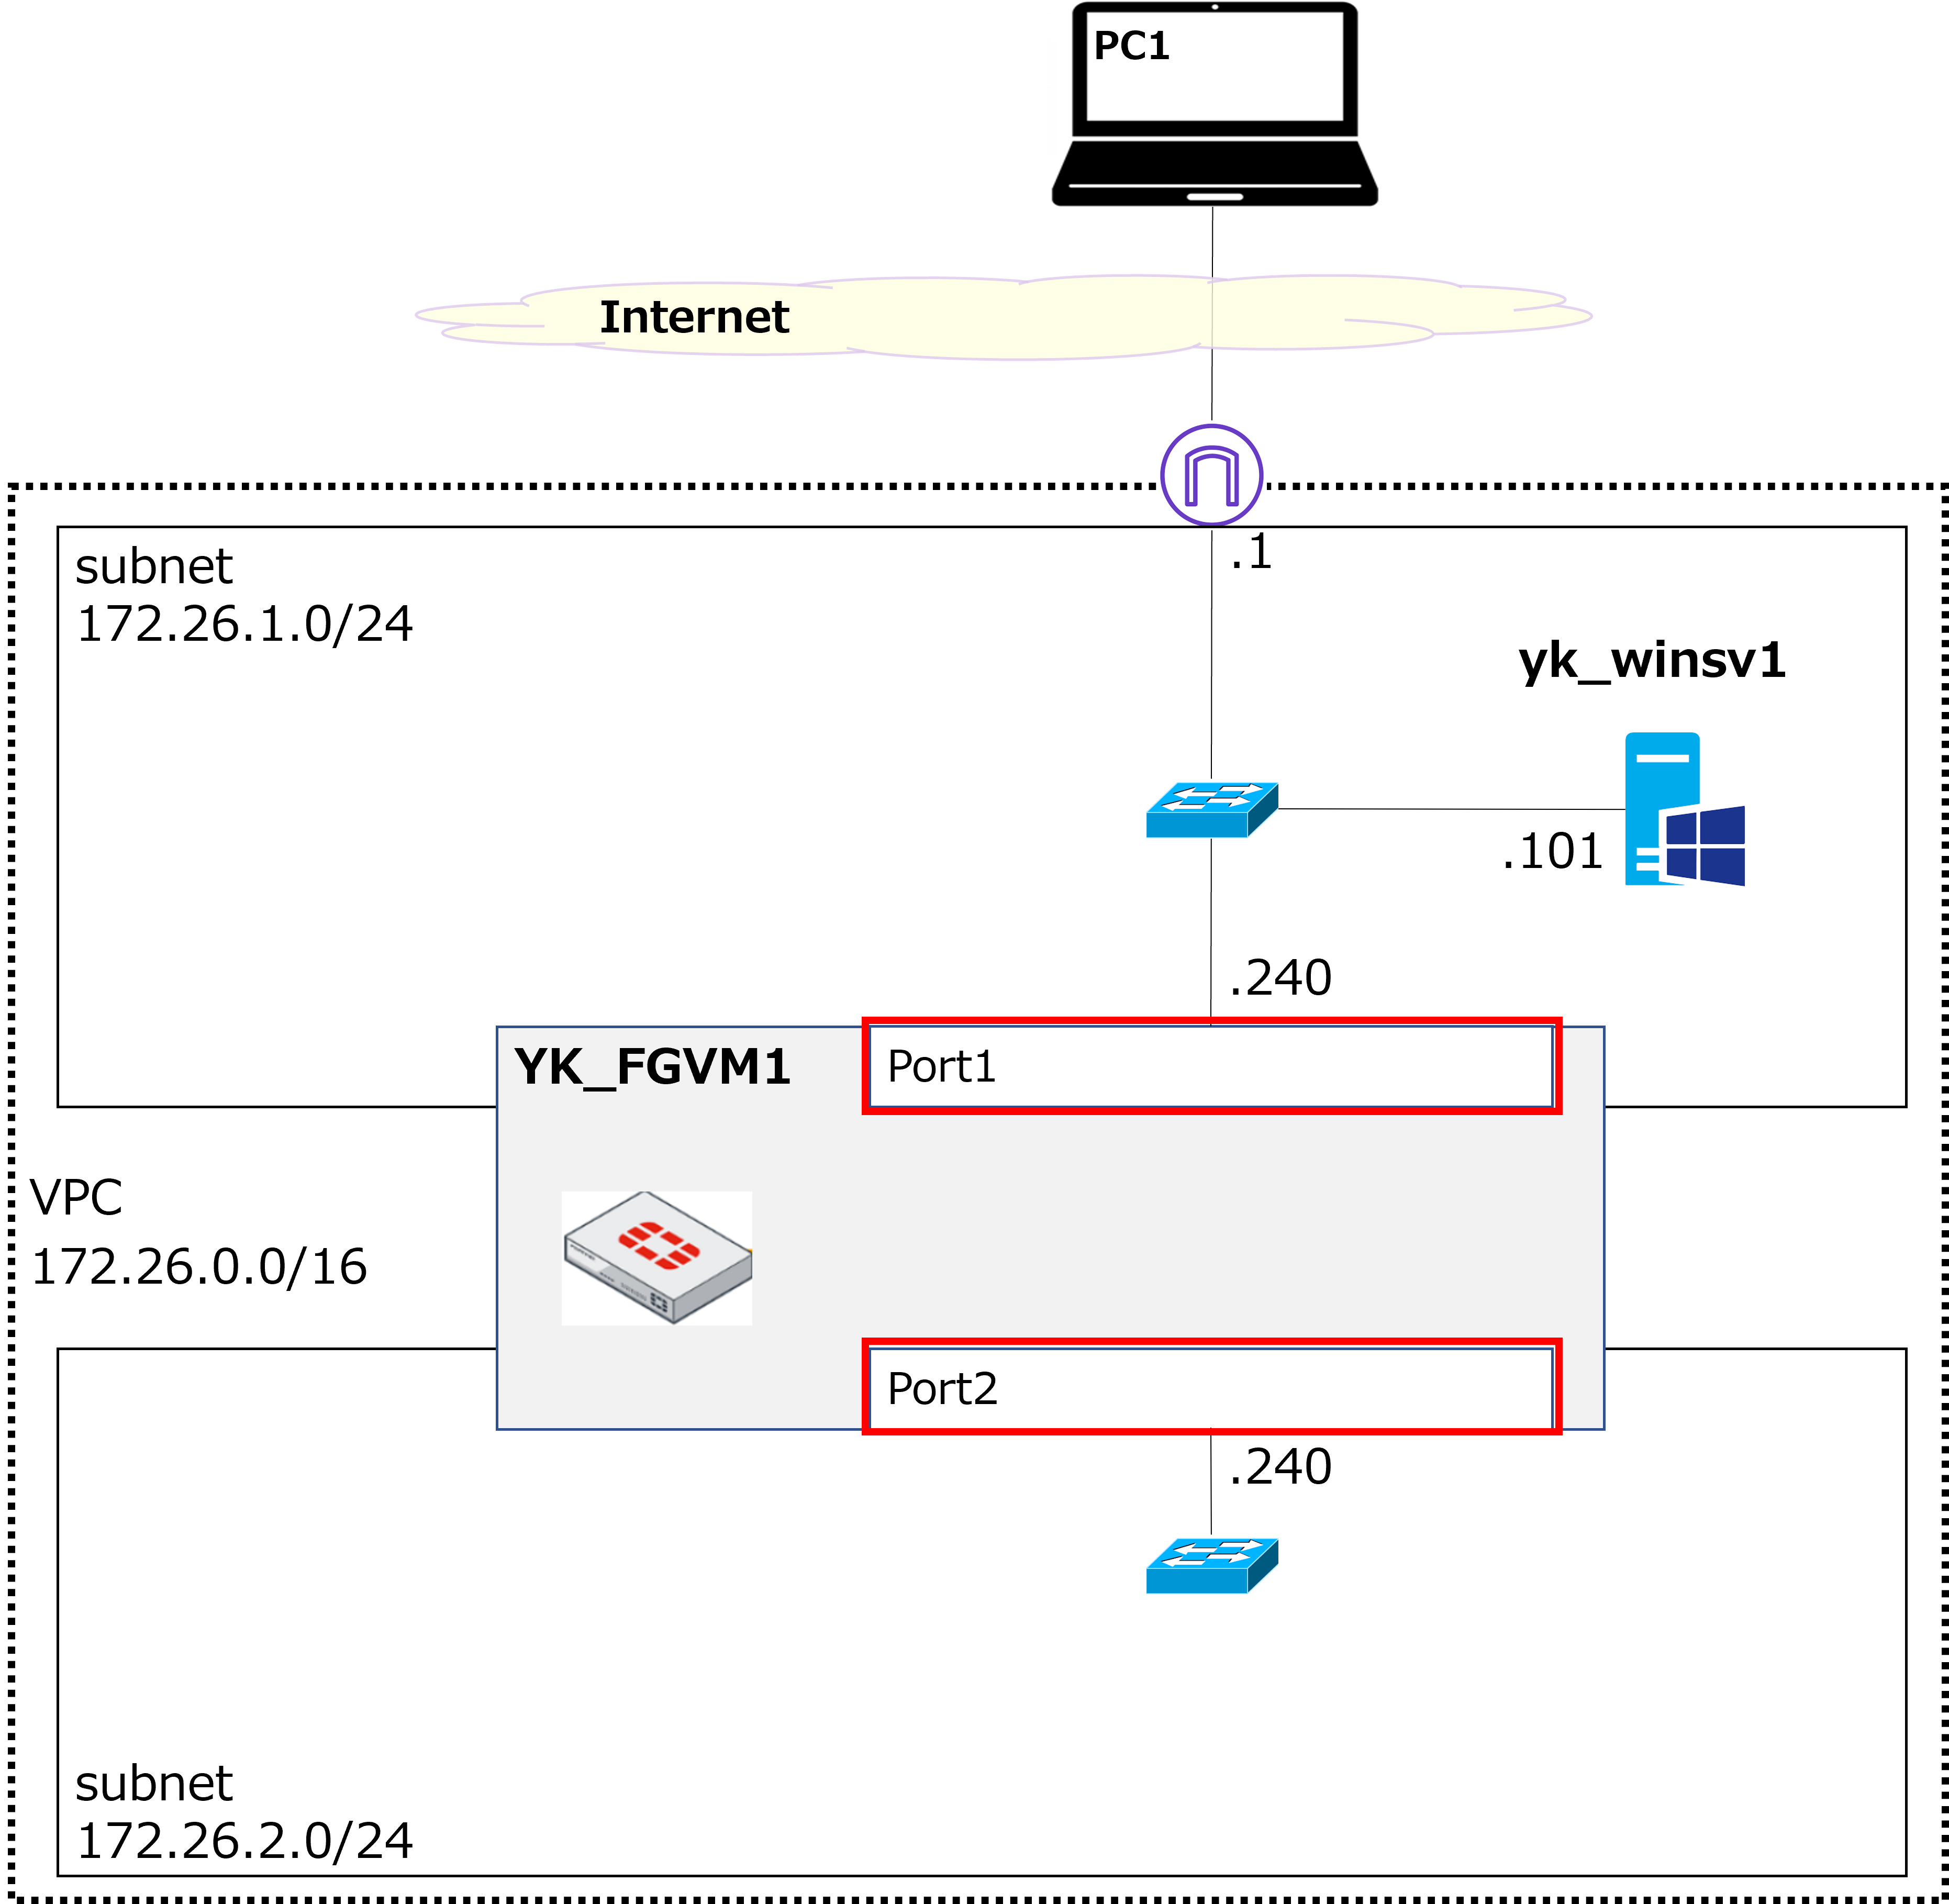
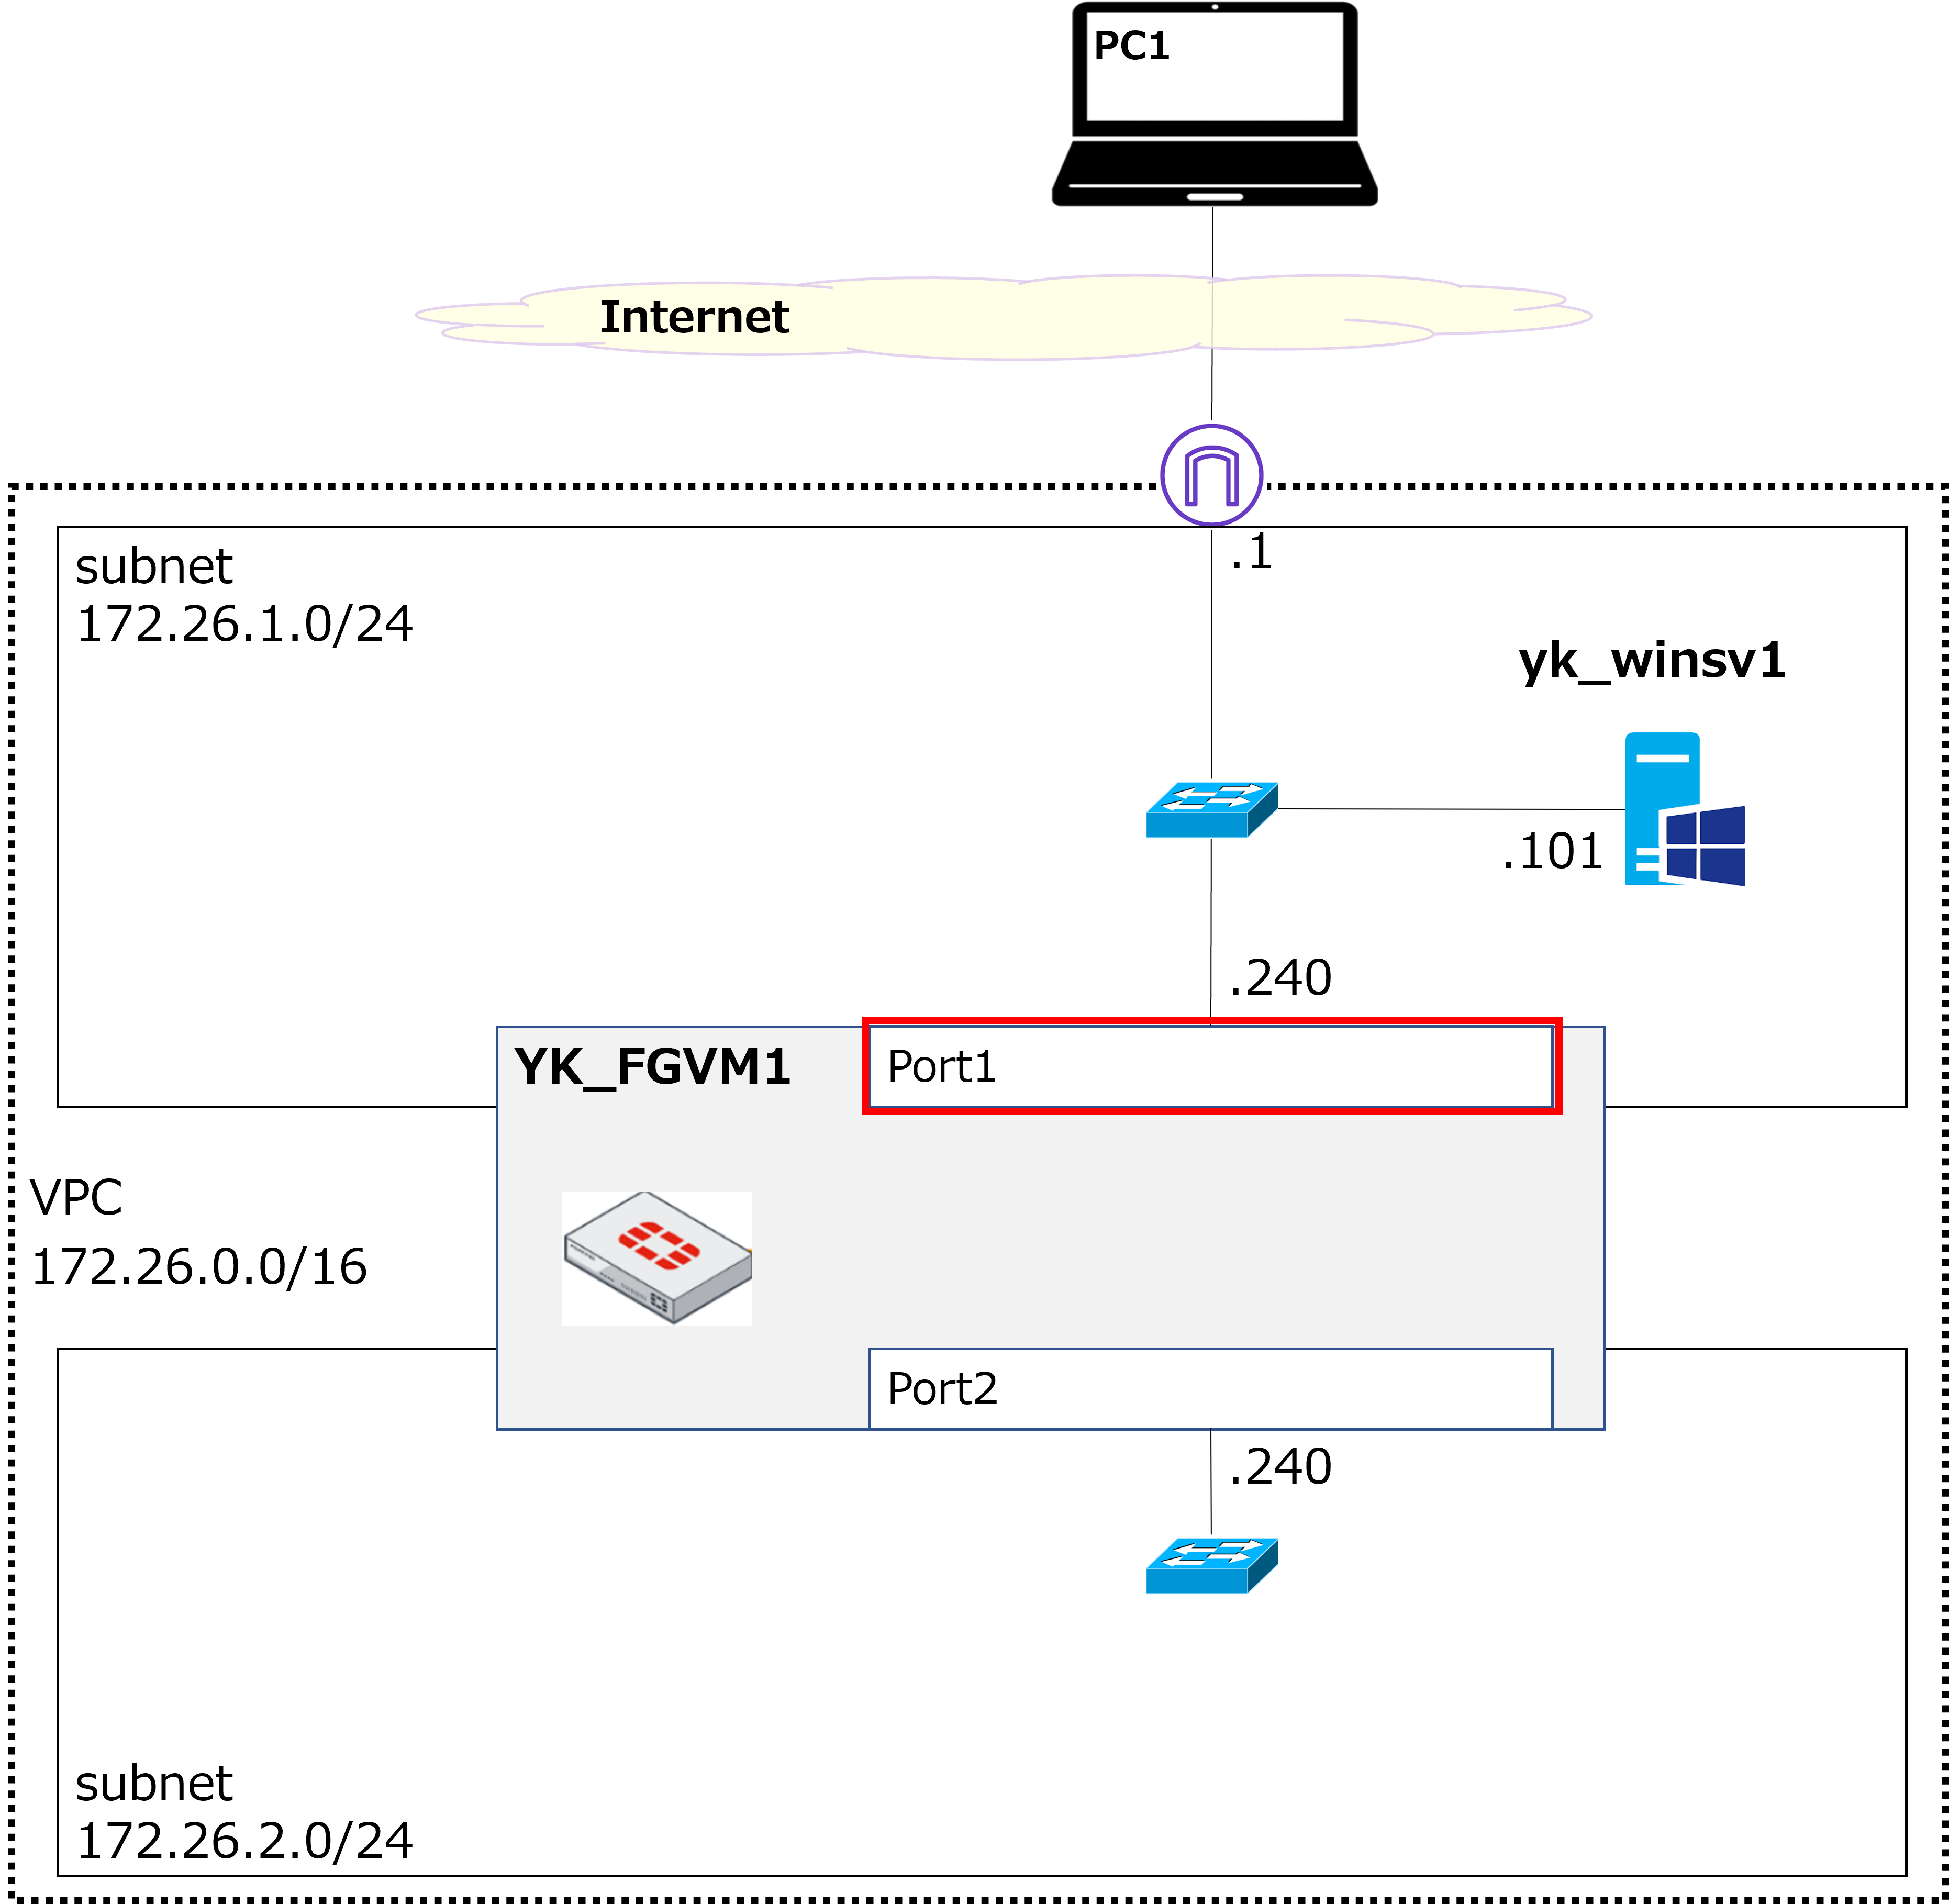
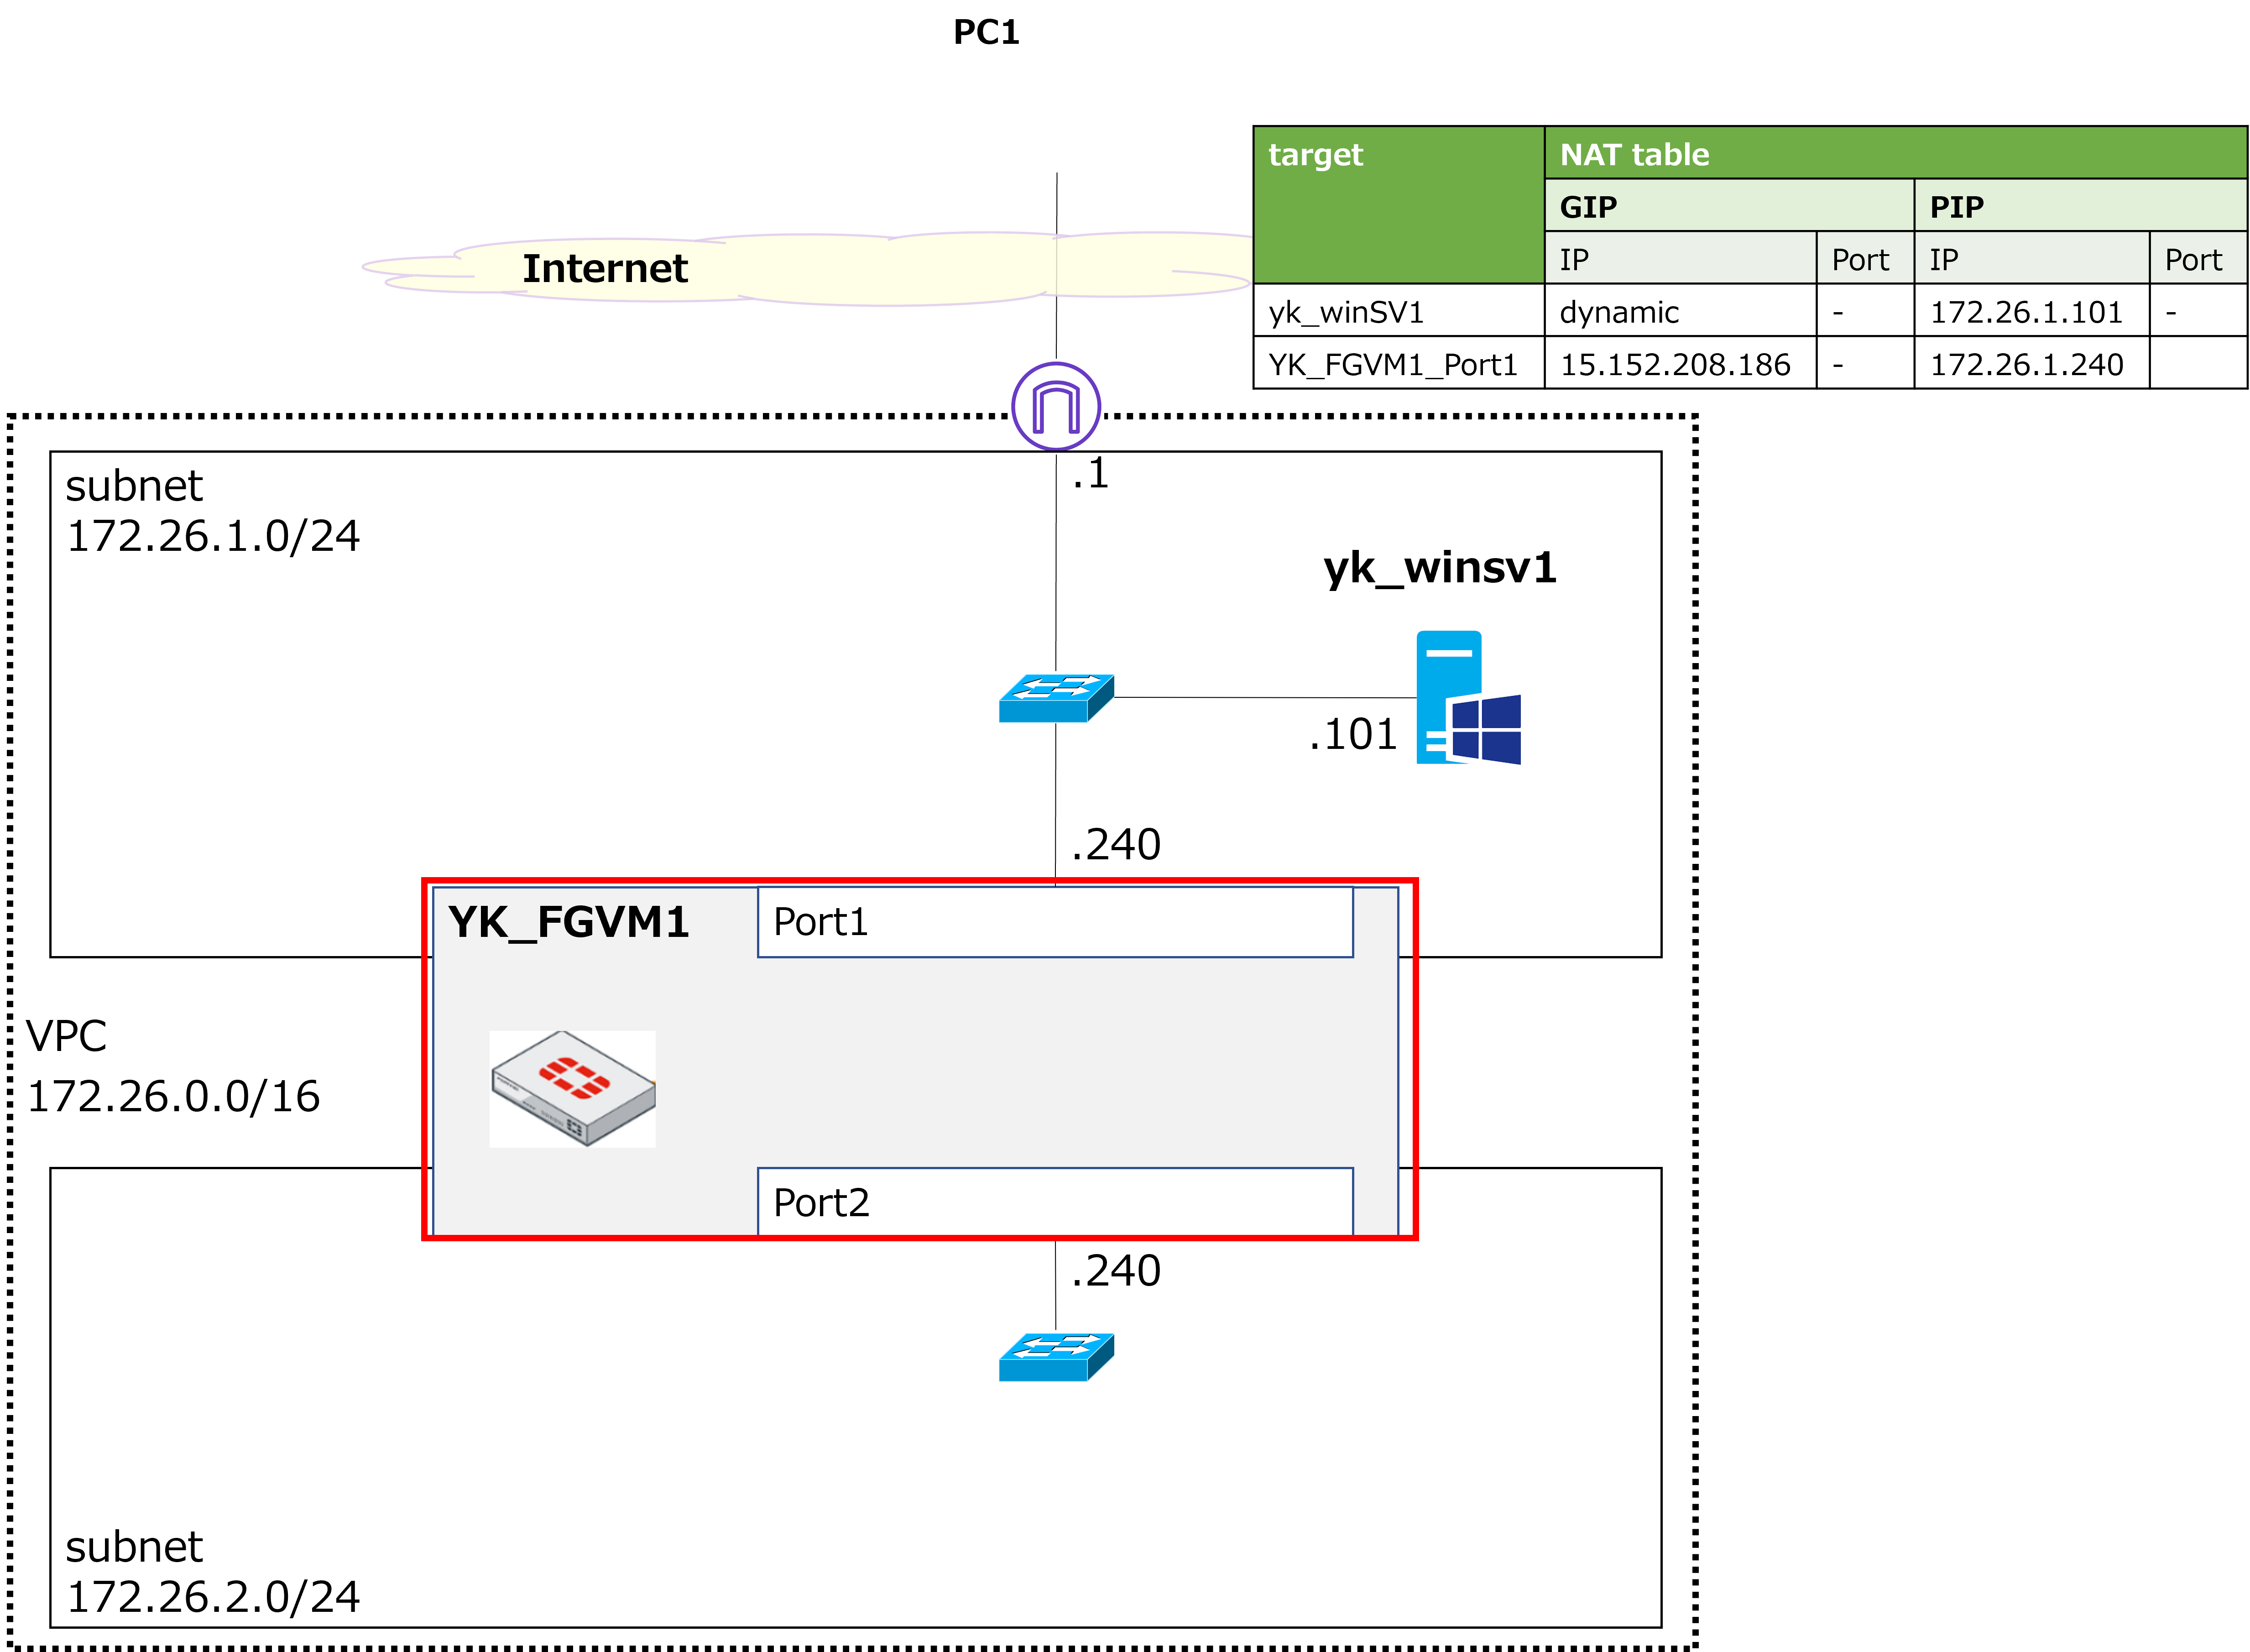
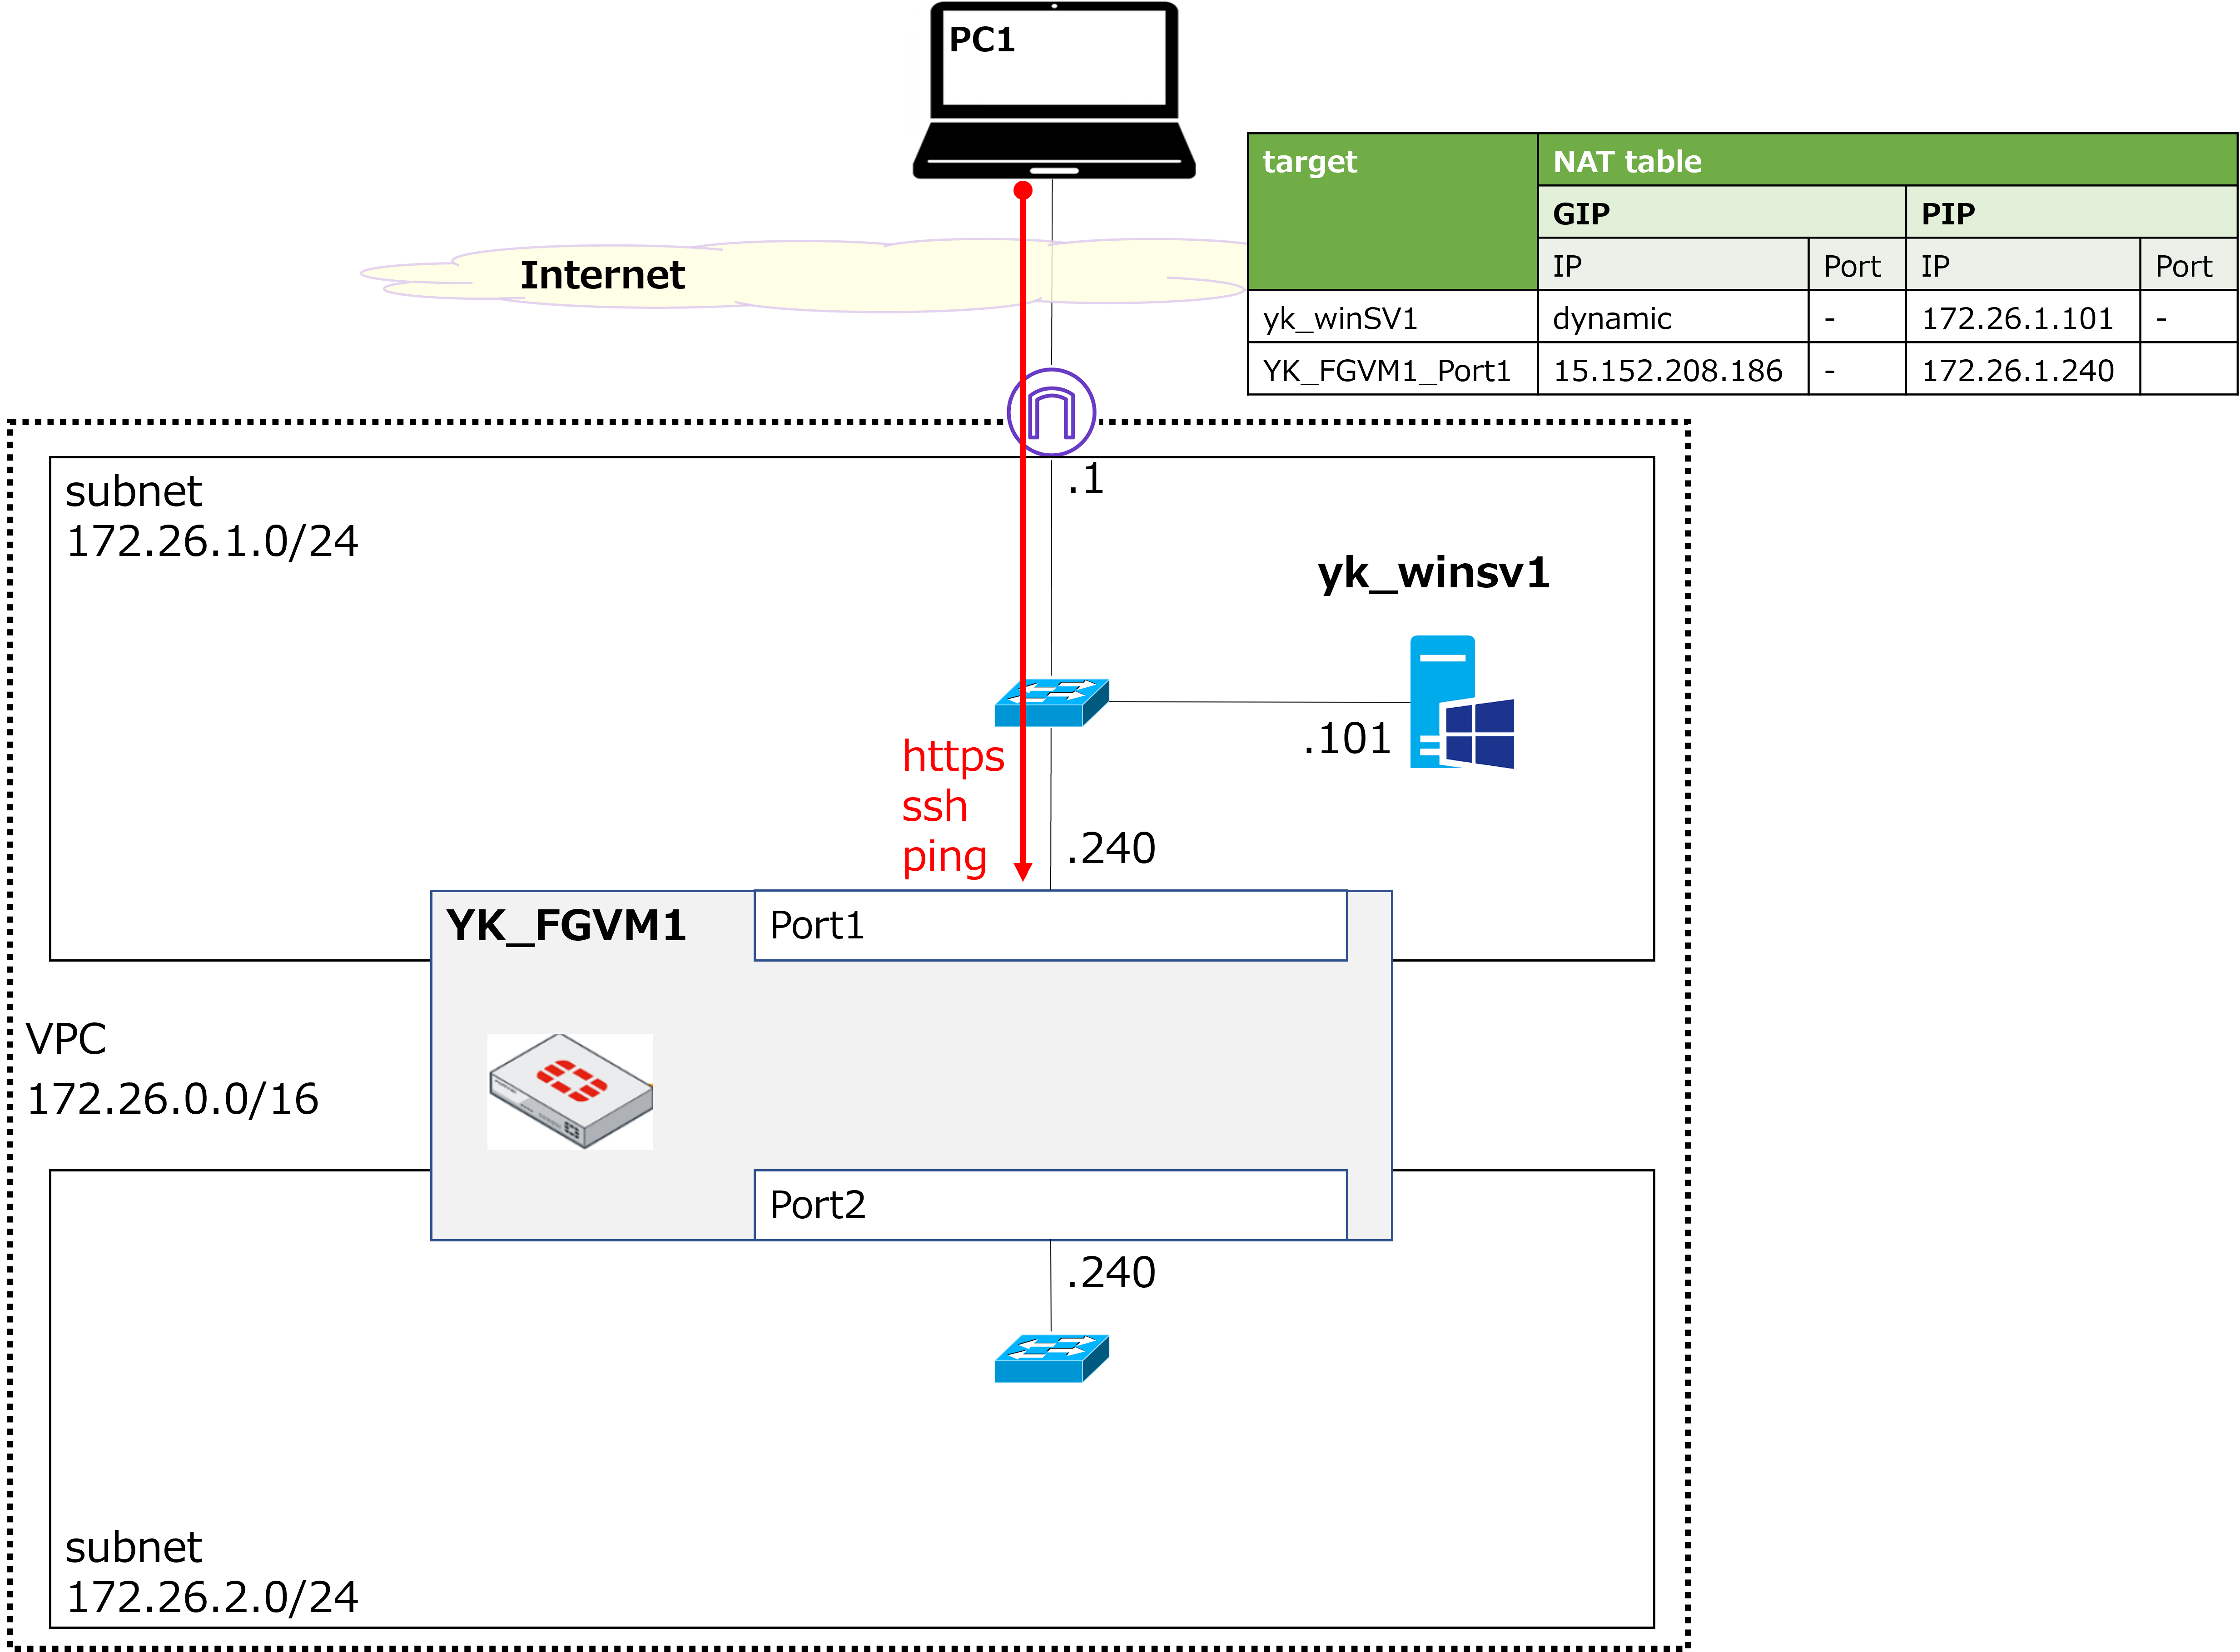
This time, we'll be building an FGVM (FortiGate VM) as shown in the diagram above. The goal is to be able to manage the FGVM from PC1 via admin access, and to confirm that ping works between yk_winsv1 and the FGVM. |
 |
I get why port1 is needed for the FGVM, but why are we creating port2 as well? And we're creating a new subnet at 172.26.2.0/24? |
|
Good point. Strictly speaking, we don't need port2 or the new subnet just for this exercise — but I want to set things up with future testing in mind. |
|
What kind of future testing are you thinking of? |
|
Things like placing a Windows VM inside the new subnet, then routing its internet traffic through the FGVM to perform UTM inspection (antivirus scanning, etc.) or applying authentication. I'd like to cover those topics in future posts. |
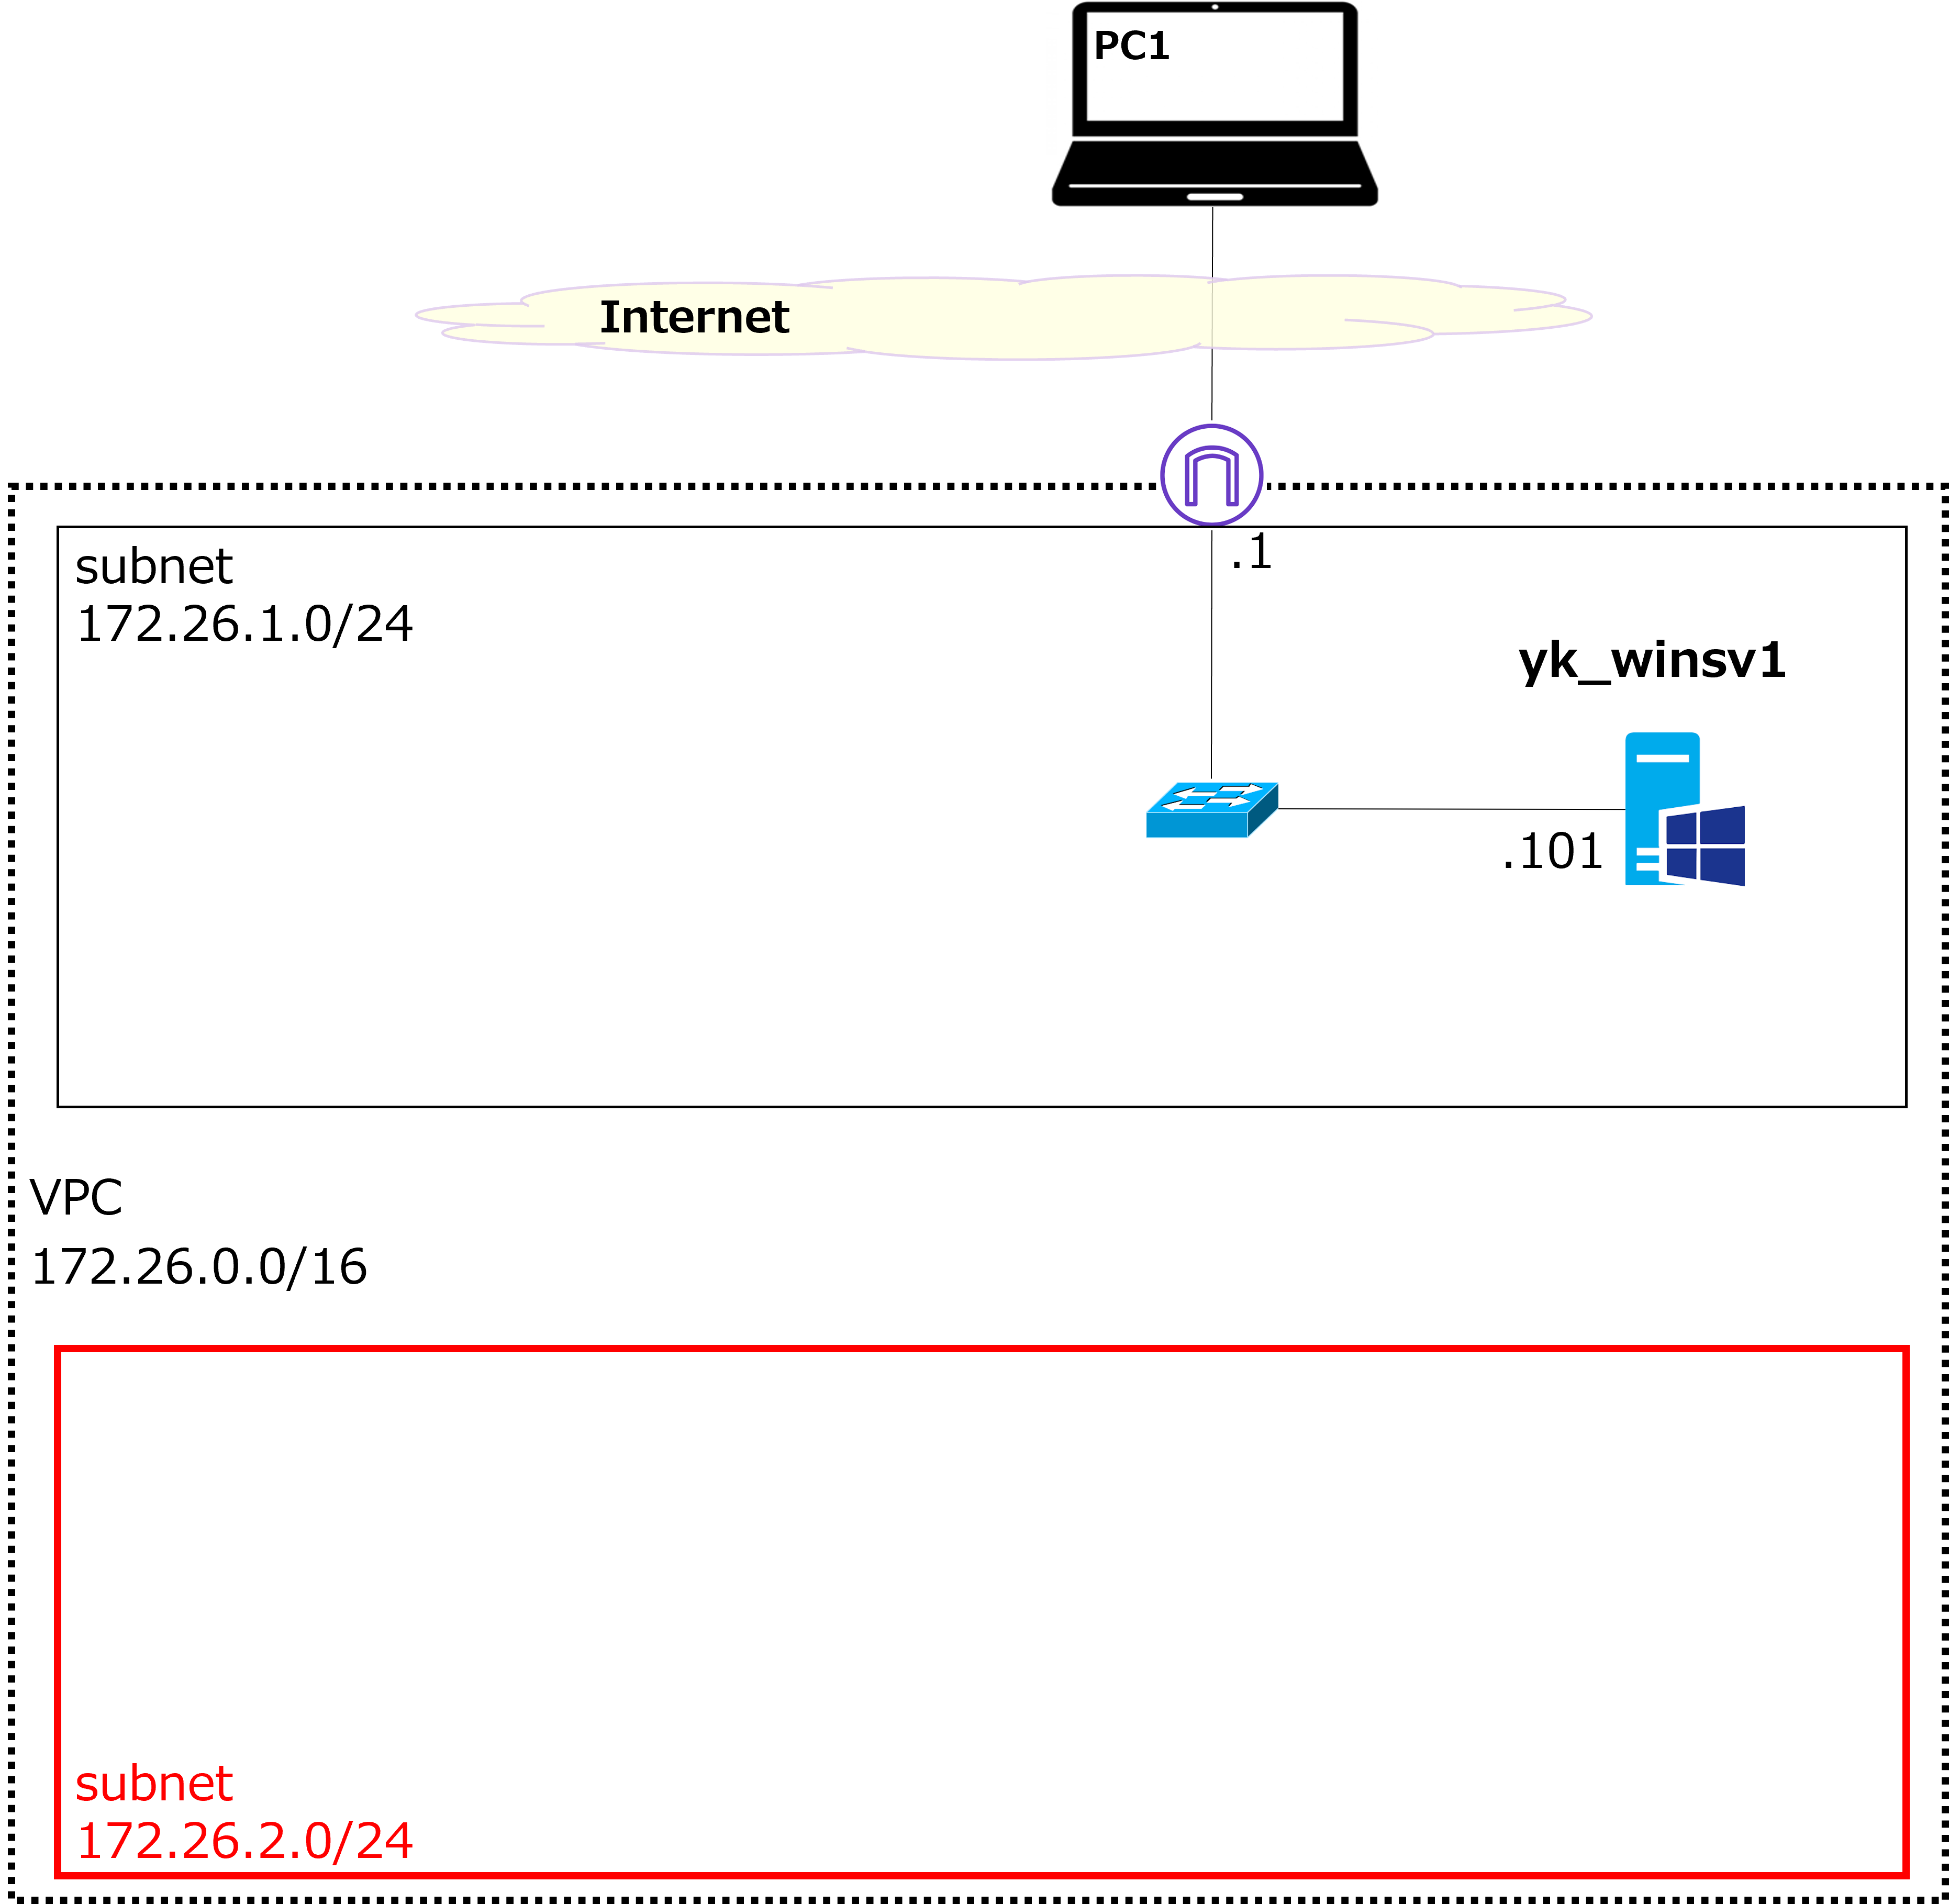
Create a New Subnet (172.26.2.0/24)
|
Here's the rough workflow for this session: Create the 172.26.2.0/24 subnet So let's start by creating the 172.26.2.0/24 subnet. |
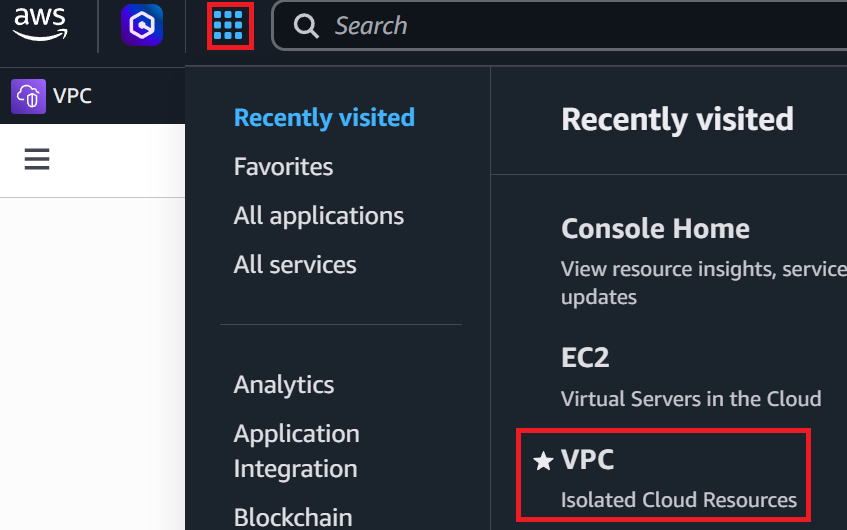
① Click the grid icon in the top-left corner → then click VPC.
② In the left menu, click Subnets → then click Create subnet in the upper right.

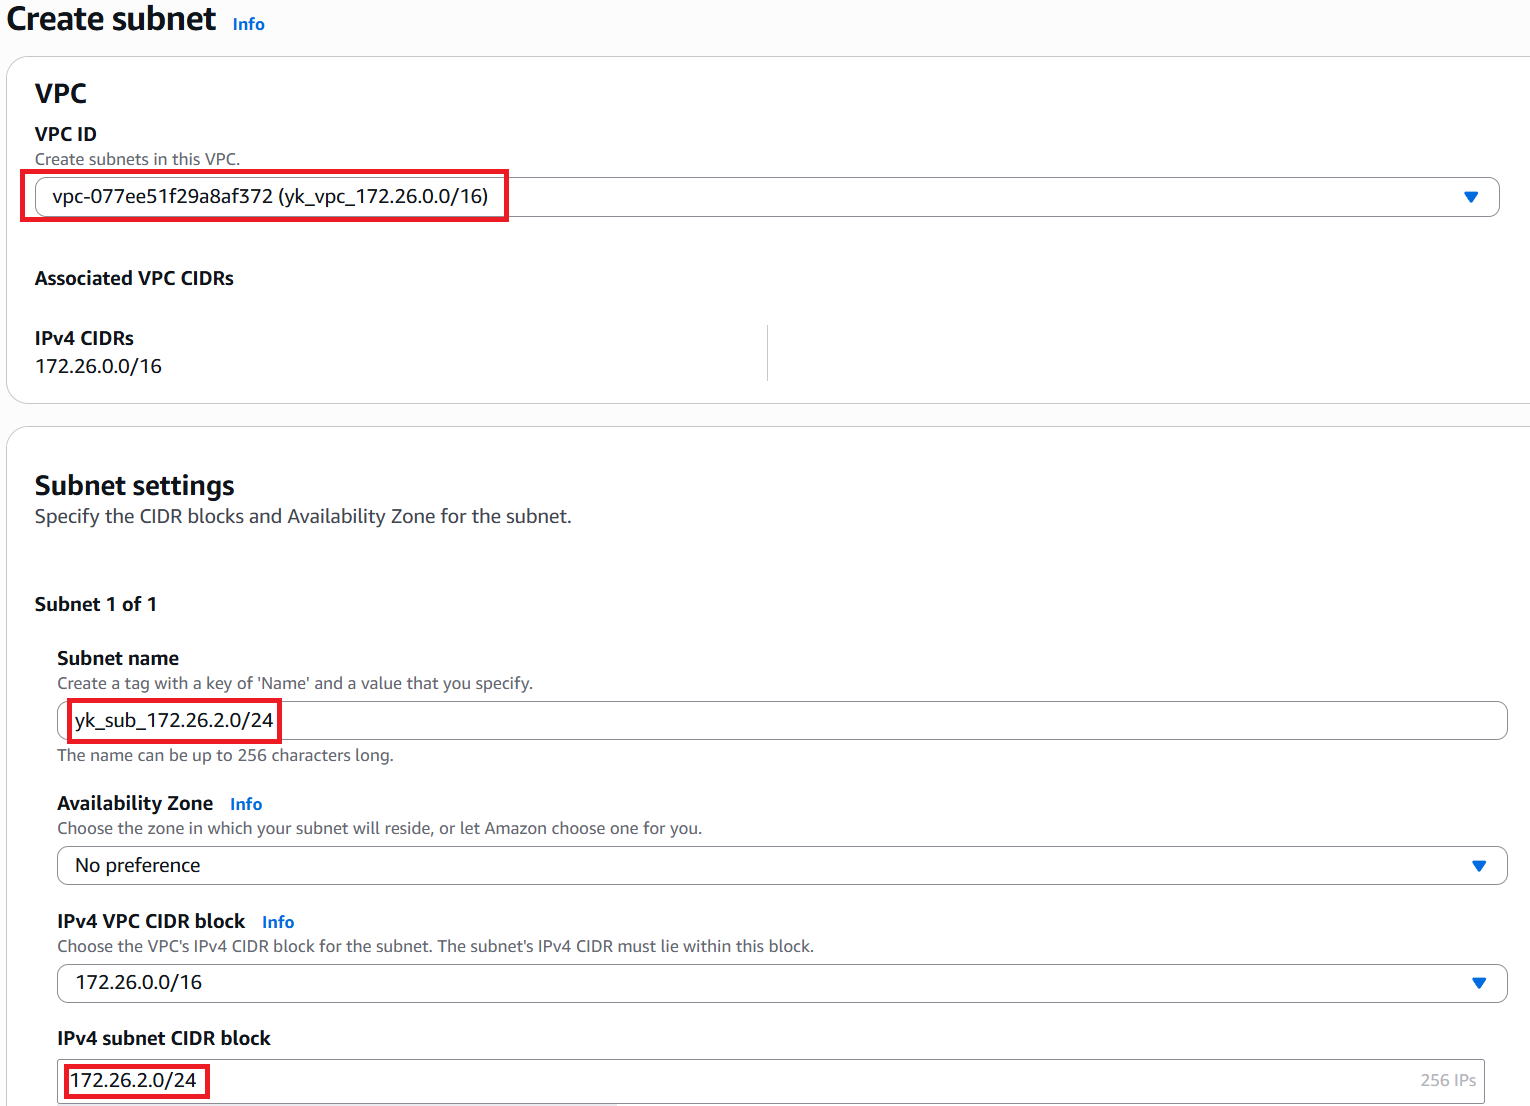
③ Select the VPC in which to create the subnet. This time, select yk_vpc_172.26.0.0/16.
Enter any name in the subnet name field. We used yk_sub_172.26.2.0/24.
In the IPv4 subnet CIDR block field, enter the network address for the subnet. Enter 172.26.2.0/24.
Leave all other settings at their defaults and click Create subnet in the bottom right.
Create Security Groups for port1 and port2
|
Next, we'll create the SGs for port1 and port2 (highlighted in red in the diagram above). Here are the rules we'll use: ■ For port1 Inbound: Allow only ping, HTTPS, and SSH Outbound: Allow all ■ For port2 Inbound and Outbound: Allow all |
|
Is it really okay to allow all traffic on port2? |
|
Yes. Since port2 only connects to the 172.26.2.0/24 subnet and is not exposed to the internet, allowing all traffic should be fine. |
|
Got it. |
① Go to the VPC dashboard → click Security Groups in the left menu → click Create security group in the upper right.
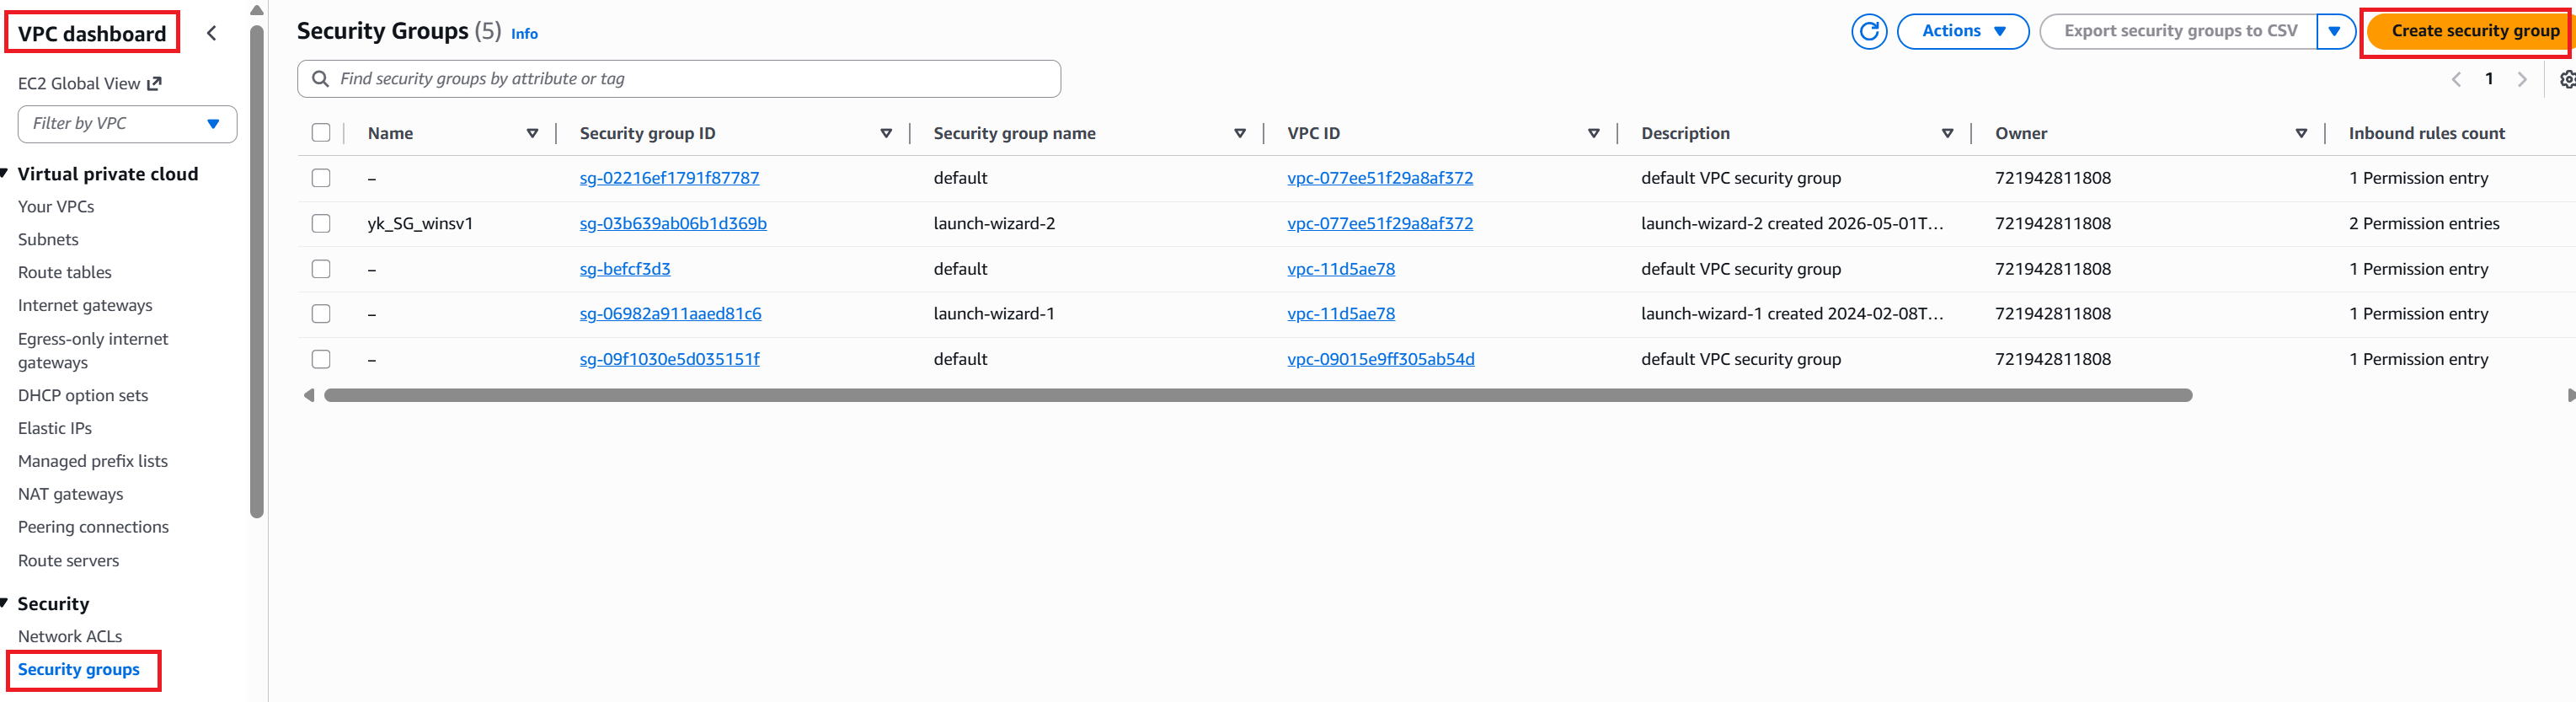
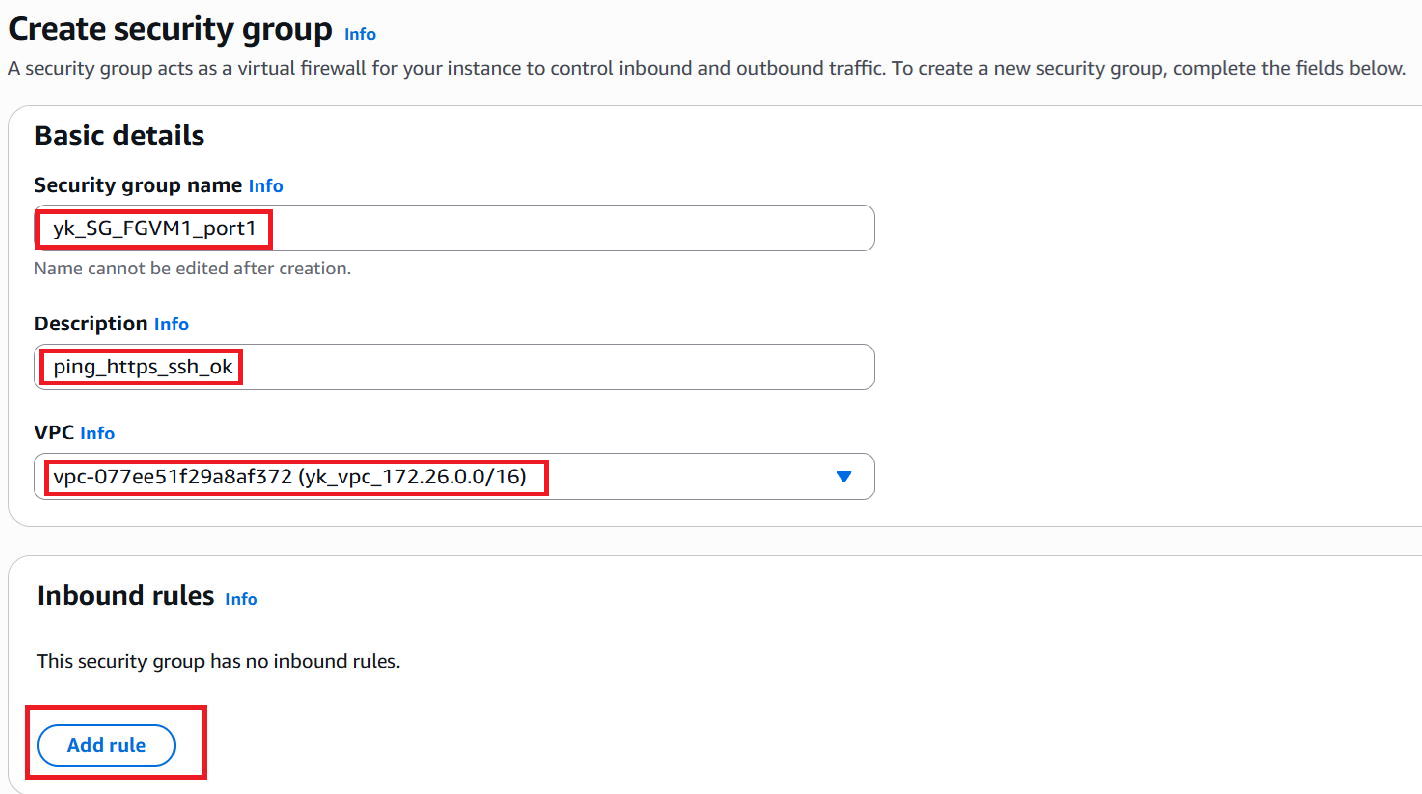
② Enter a name in the Security group name field. We used yk_SG_FGVM1_port1.
A Description is also required, so we entered ping_https_ssh_ok.
For VPC, select yk_vpc_172.26.0.0/16. Click Add rule at the bottom left to configure Inbound rules.
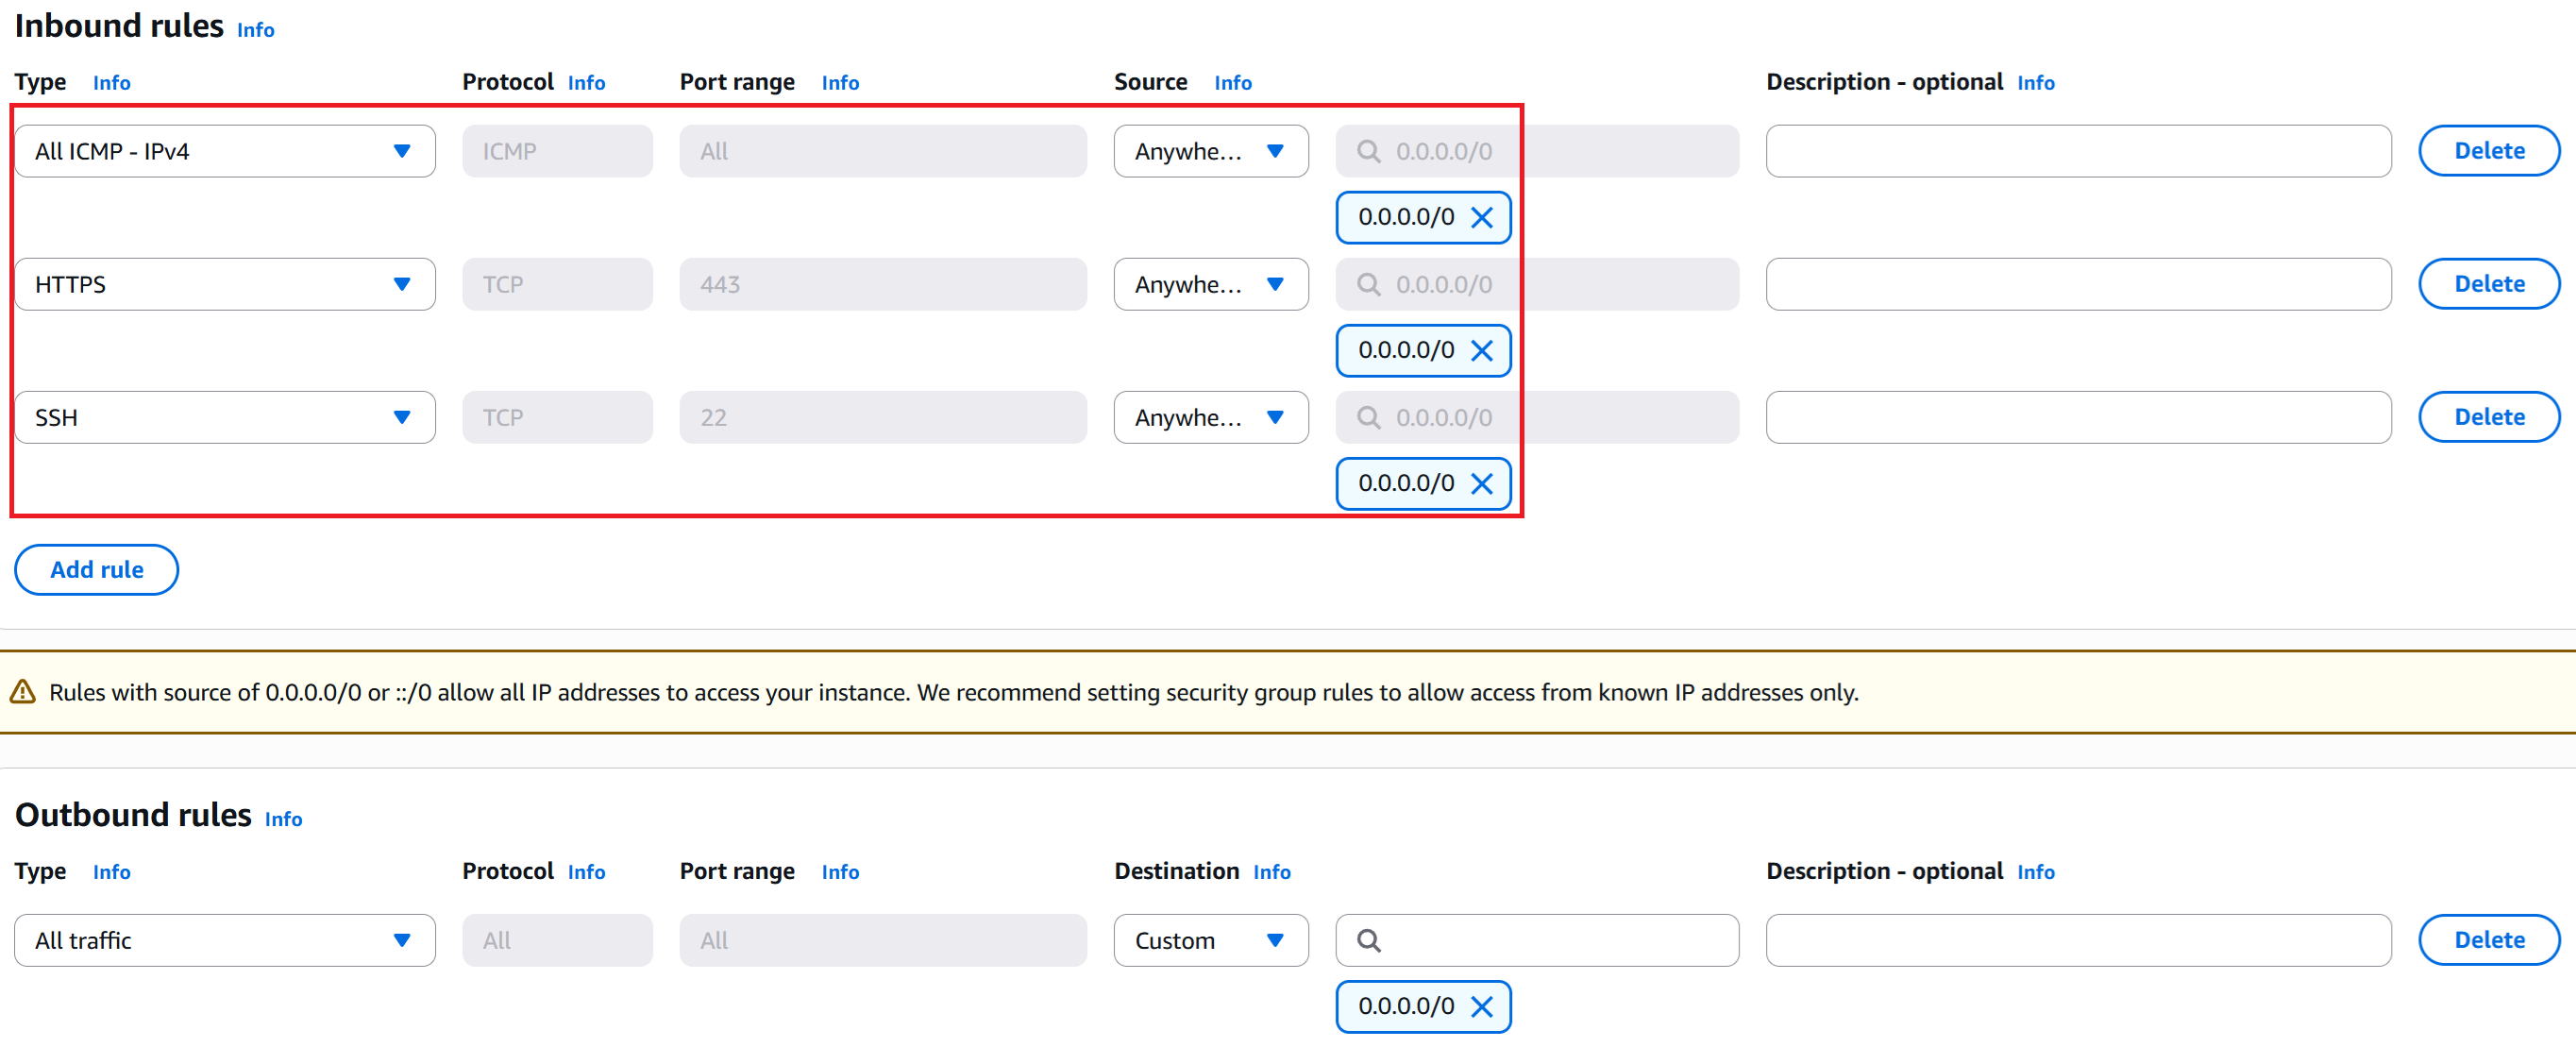
③ Add rules to allow ICMP, HTTPS, and SSH inbound. The outbound rules allow all traffic by default, so leave them as-is. Click Create security group in the bottom right.
④ Creation complete.

⑤ Create the SG for port2 using the same steps.
Enter a name in the Security group name field. Since this SG allows all traffic and will likely be reused in various places,
we named it yk_SG_allpermit rather than yk_SG_FGVM1_port2.
Description: allpermit.
VPC: yk_vpc_172.26.0.0/16.
Edit the Inbound rules to allow all traffic, then create the SG.

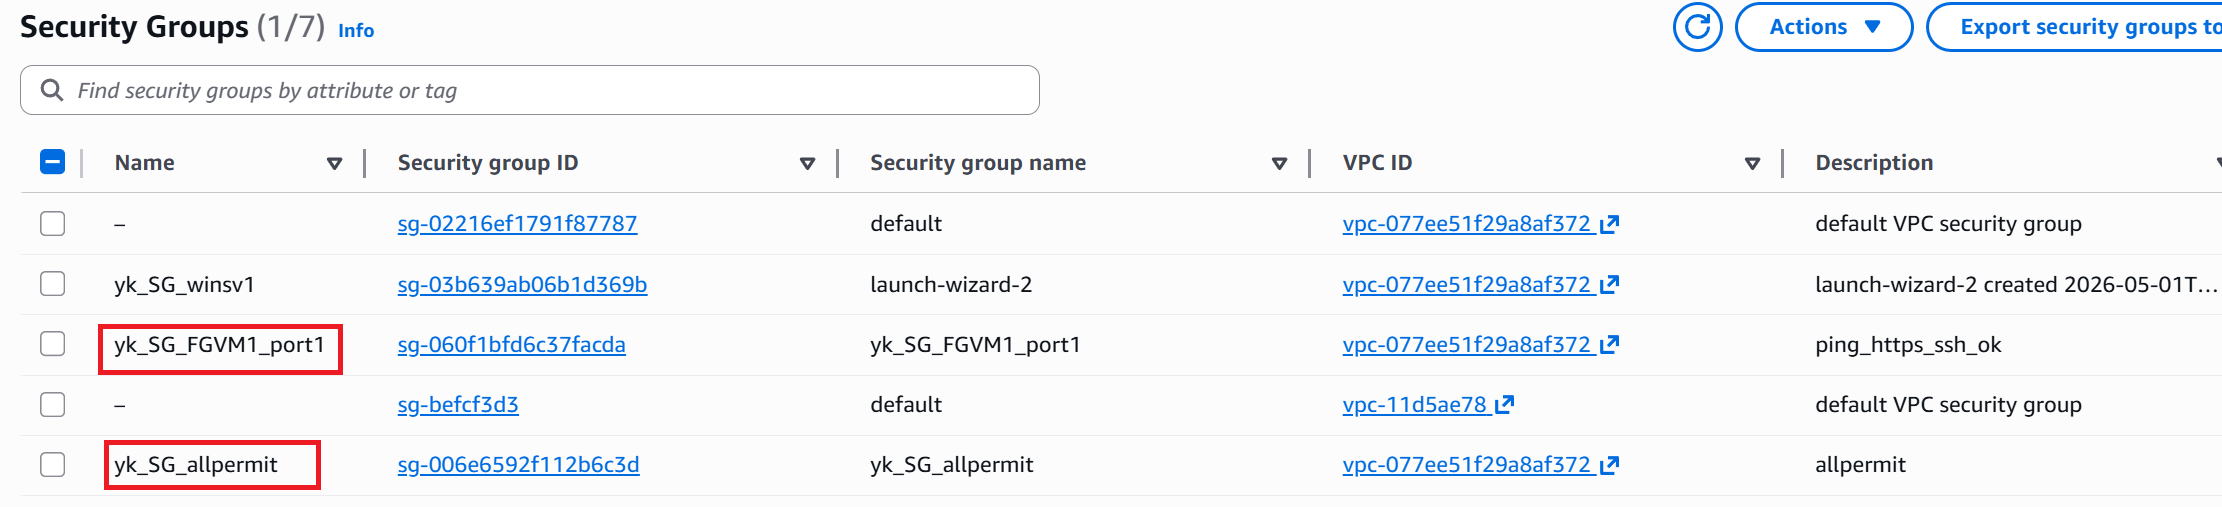
⑥ The SG list after creation.
Just like with Windows VM creation, newly created SGs will have the Security group name field filled in, but the Name field will be blank.
Go ahead and manually enter a name in the Name field as shown by the red boxes.
Create Network Interfaces for port1 and port2
|
Next, we'll create the Network Interfaces for port1 and port2 (shown in red in the diagram above). These will be attached to the FGVM later. |
|
Hmm — so we're creating the ports as separate components beforehand, rather than during VM creation. Is that the only way to do it? |
|
You can actually create them during VM setup too. However, when attaching multiple Network Interfaces to a single VM — as we're doing here — you can't assign a dynamic GIP (Global IP address) the way we did when building the Windows VM last time. That means you need a fixed GIP, which AWS calls an Elastic IP. Personally, I find it cleaner to create the Network Interfaces in advance when working with Elastic IPs. That said, it's mostly a matter of preference — either approach works. |
|
I see... Is a fixed GIP more expensive than a dynamic one? |
|
The hourly rate itself is the same, but the billing behavior differs: a dynamic IP is only charged while the instance is running, whereas a fixed IP (Elastic IP) is charged even when the instance is stopped. |
|
That makes sense — you're still reserving the IP address even when the instance is stopped. |
|
Exactly. The monthly cost is around $4 (~¥600), which personally feels a bit steep. I'm hoping AWS will eventually allow dynamic IPs to be used with multi-interface setups. Anyway, let's get into the steps. |
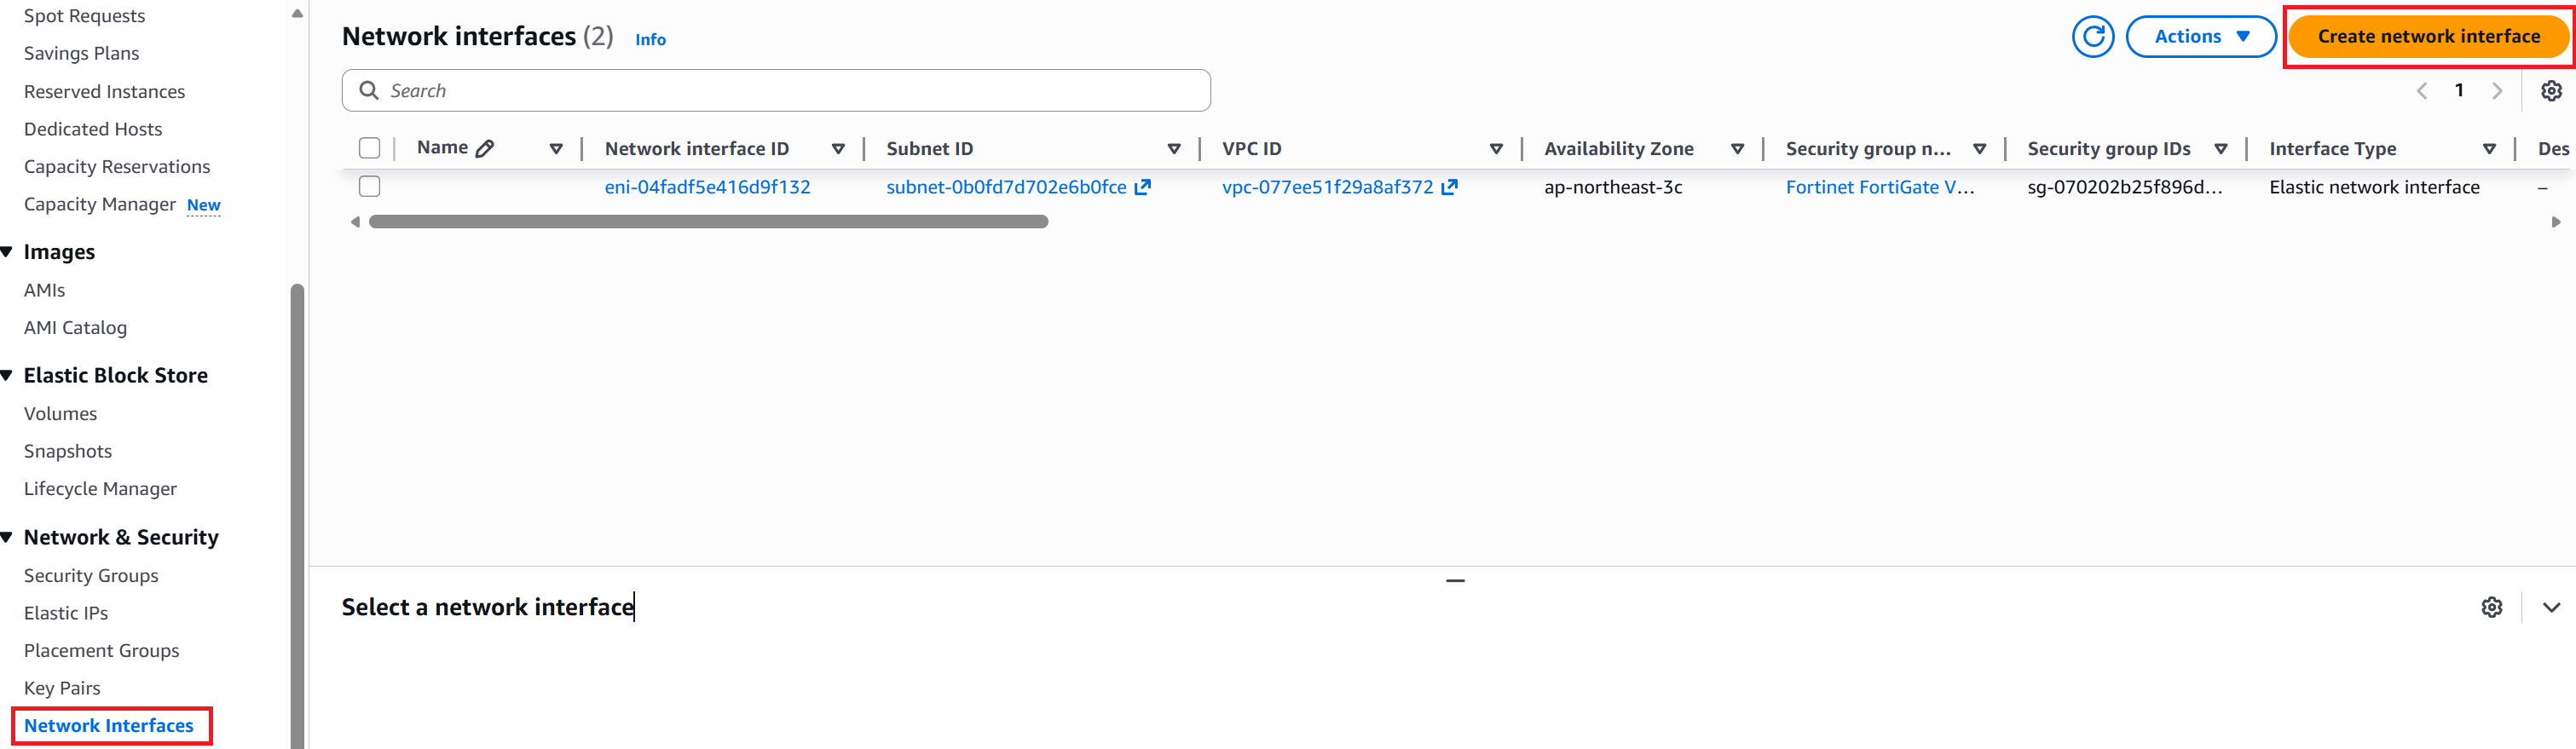
① Create the Network Interface for port1.
Open the EC2 dashboard, go to Network Interfaces in the left menu → click Create network interface in the upper right.
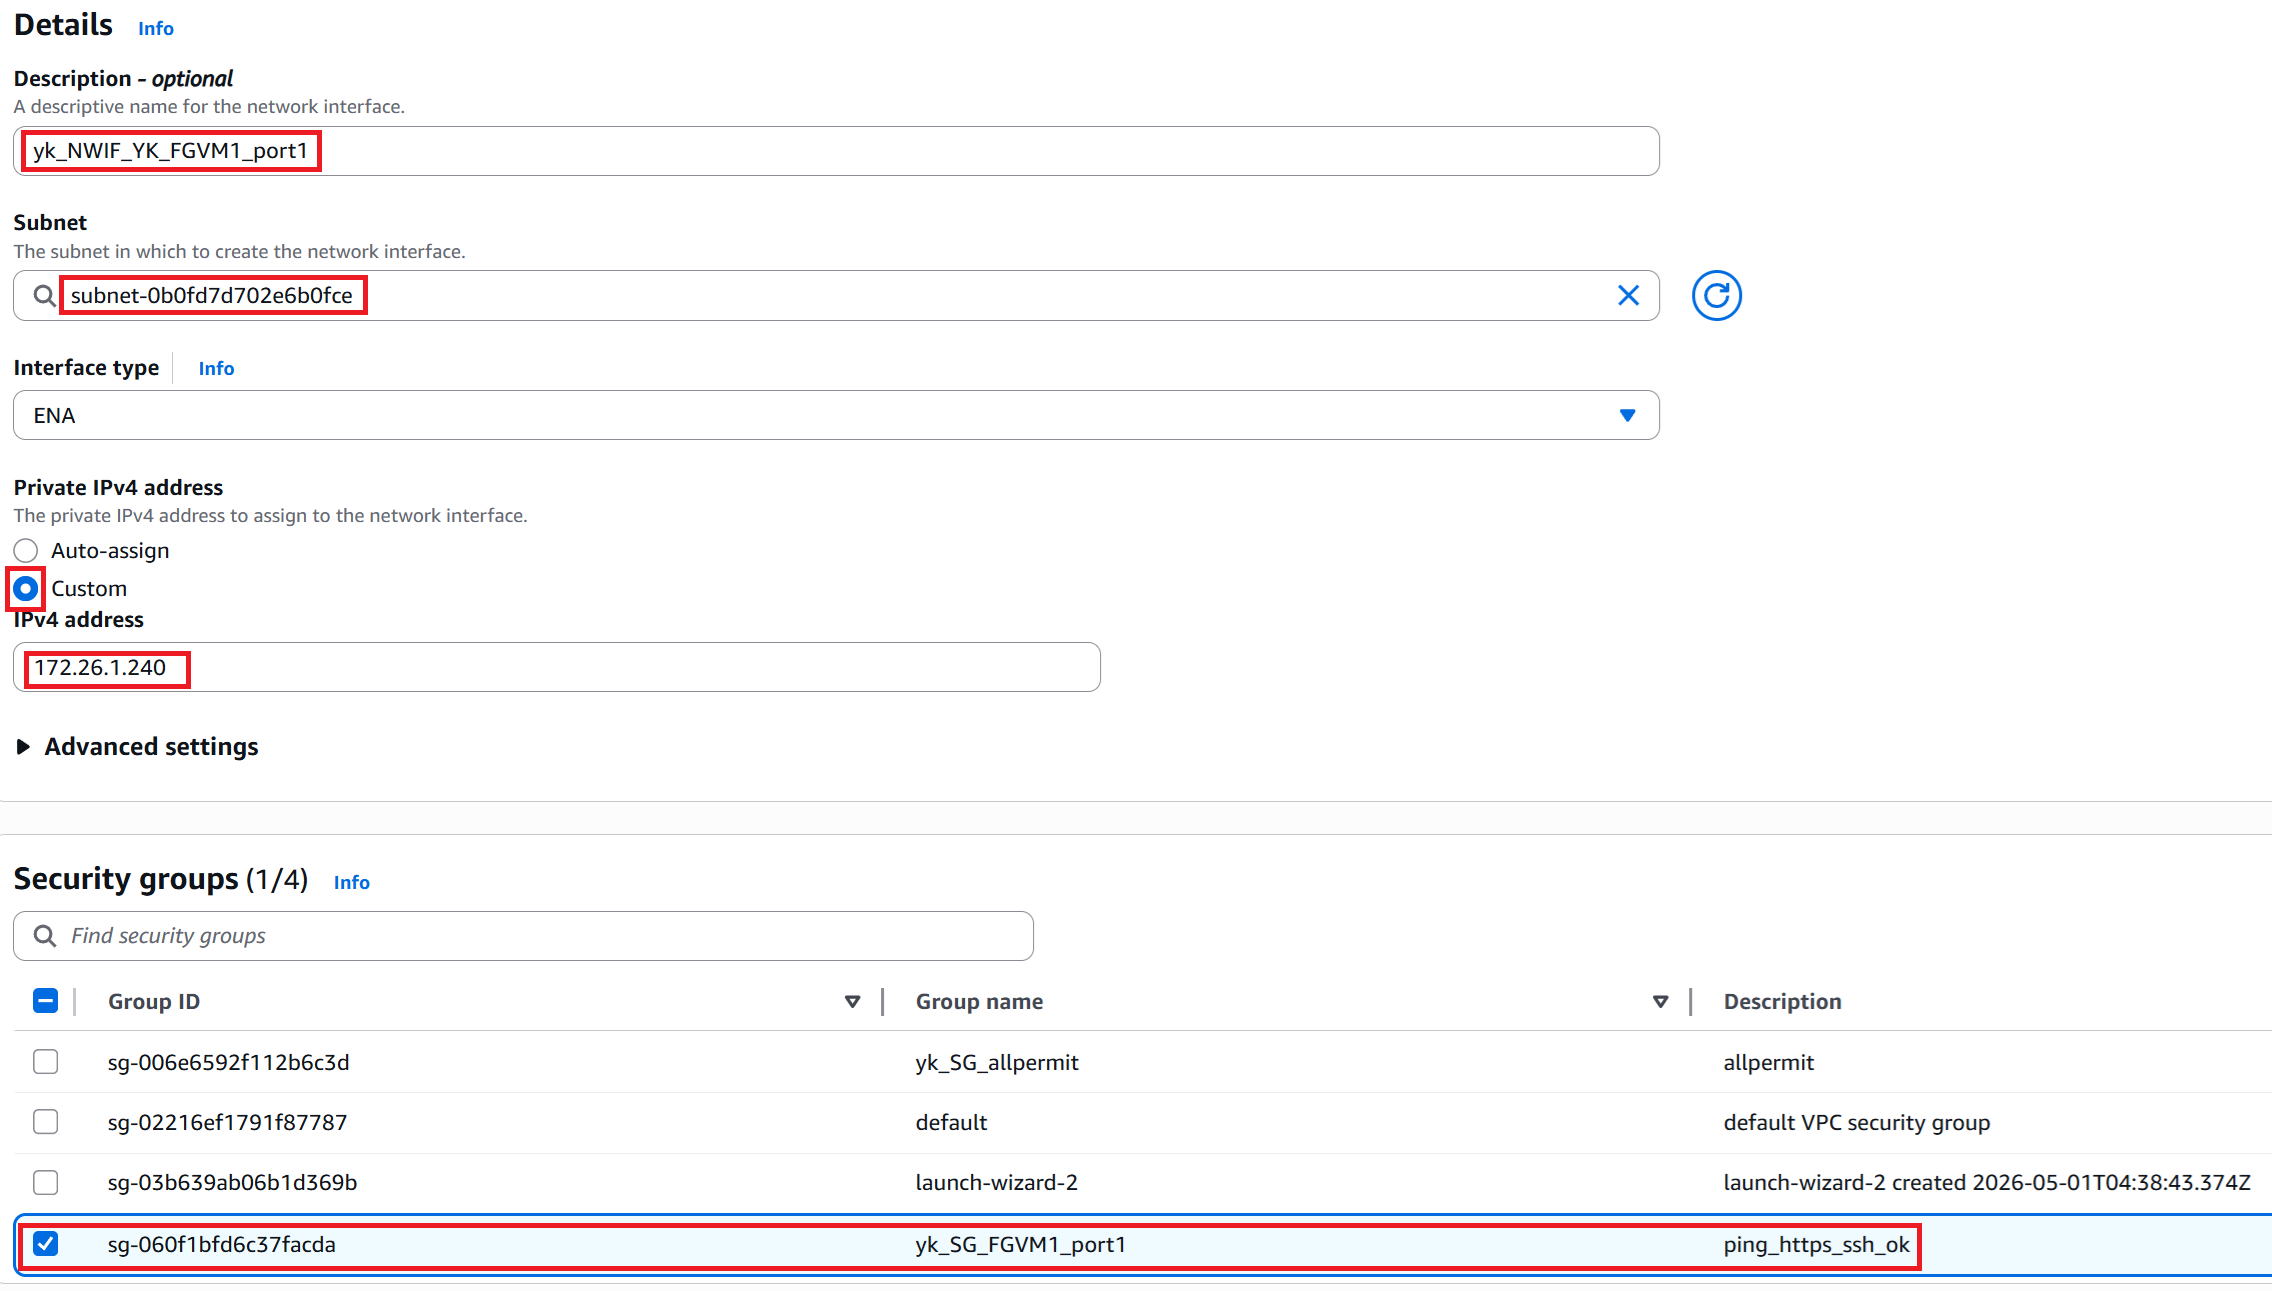
② Enter yk_NWIF_YK_FGVM1_port1 in the Description field.
For Subnet, select subnet-010fd~ (yk_sub_172.26.1.0/24), which is where port1 will reside.
For Private IPv4 address, select Custom and enter 172.26.1.240.
For Security group, select yk_SG_FGVM1_port1 created earlier.
Click Create network interface in the bottom right.
③ Creation complete. As with SGs, the Name field will be blank immediately after creation — go ahead and enter a name as shown by the red box.

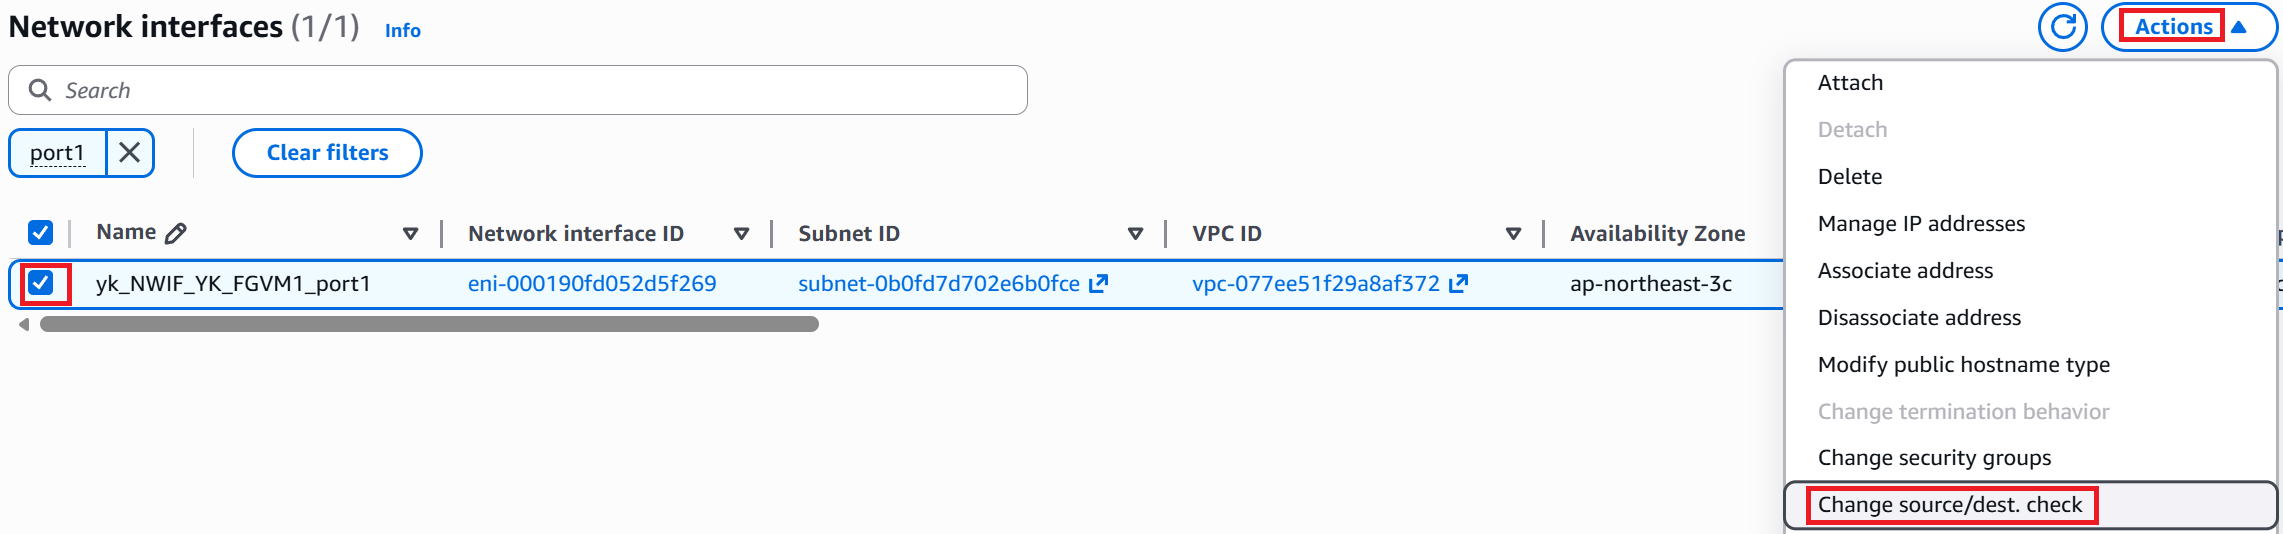
④ Check the checkbox as shown in red, then go to Actions → Change source/dest check.
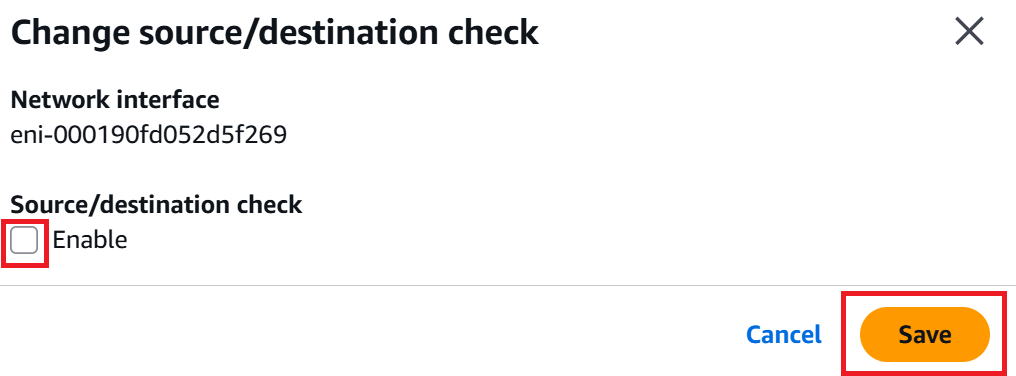
⑤ By default, the checkbox shown in red will be checked — uncheck it and click Save. (The reason is explained below.)
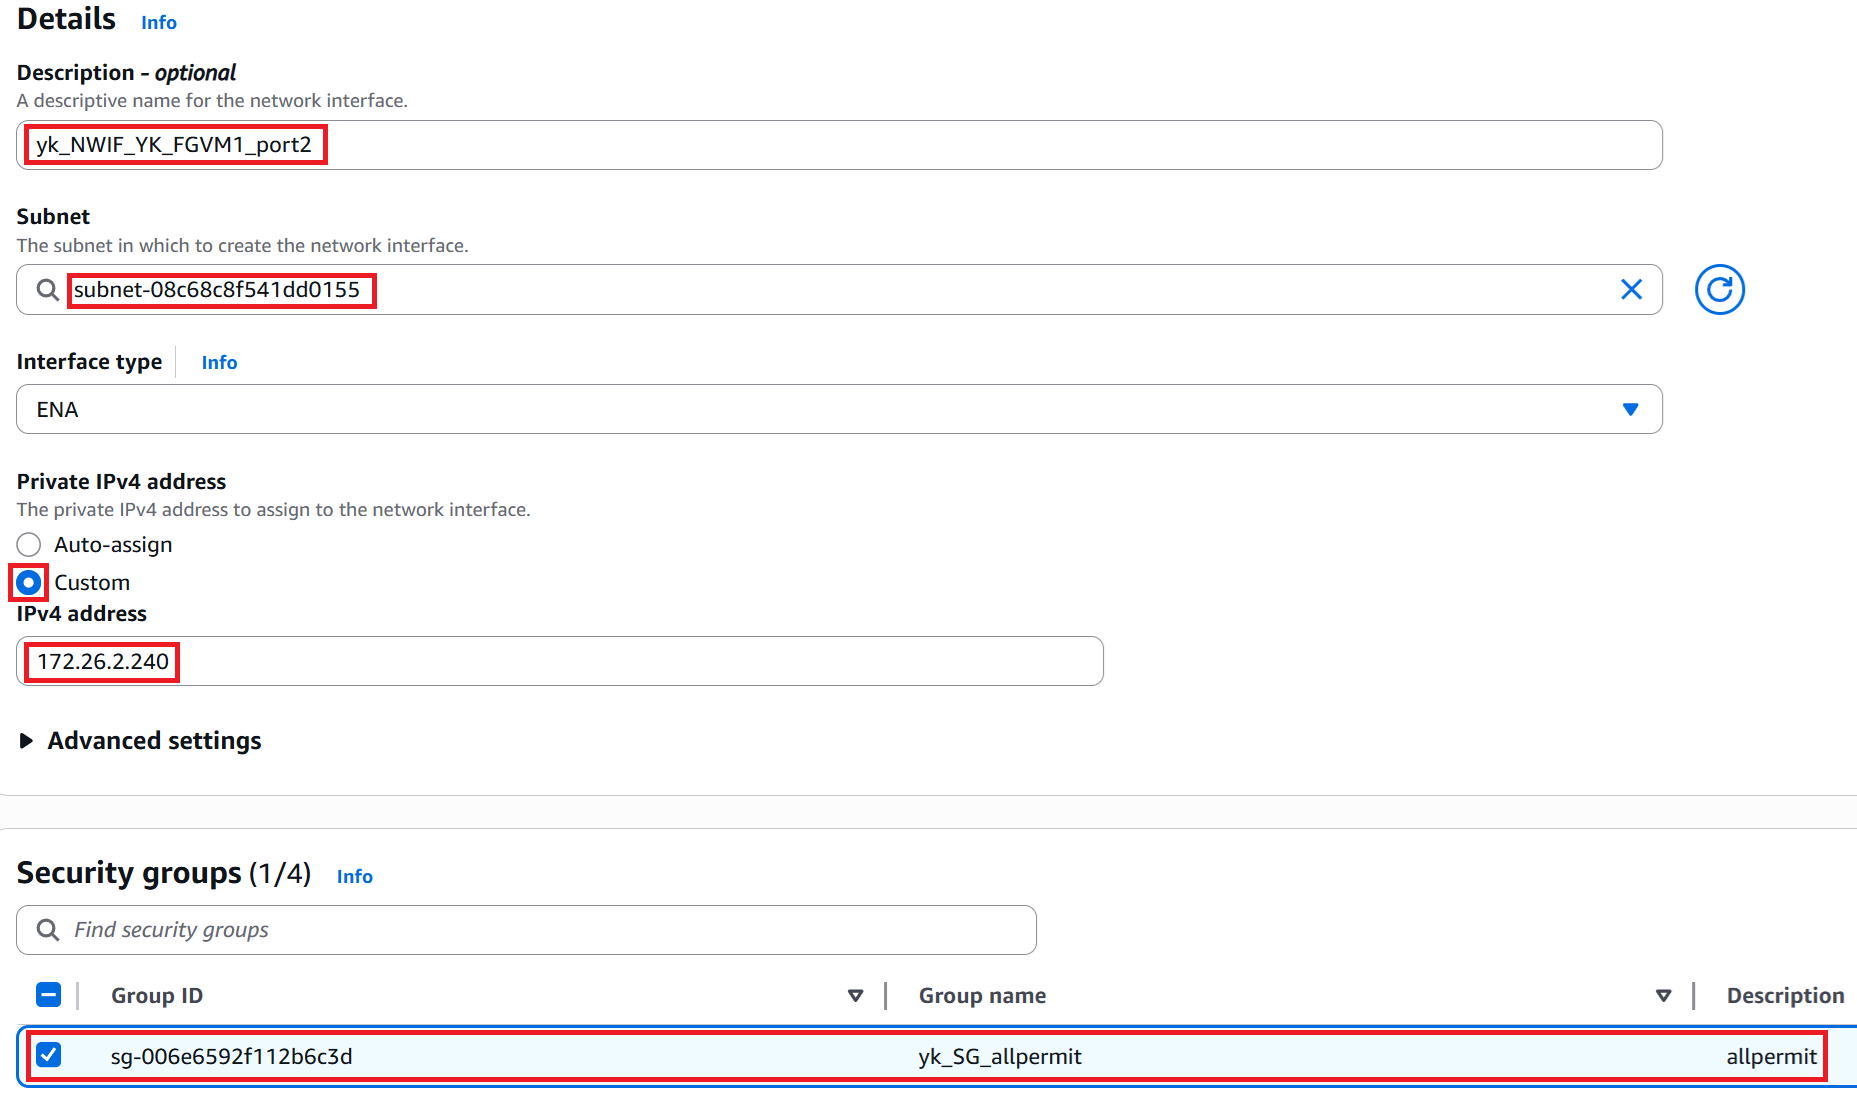
⑥ Now create the Network Interface for port2. Enter yk_NWIF_YK_FGVM1_port2 in the Description field.
For Subnet, select subnet-08c68~ (yk_sub_172.26.2.0/24), which is where port2 will reside.
For Private IPv4 address, select Custom and enter 172.26.2.240.
For Security group, select yk_SG_allpermit.
Click Create network interface to create it.
We'll skip the remaining screenshots, but just like with port1: after creation, manually enter a name in the Name field, and also uncheck the source/dest check.
|
What happens when you uncheck the source/dest check? |
|
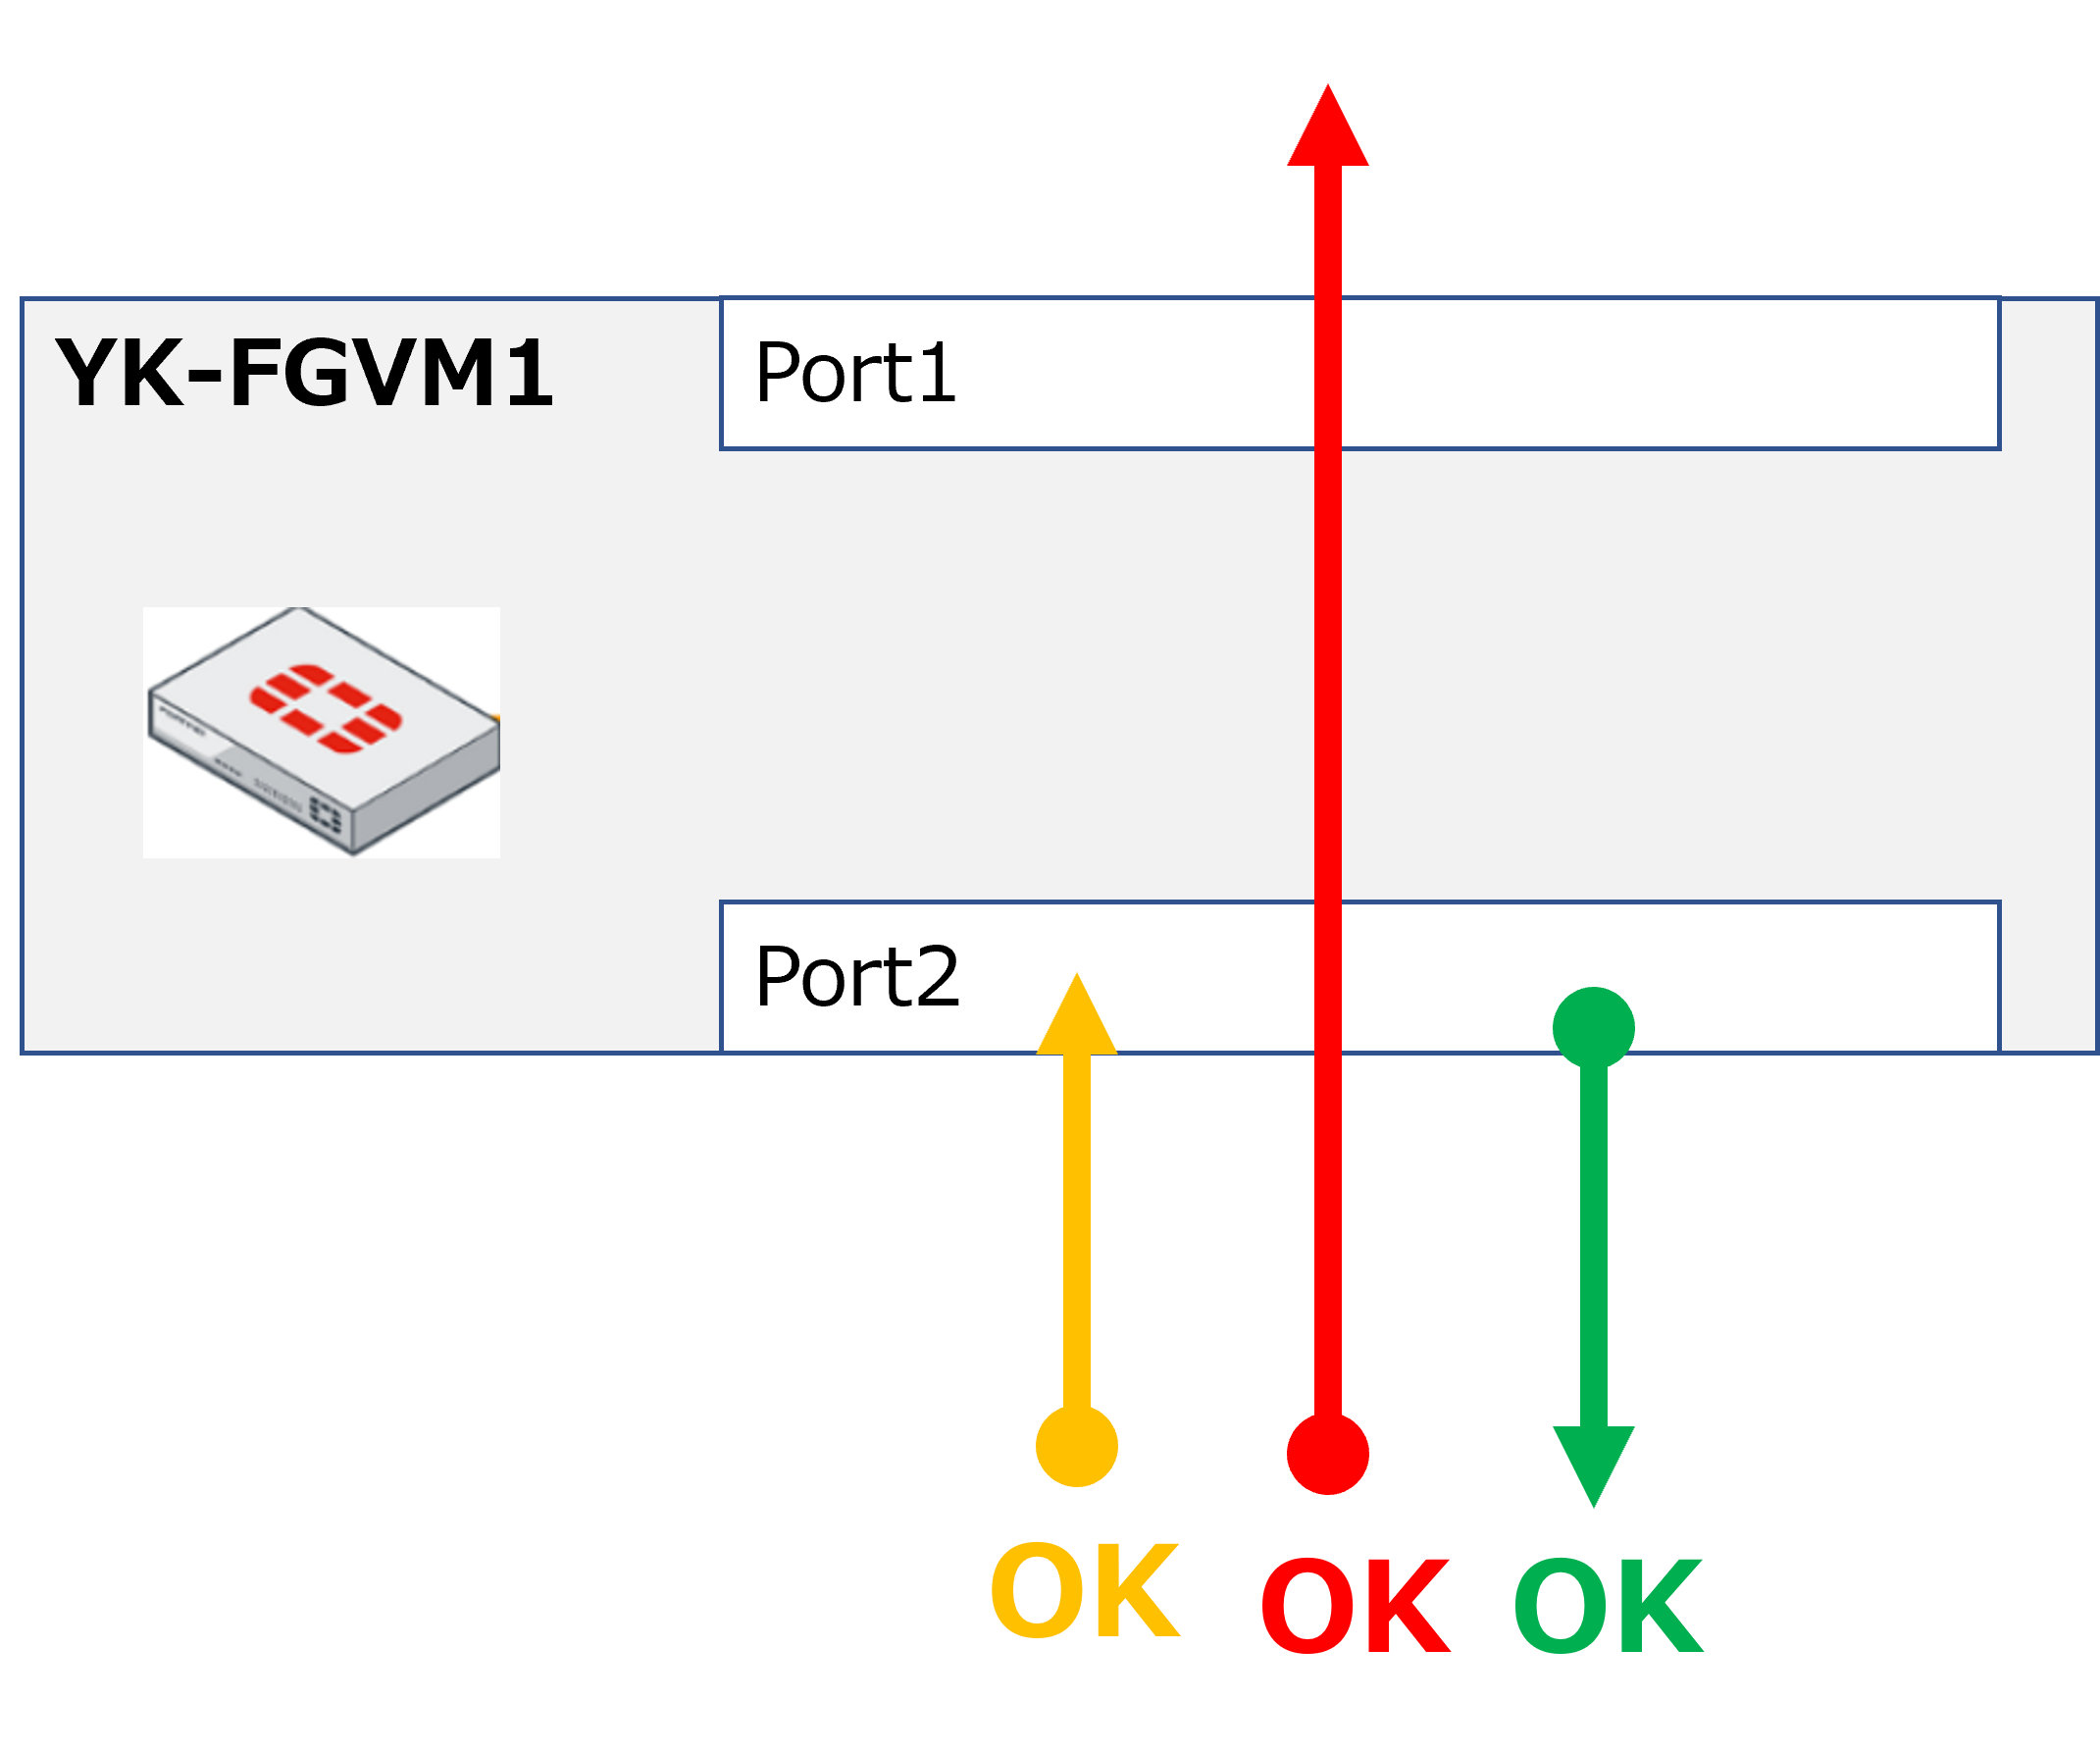
Unchecking it allows packets to pass through that Network Interface. When the check is enabled (default), only traffic where the Network Interface's own IP address is the source or destination is allowed — transit traffic (shown by the red arrows in the diagram below) is blocked. Unchecking it enables that transit traffic. |
■ Source/dest check enabled (default)
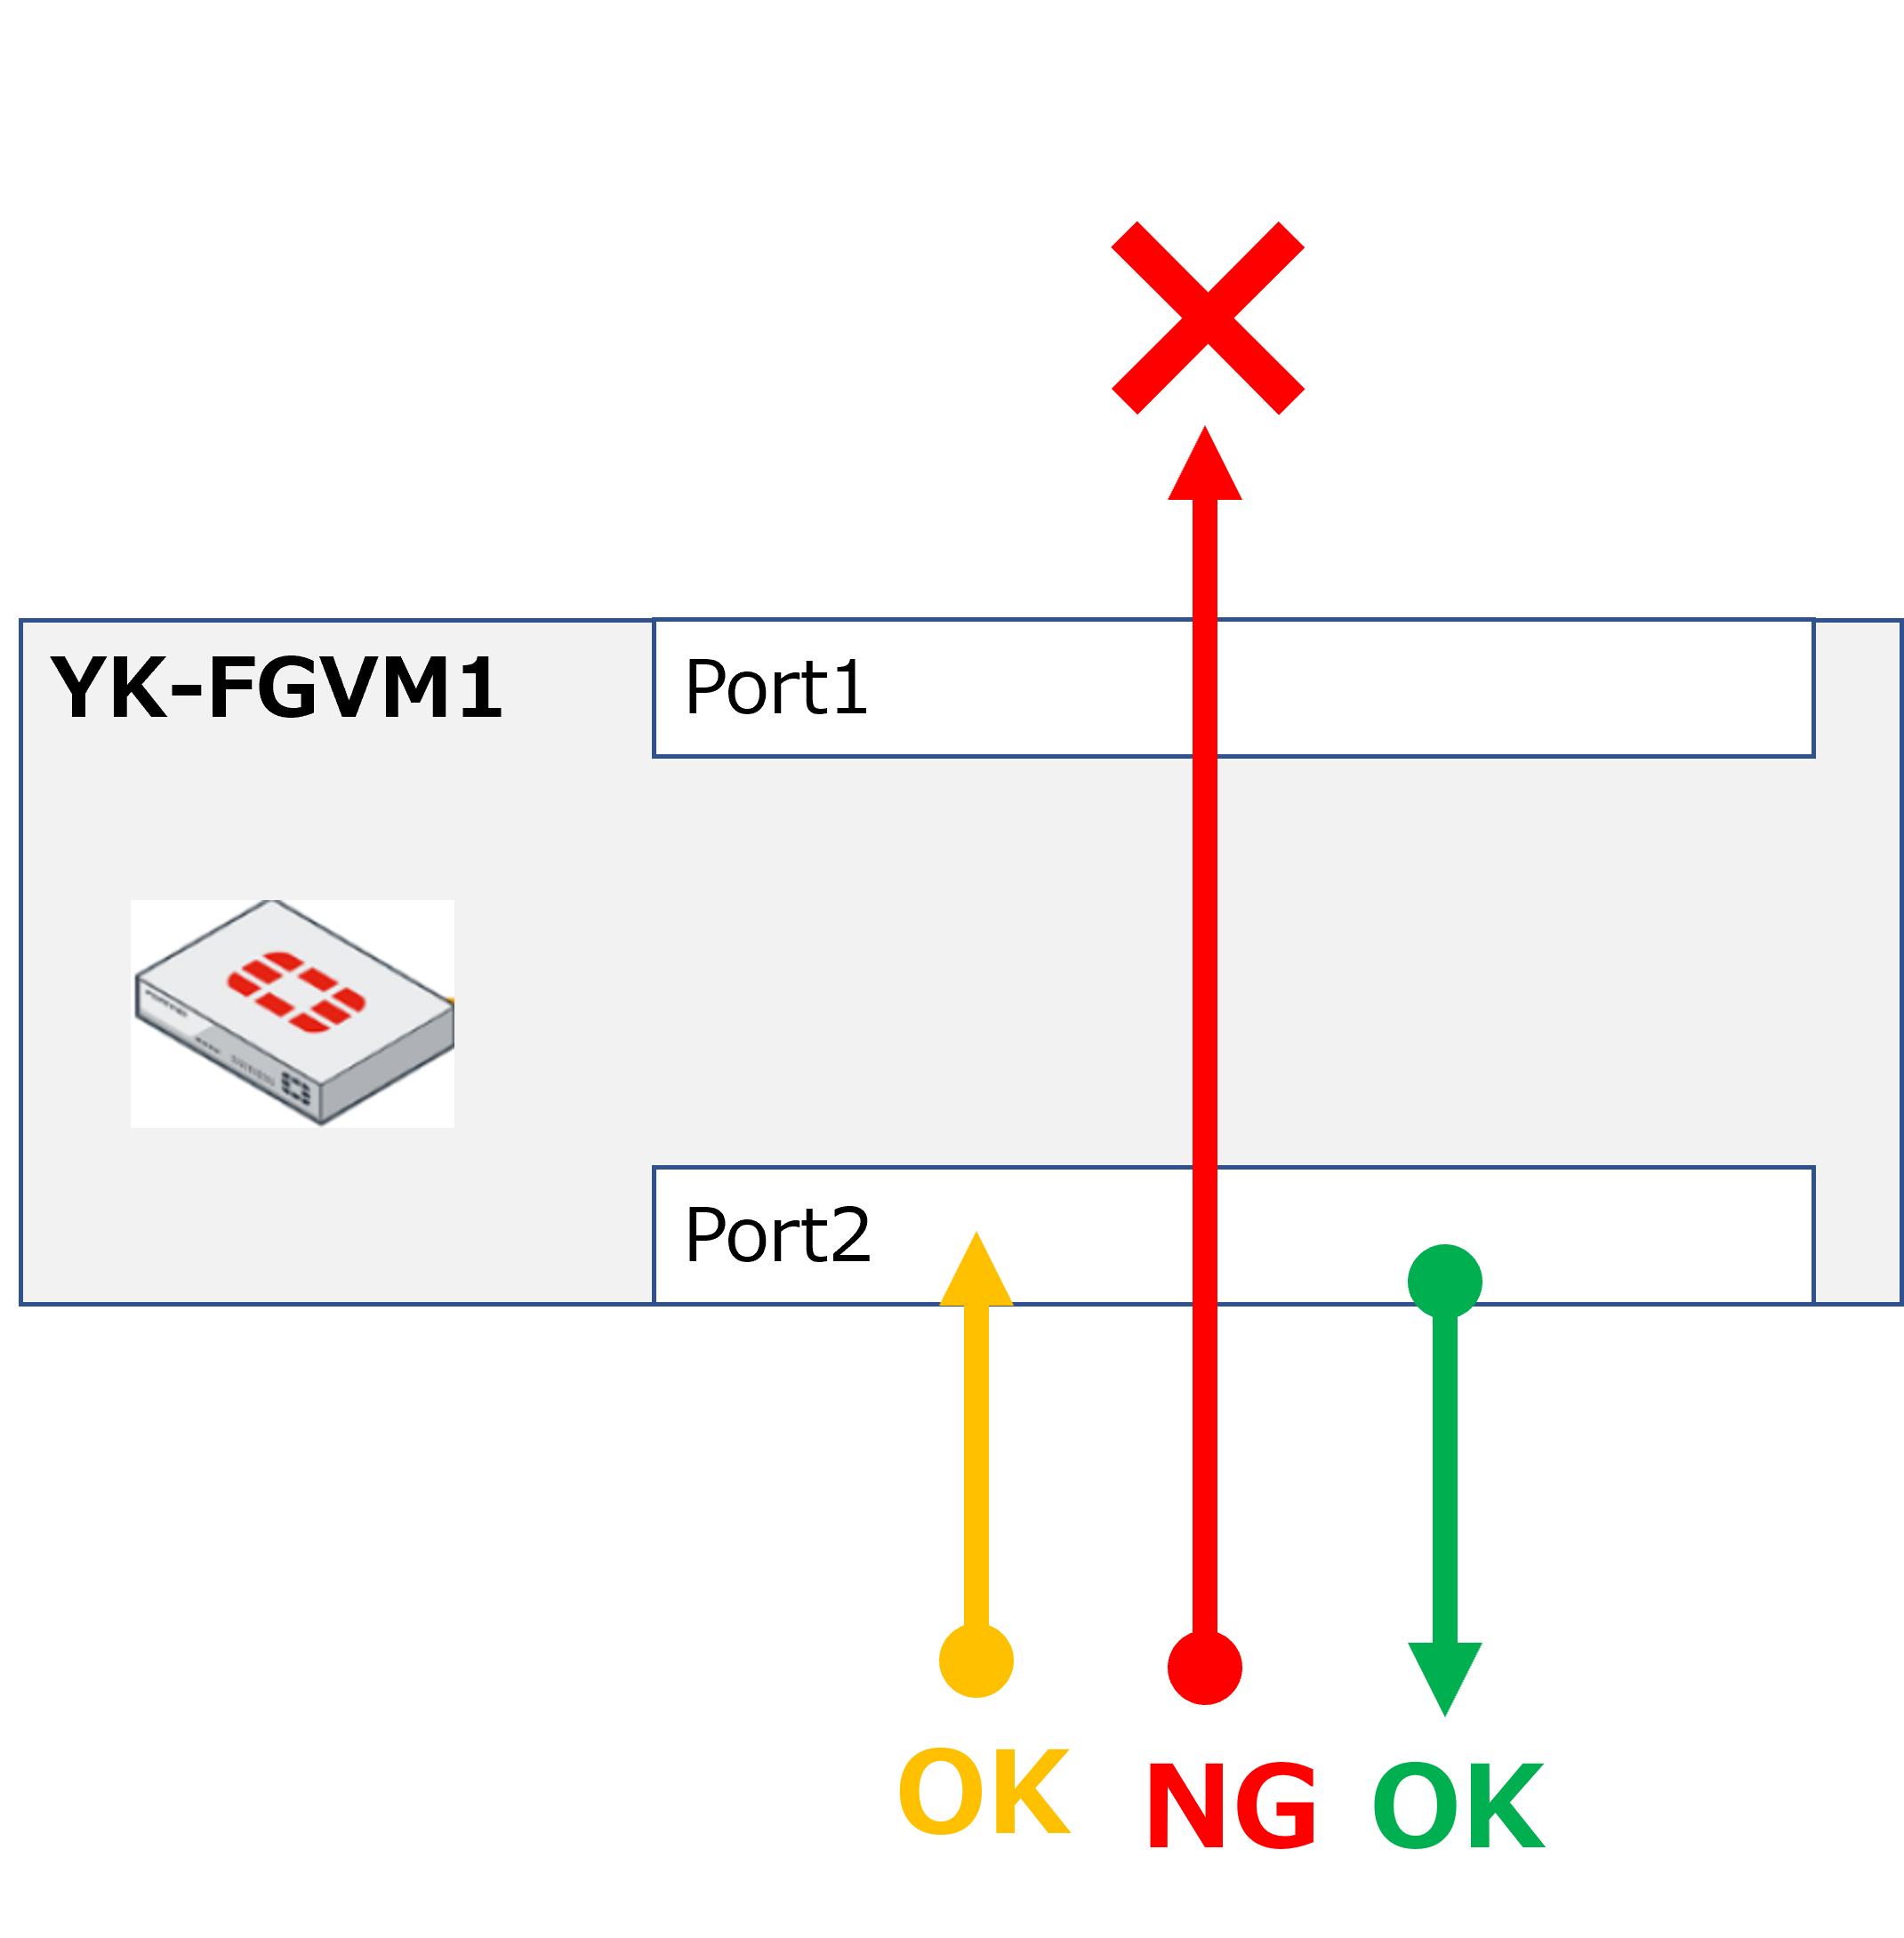
■ Source/dest check disabled
|
Ah, I see. That's quite a gotcha... |
|
Yeah, it really is... |
Allocate a Fixed GIP (Elastic IP) and Associate It with Port1
|
Next, we'll allocate a fixed GIP (Global IP address) and associate it with the port1 Network Interface we just created. In AWS, this fixed GIP is called an Elastic IP. |
|
The actual IP address of the port1 interface is 172.26.1.240/24, right? So by associating a GIP, internet access to the FGVM will go through that GIP? |
|
Exactly. The IGW (Internet Gateway) will handle NAT between the GIP and the PIP (Private IP address) in both directions. |
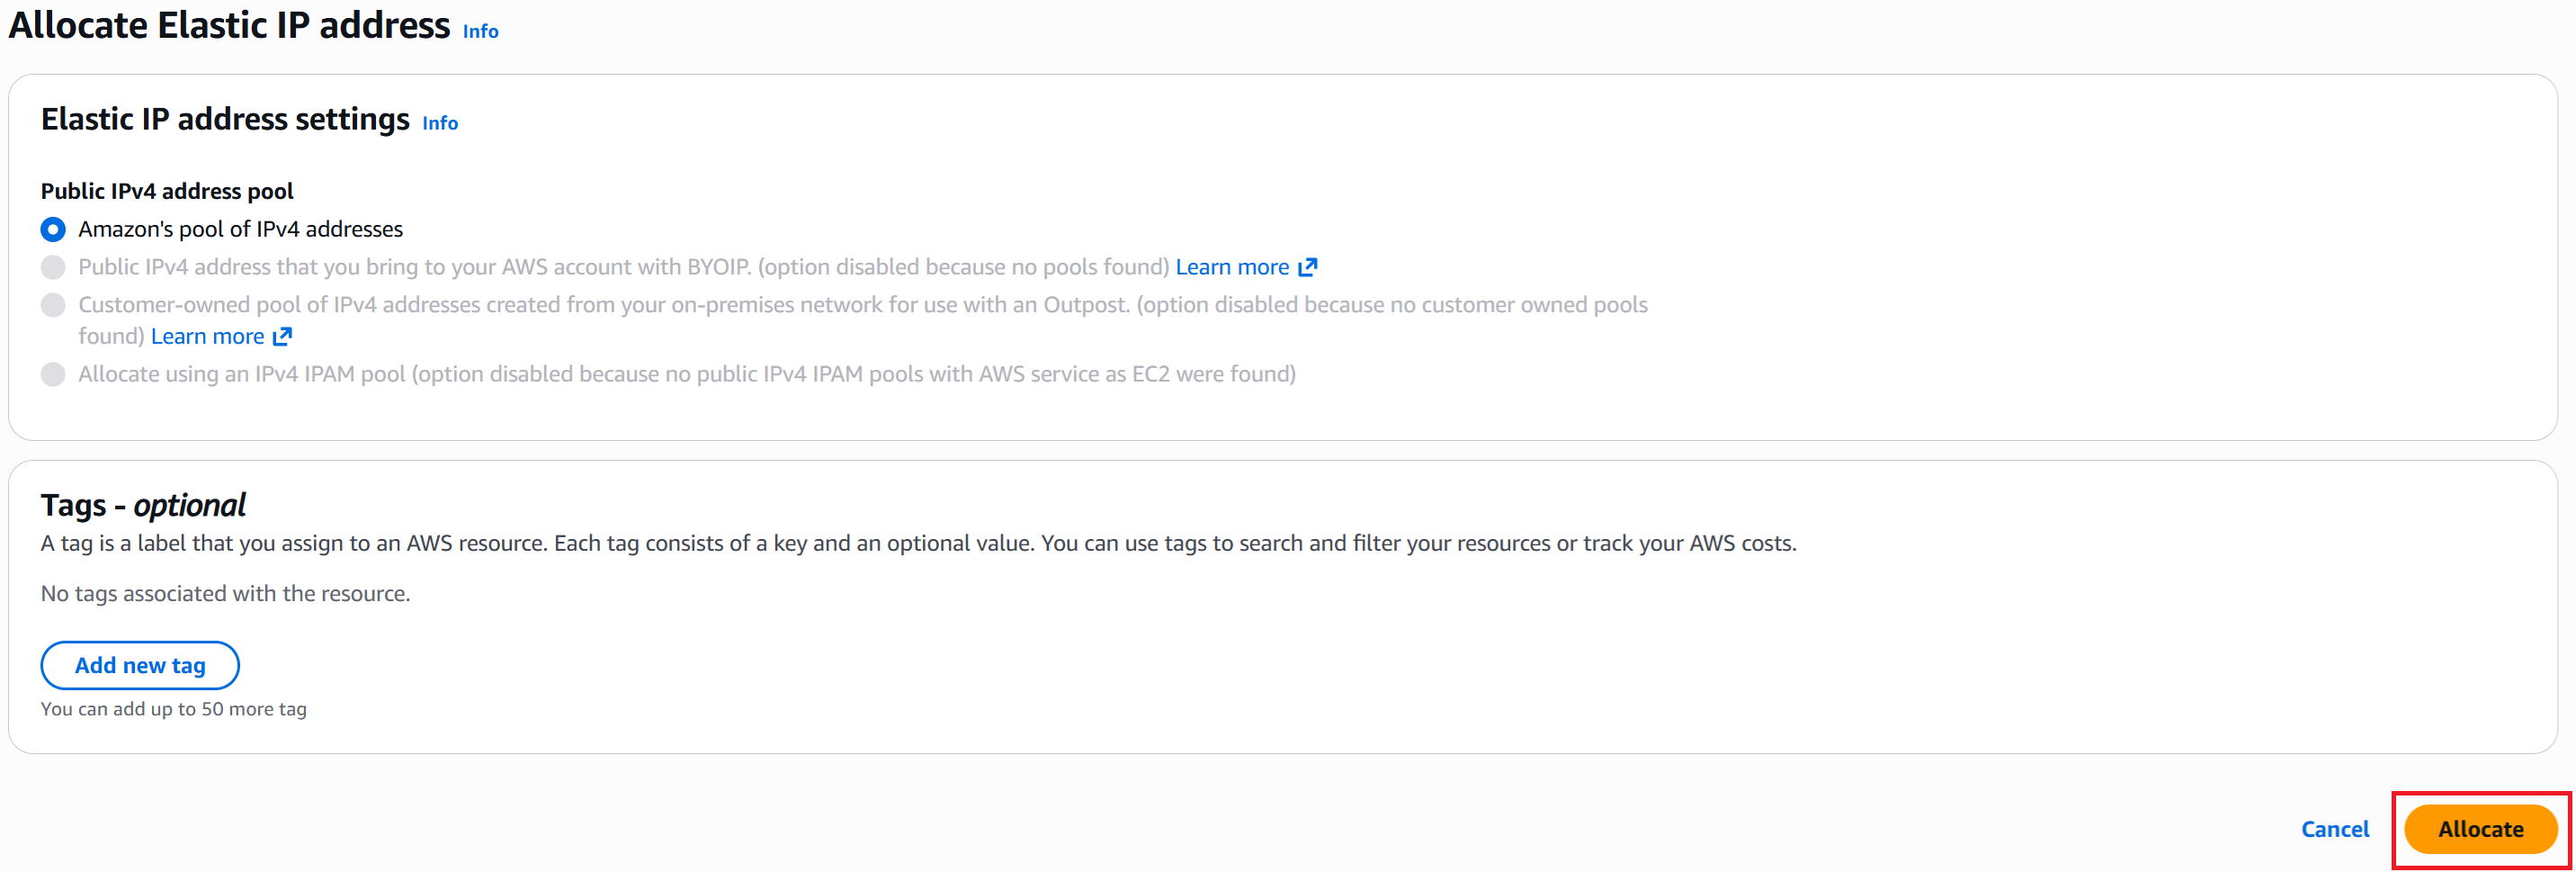
① In the EC2 dashboard left menu, go to Elastic IPs → click Allocate Elastic IP address in the upper right.

② Click Allocate in the bottom right.
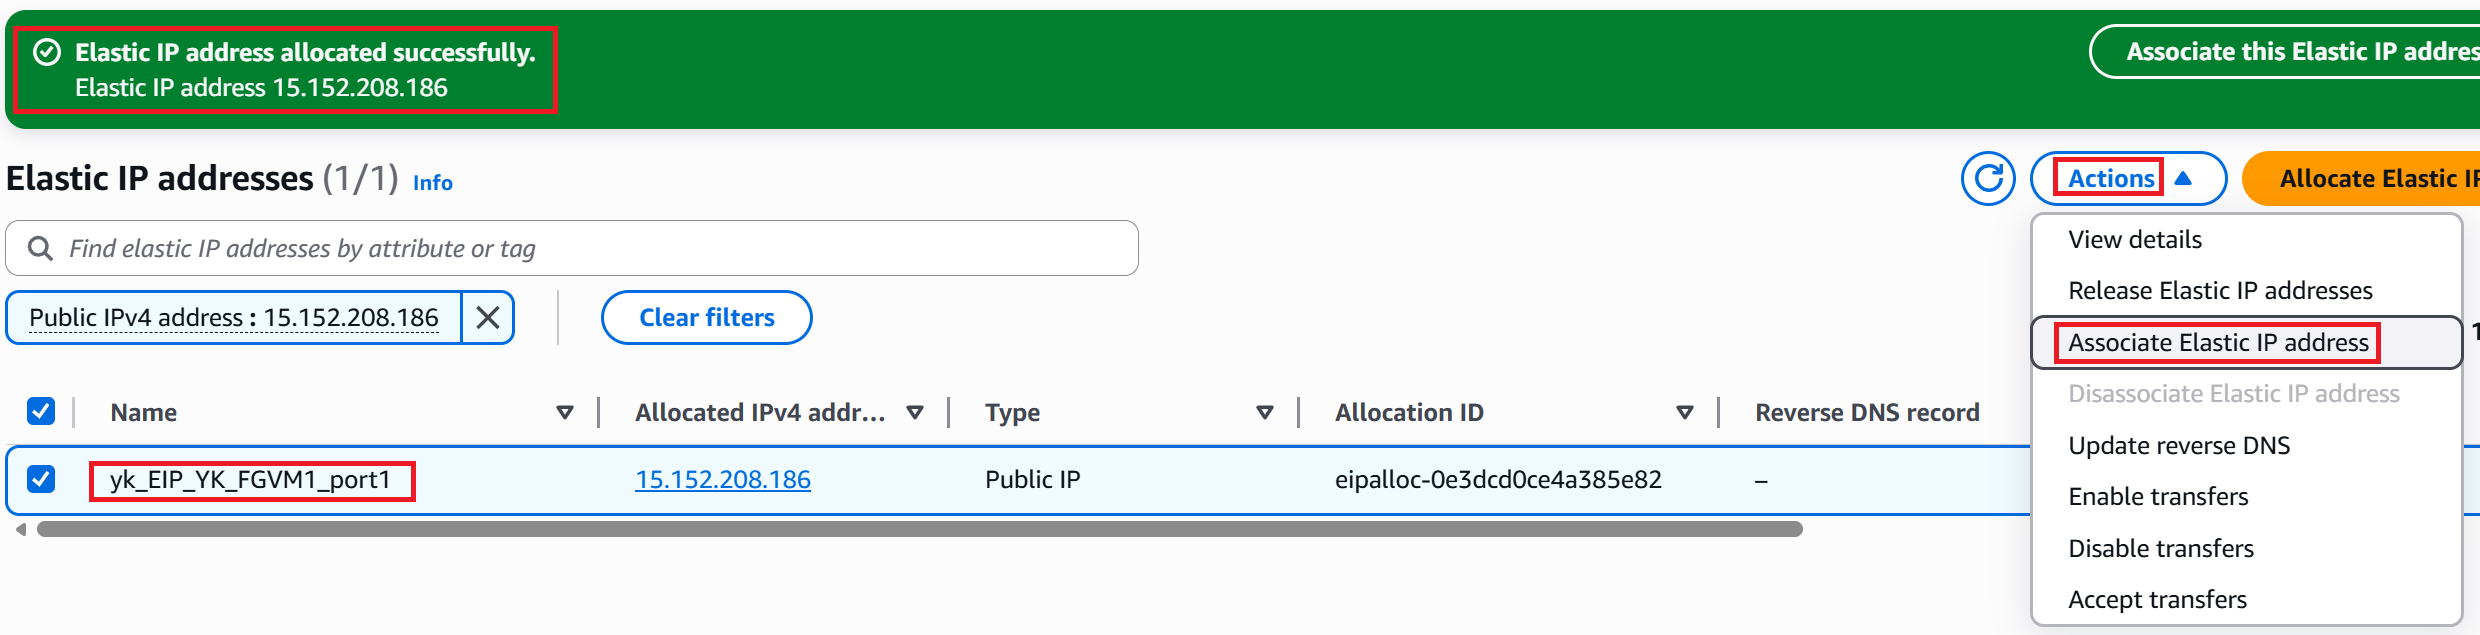
③ A success screen appears. The Name field will be blank, so enter a name. We used yk_EIP_YK_FGVM1_port1.
To associate it with the Network Interface, go to Actions → Associate Elastic IP address in the upper right.
④ For Resource type, select Network interface.
For Network Interface, select eni-00019~ (yk_NWIF_YK_FGVM1_port1).
For Private IP address, select 172.26.1.240. Then click Associate in the bottom right.
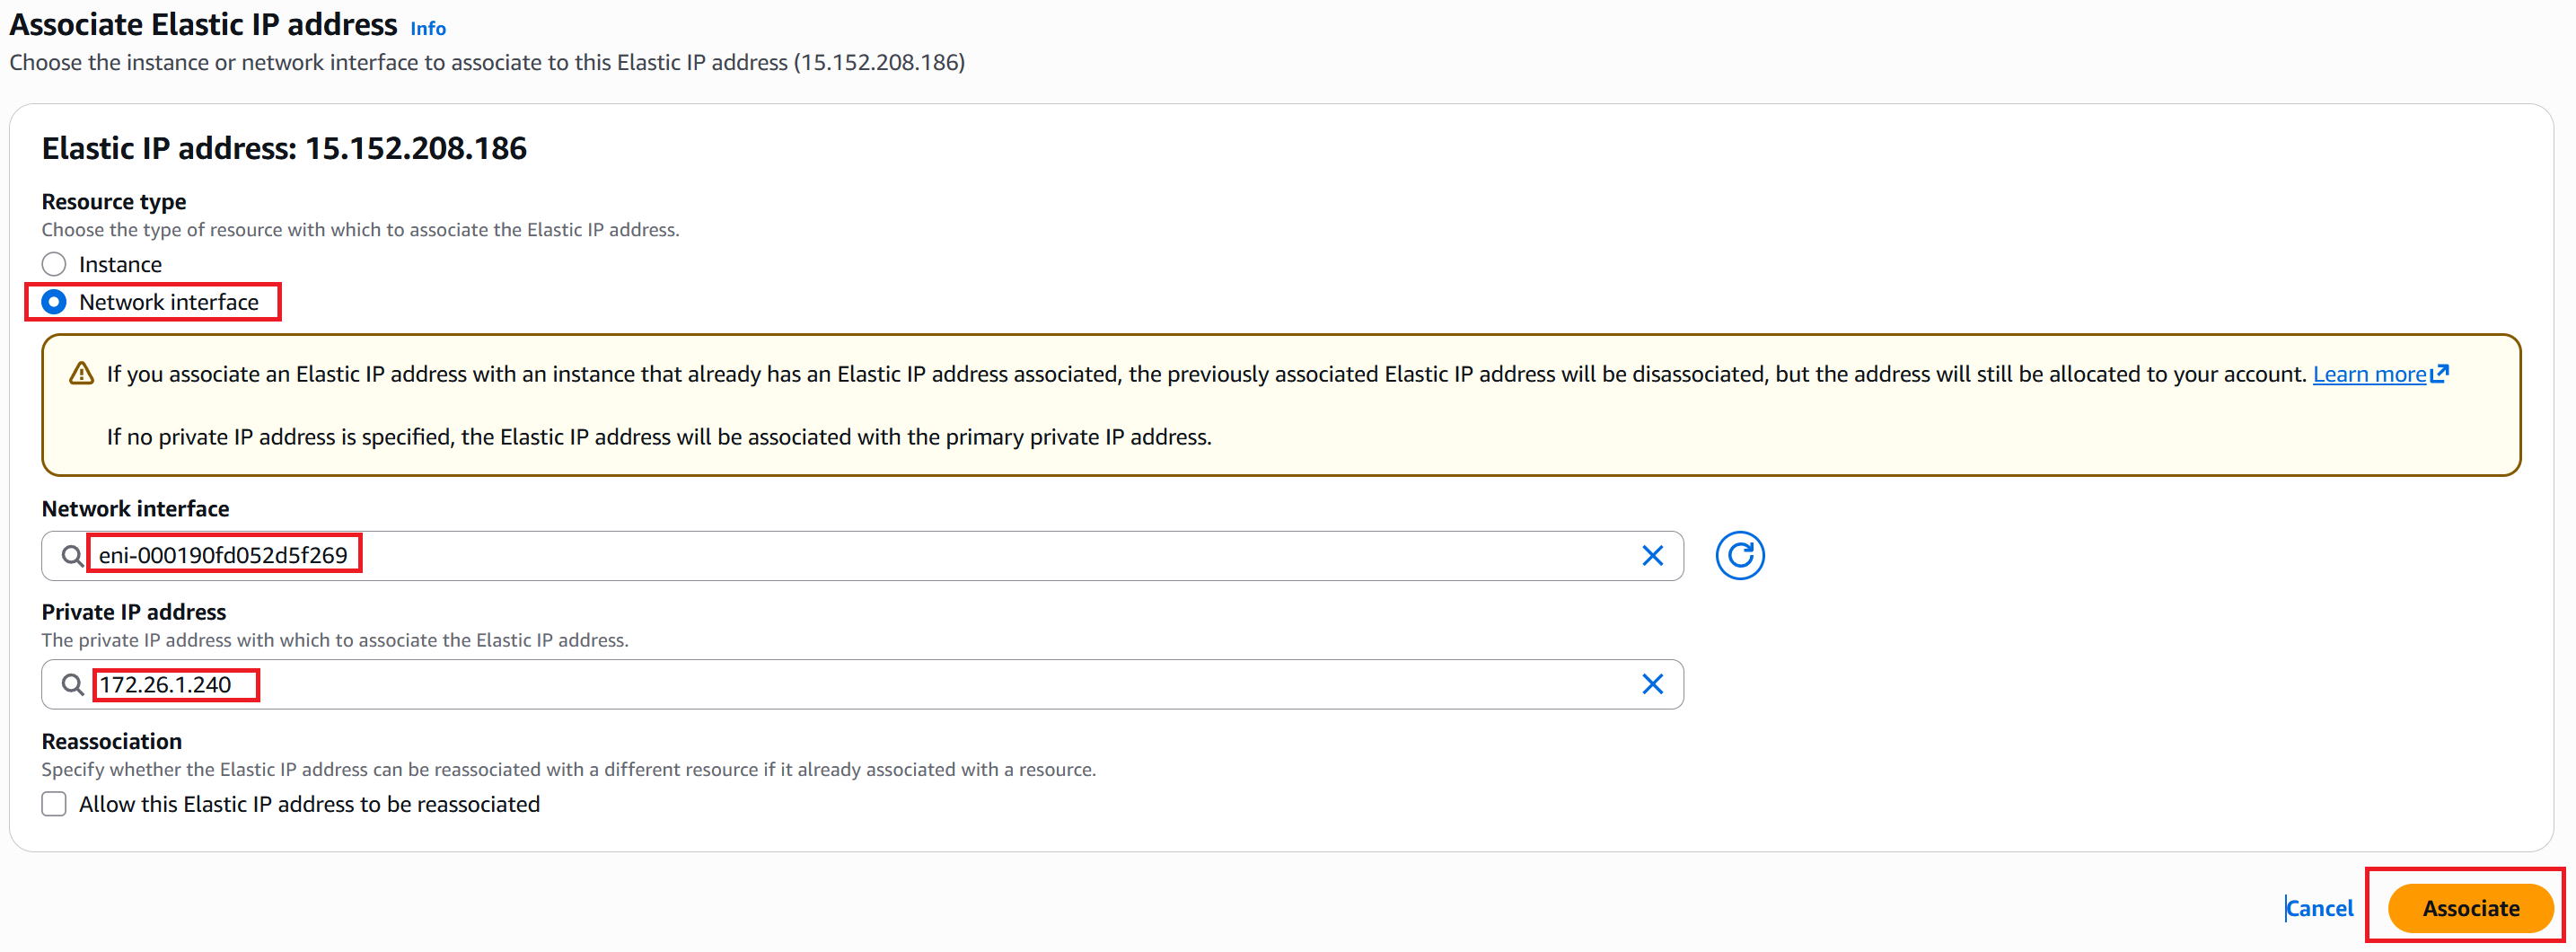
⑤ A success screen appears.

Create the FortiGate VM
|
Now it's time to create the FGVM itself (highlighted in red in the diagram above). |
|
Phew — that was a lot of prep. Here we go! I'm a little excited! |
|
Ha, same — I still remember the feeling of "wow" when I built one for the first time. |
① In the EC2 dashboard left menu, click Instances → click Launch instance in the upper right.

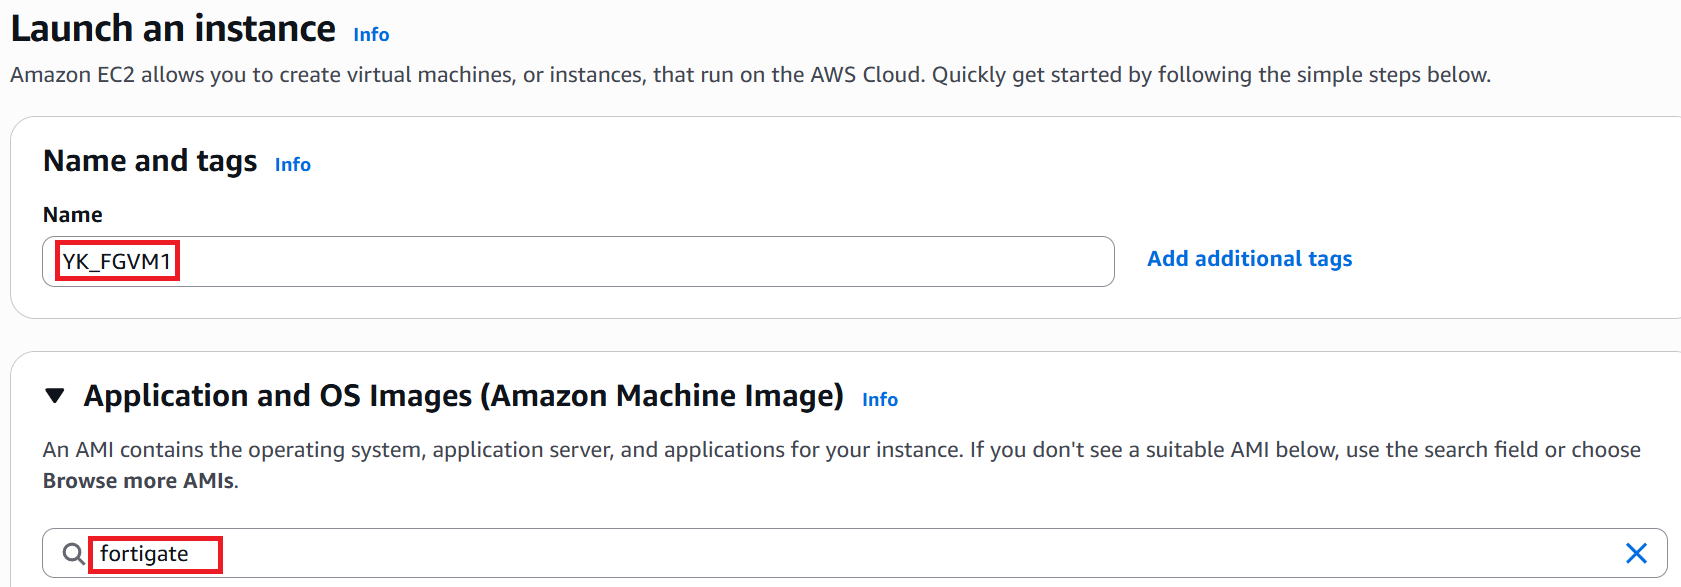
③ Enter YK_FGVM1 in the Name field. In the Application and OS Images field, type fortigate and press Enter.
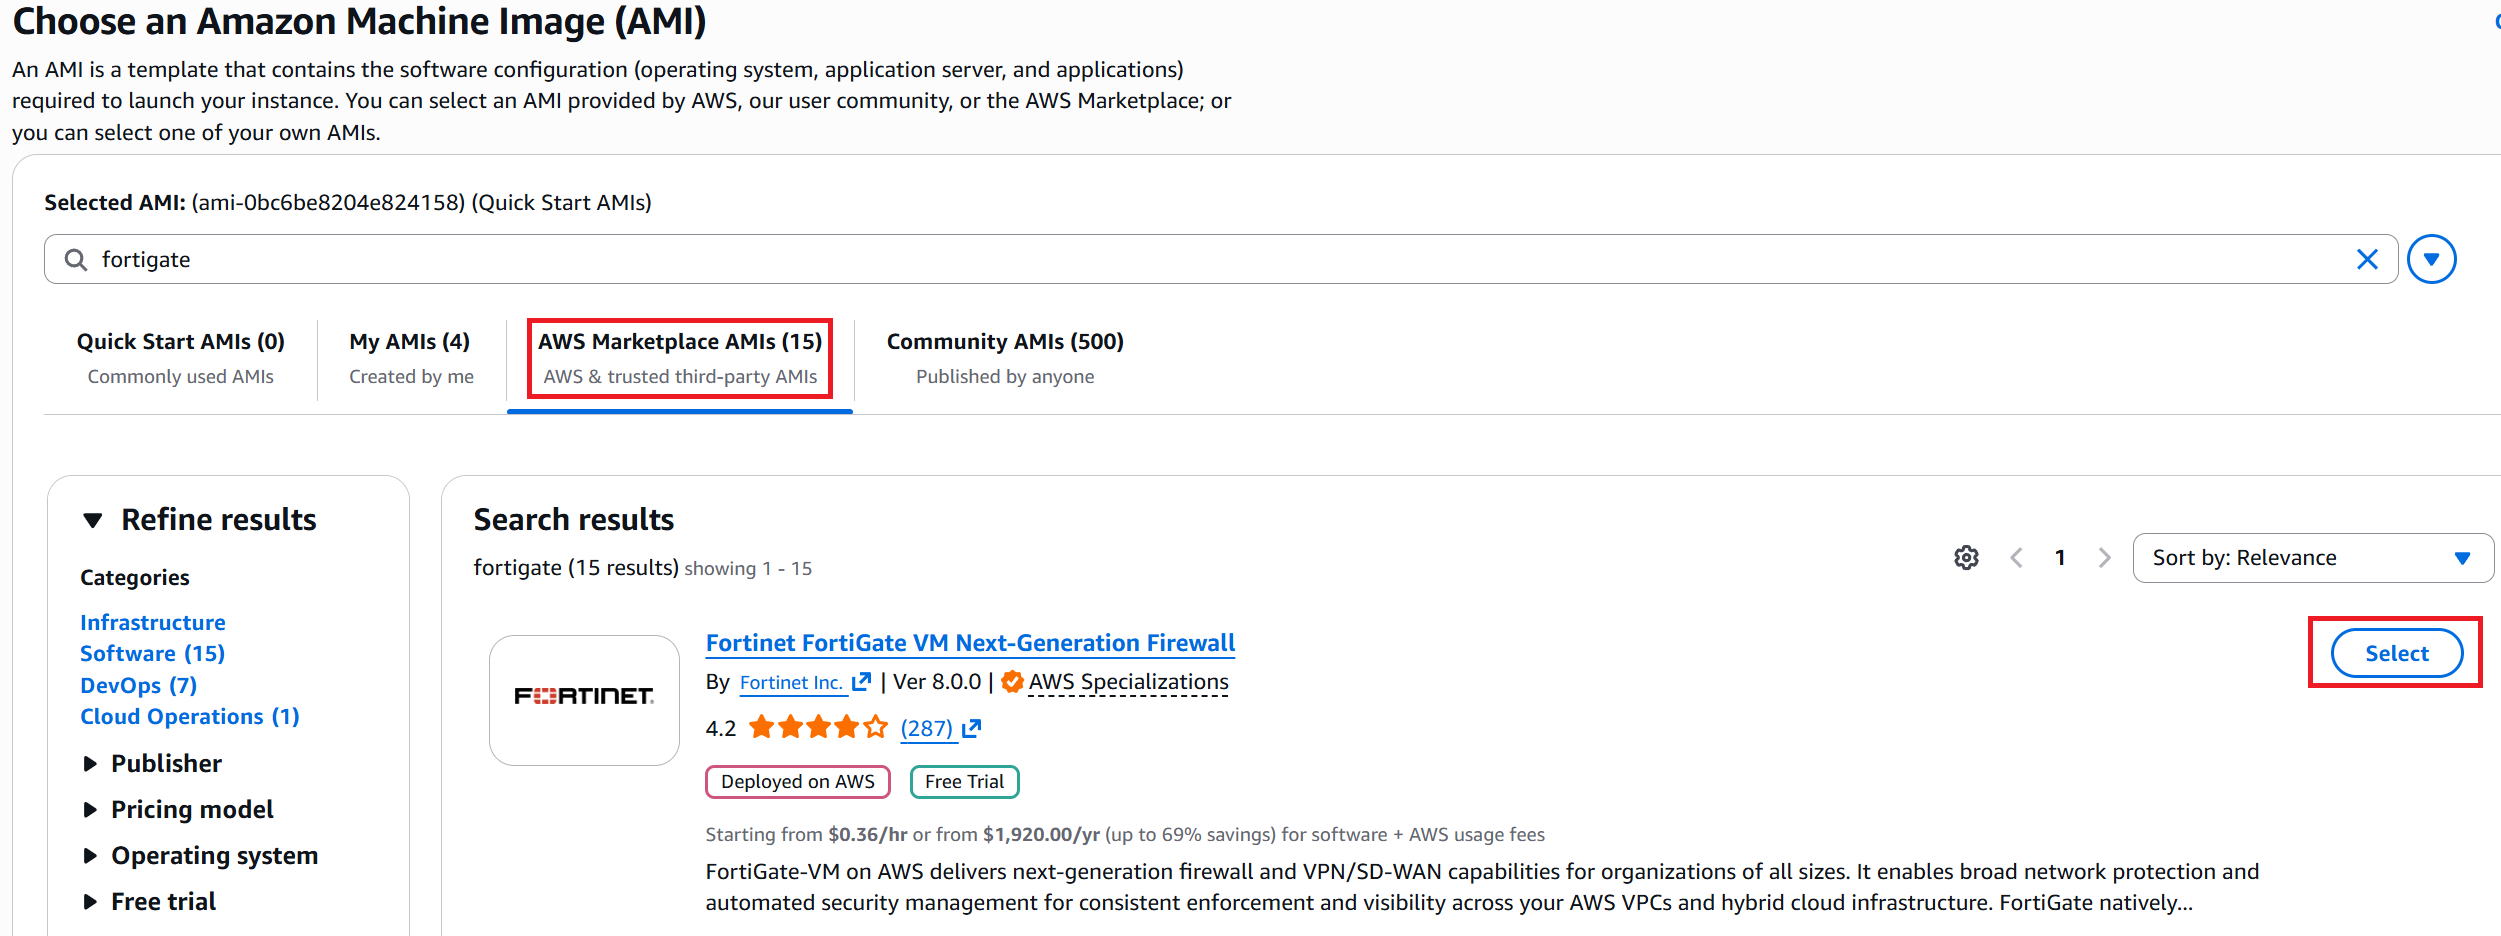
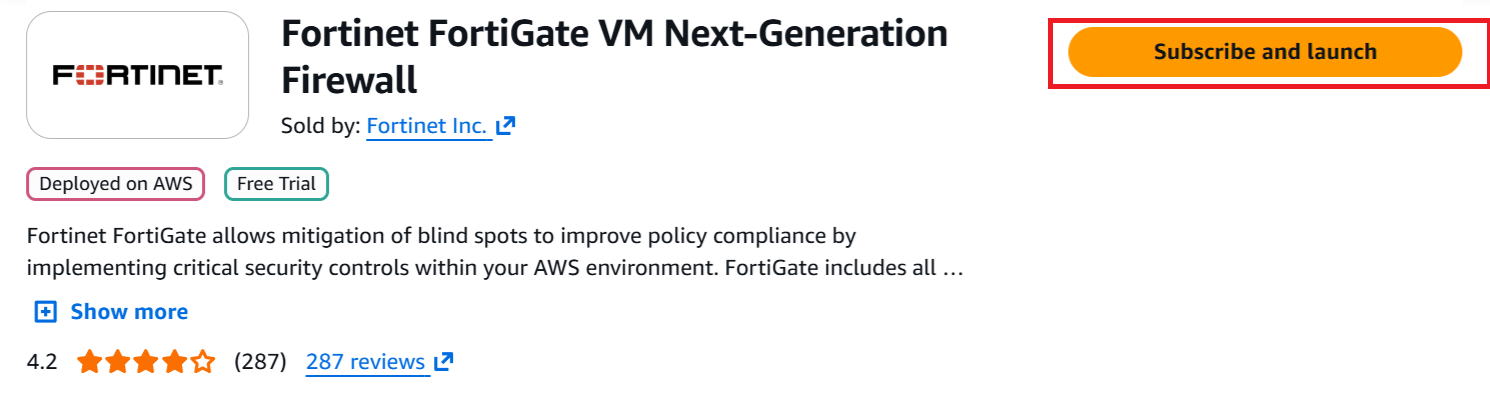
④ Open the AWS Marketplace AMIs tab and click Select next to Fortinet FortiGate VM Next-Generation Firewall.
※ You'll also see Fortinet FortiGate (BYOL) Next-Generation Firewall in the list — this is a different option.
BYOL stands for Bring Your Own License, meaning you need to purchase and bring your own license.
BYOL can be more cost-effective if you plan to run the instance continuously for a long time, but otherwise avoid it.
⑤ Click Subscribe and launch.
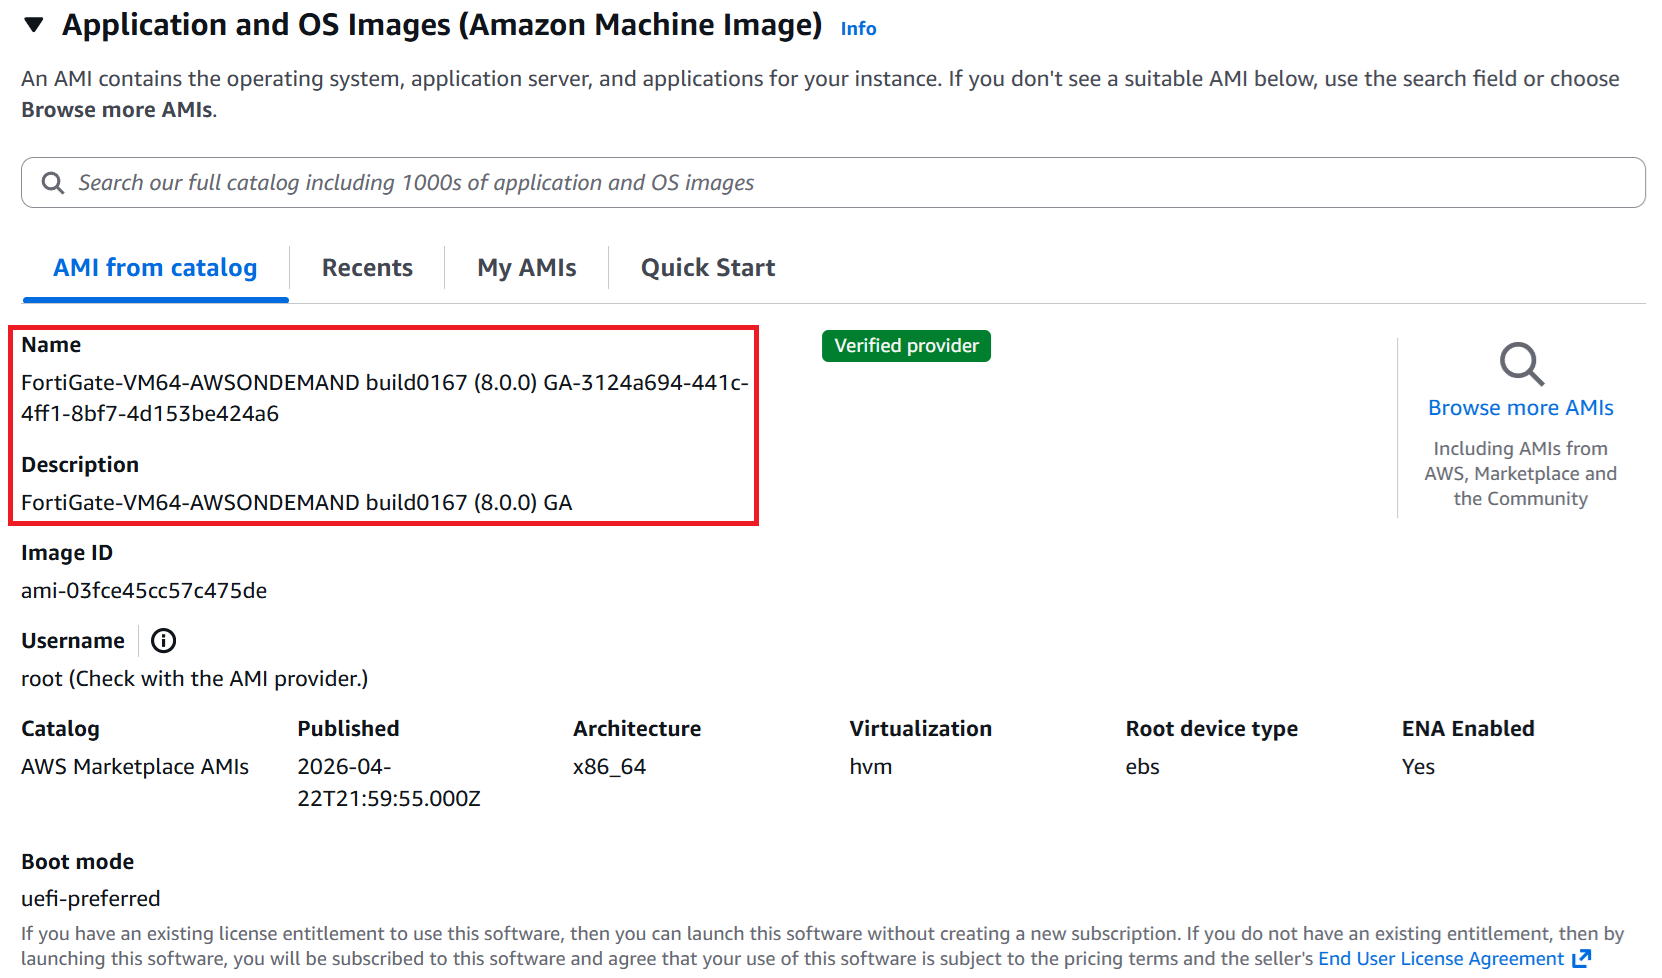
⑥ You're returned to the previous screen. Confirm that FortiGate-VM is selected as shown in the red box.
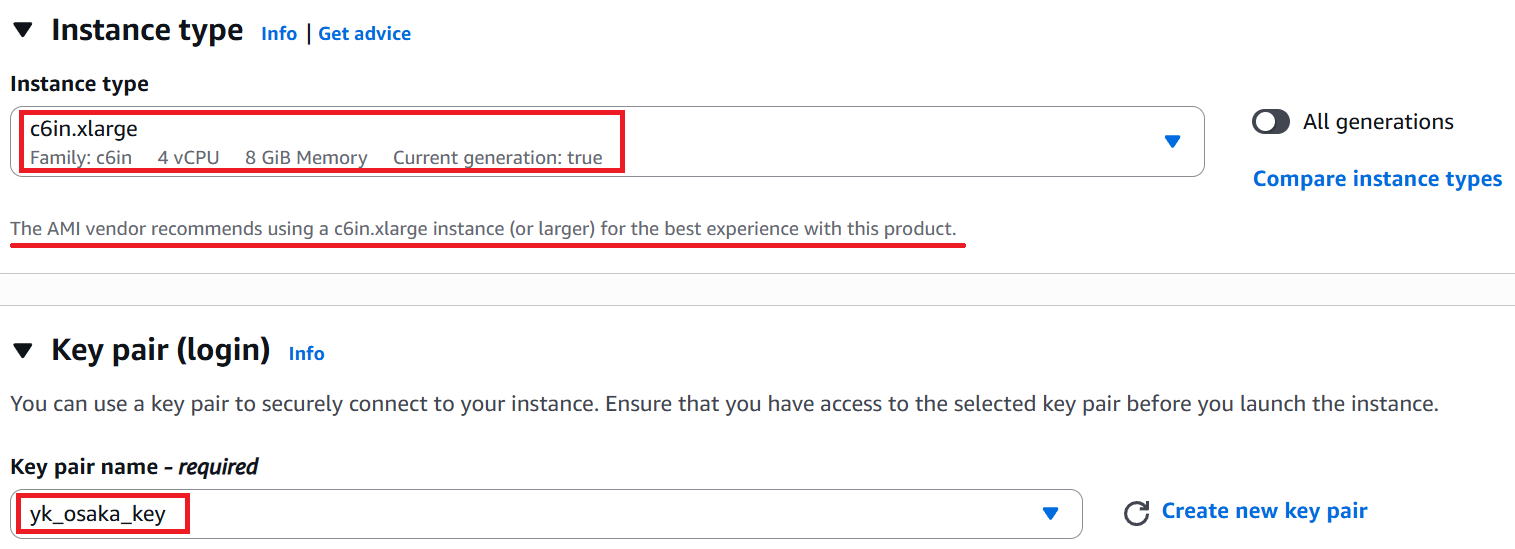
⑦ For Instance type, select c6in.xlarge. As shown by the red line, this is actually the default recommended option.
We'd personally also recommend 8GB of memory or more, so this instance type should work well.
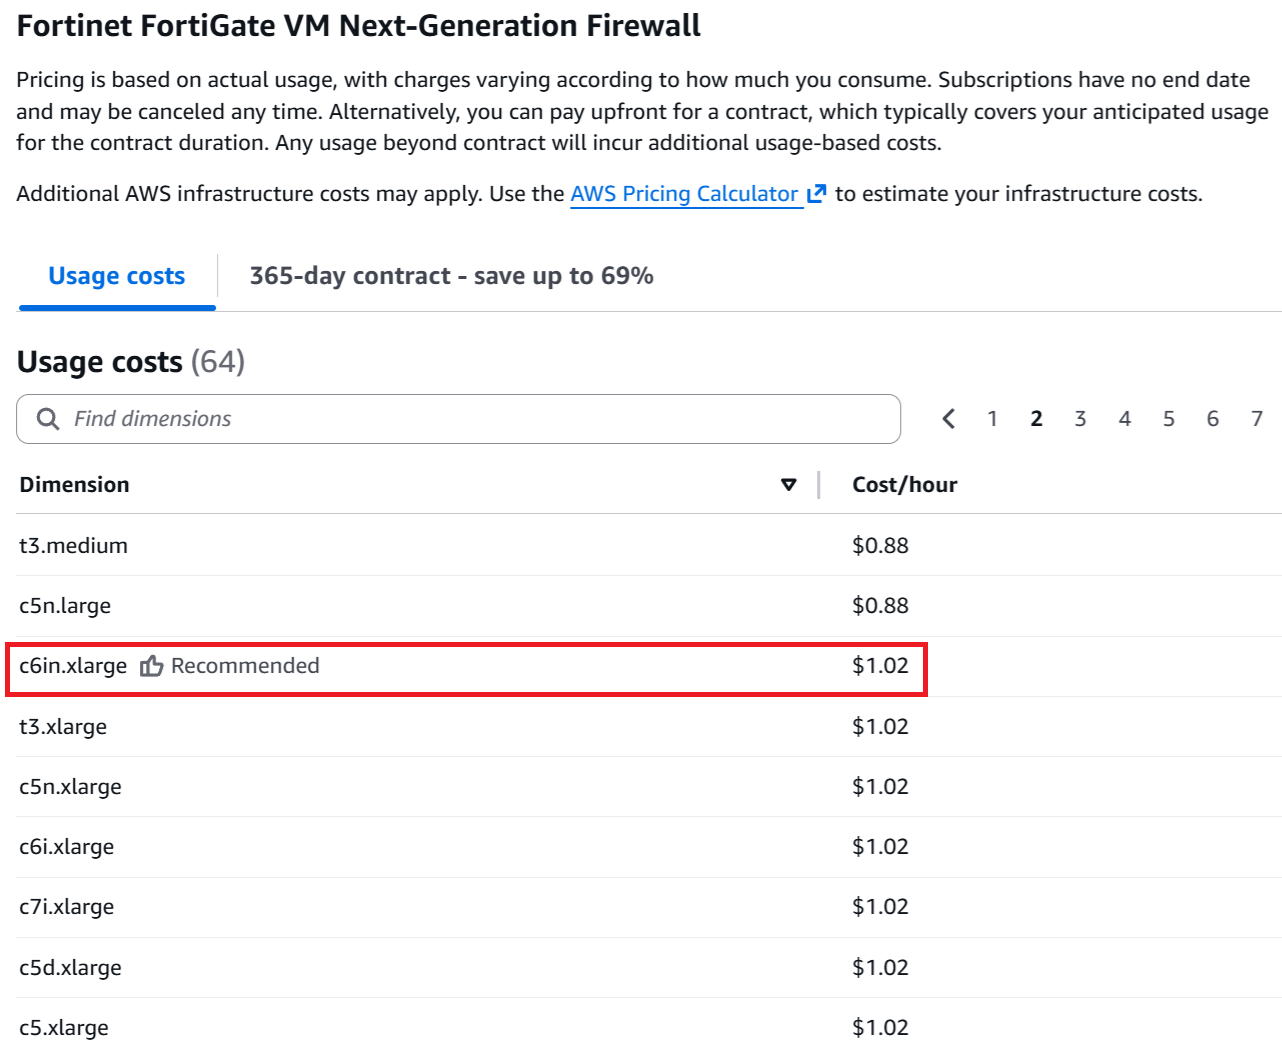
Note that the resource usage cost for c6in.xlarge is $1.02/h as shown in the second screenshot. It's on the pricier side, but it's among the cheapest options with 8GB+ memory...
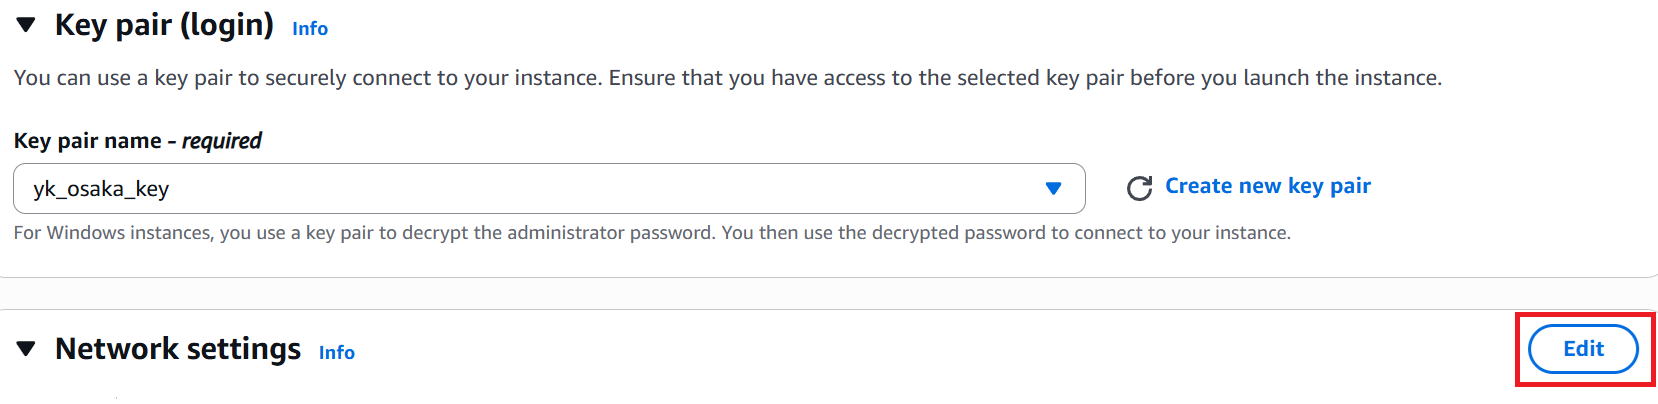
For Key pair, select the same key as used for the Windows VM — yk_osaka_key.
⑧ Click edit in the Network settings section.
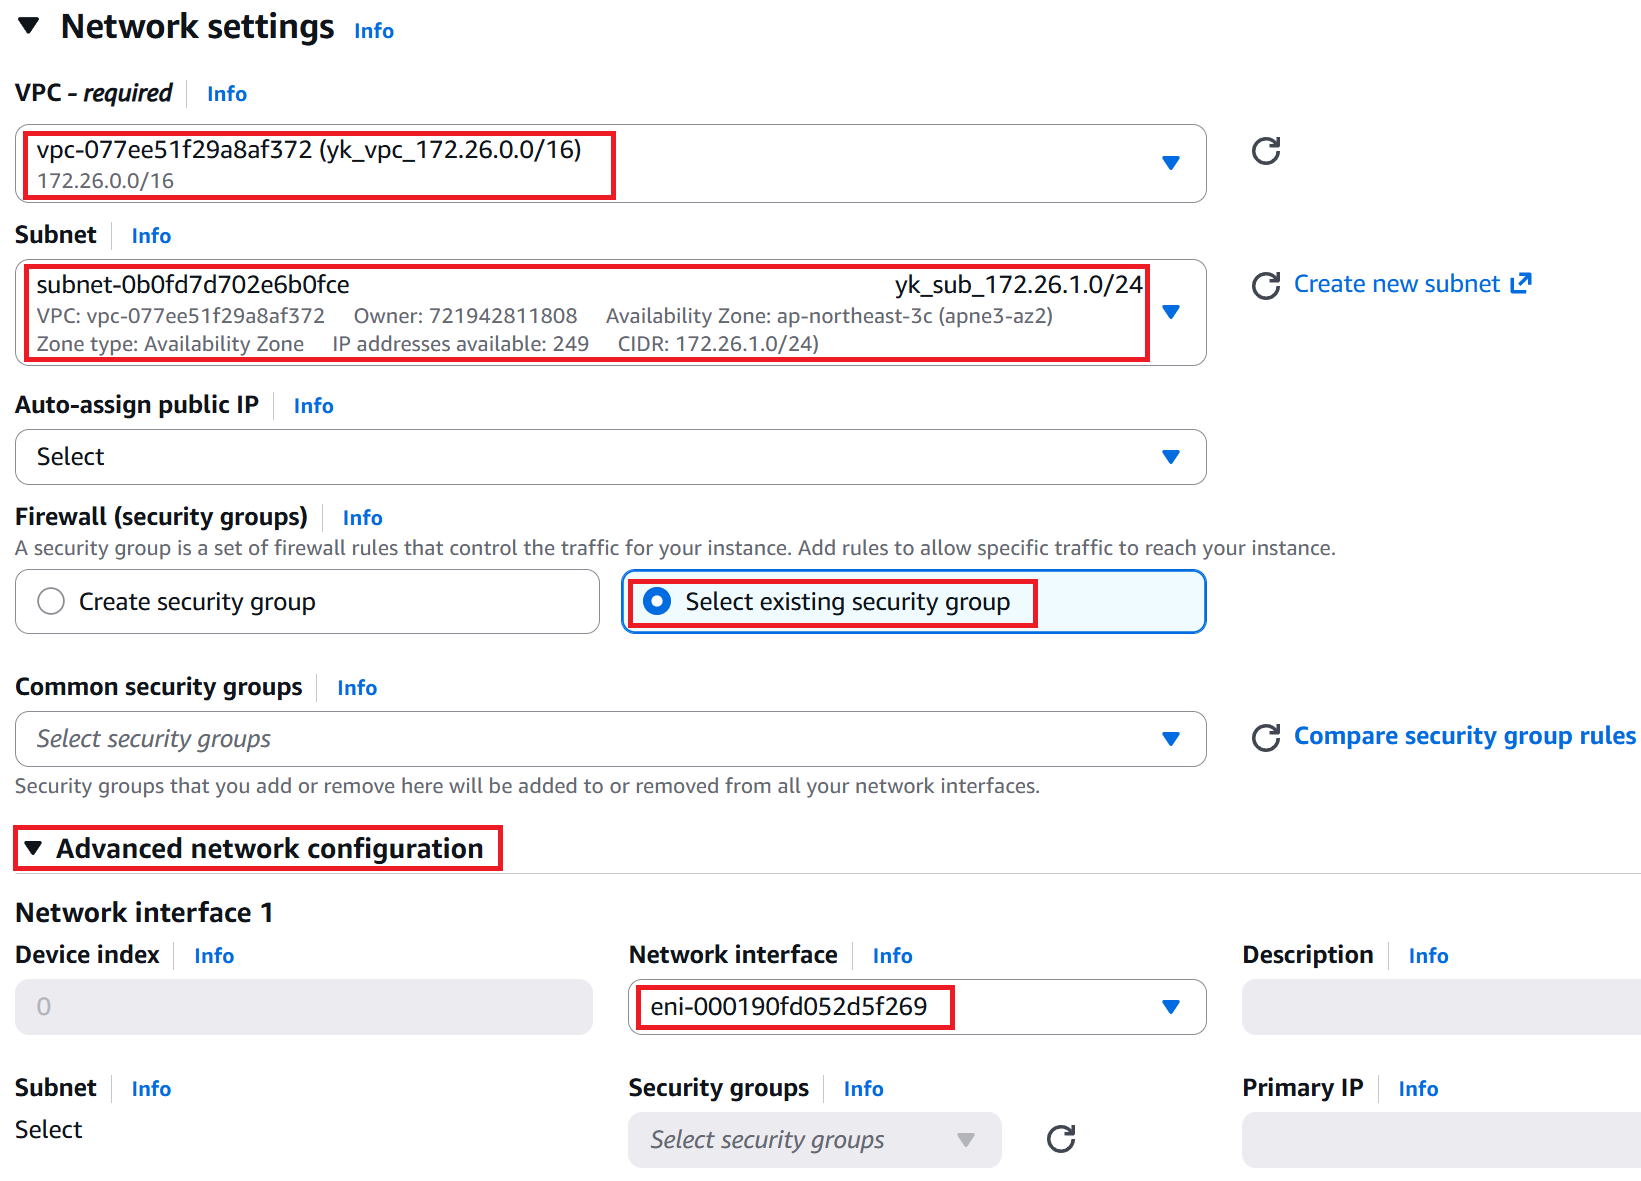
⑨ For VPC, select yk_vpc_172.26.0.0/16.
For Subnet, select yk_sub_172.26.1.0/24.
For Firewall (security groups), select Select existing security group.
Expand Advanced network configuration and select eni-00019~ (yk_NWIF_YK_FGVM1_port1) from the Network interface dropdown.
⑩ To add the port2 Network Interface, click Add network interface.

⑪ For Subnet, select Select. For Network interface, select eni-06051~ (yk_NWIF_YK_FGVM1_port2).

⑫ Click Launch Instance in the bottom right.

⑬ "Success" is displayed and the VM has been created. Click the instance ID in the red box to view the details.

Verification
|
Let's verify everything is working. First, we'll test admin access (HTTPS, SSH, and ping) from PC1 to the FGVM, as shown in the diagram. |
■ PC1 → FGVM1 HTTPS
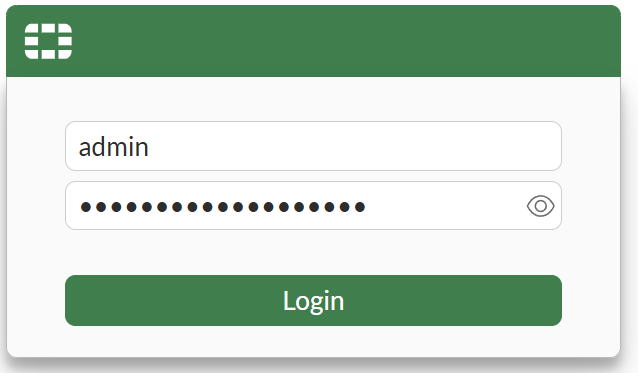
① Enter https://15.152.208.186 in PC1's browser. A certificate warning will appear — proceed past it, and the screen below will be displayed.
It states that the username is admin and the password is the instance ID.
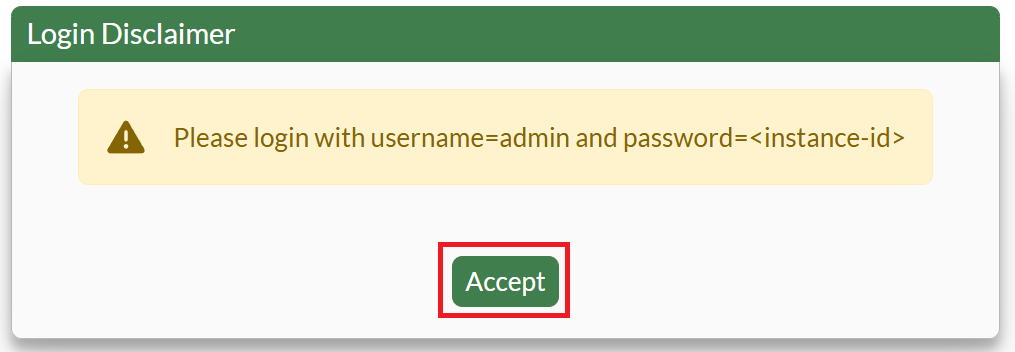
② Enter admin as the username and the instance ID as the password, then click Login.
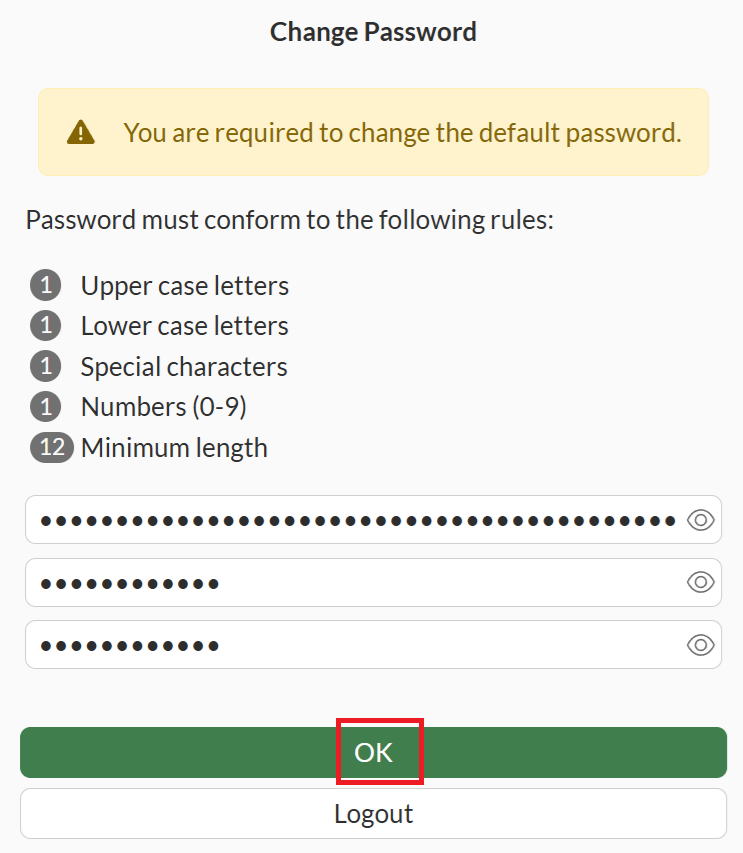
③ You'll be prompted to change the password — set it to something of your choice.
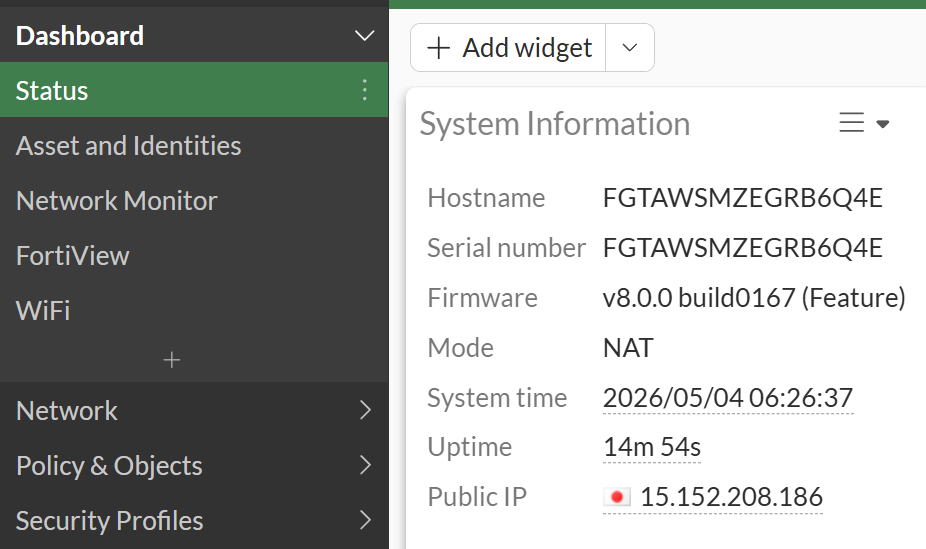
④ The login screen appears again — log in with the new password. After answering a few setup prompts, the GUI dashboard shown below is finally displayed.
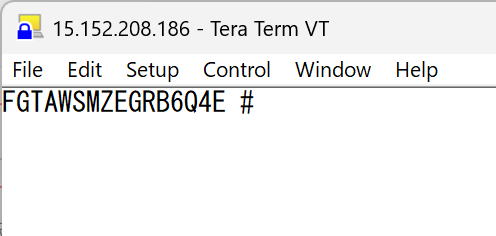
■ PC1 → FGVM1 SSH
① Try SSH from Tera Term. Enter the username and password, then click OK.
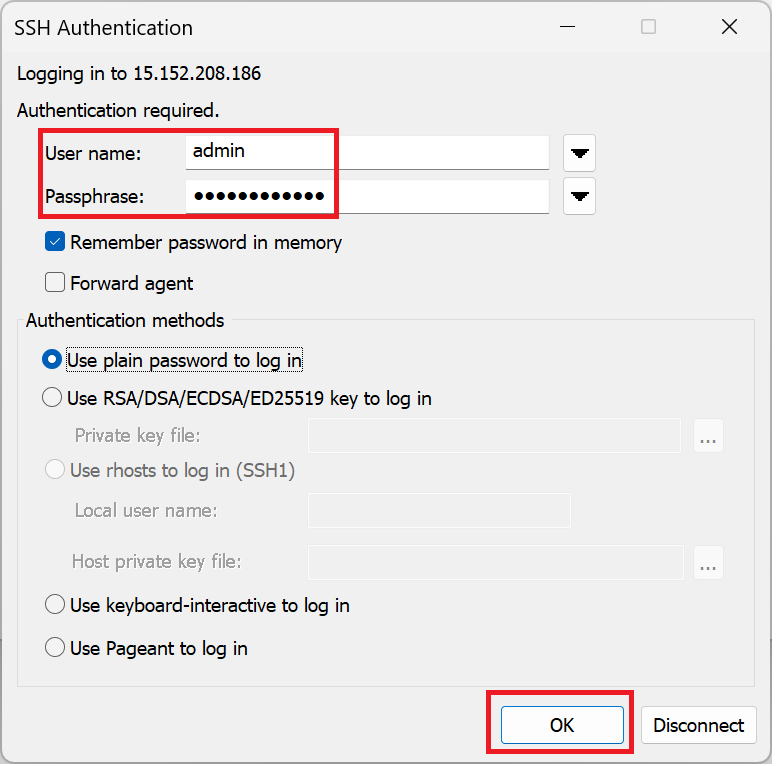
② SSH connection established successfully.
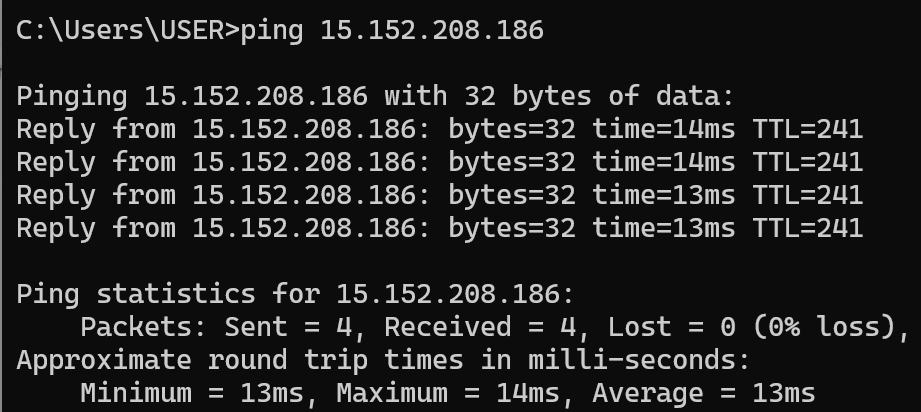
■ PC1 → FGVM1 Ping
Ping also succeeded.
|
All three passed! |
|
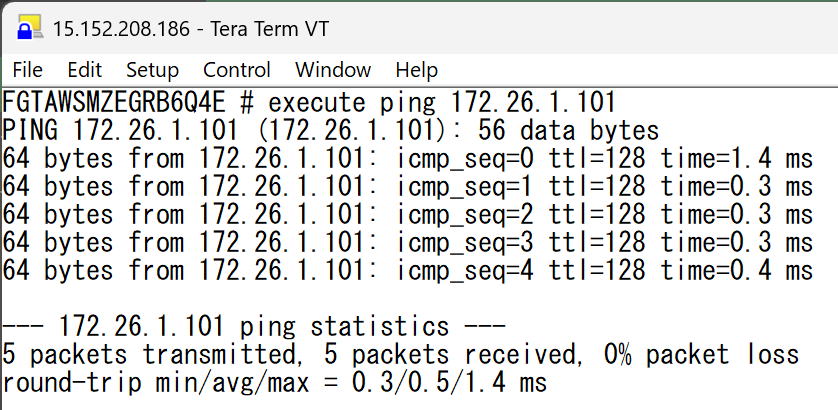
Great. Now let's test ping between the FGVM and winsv1. |
■ FGVM1 → winsv1 Ping OK
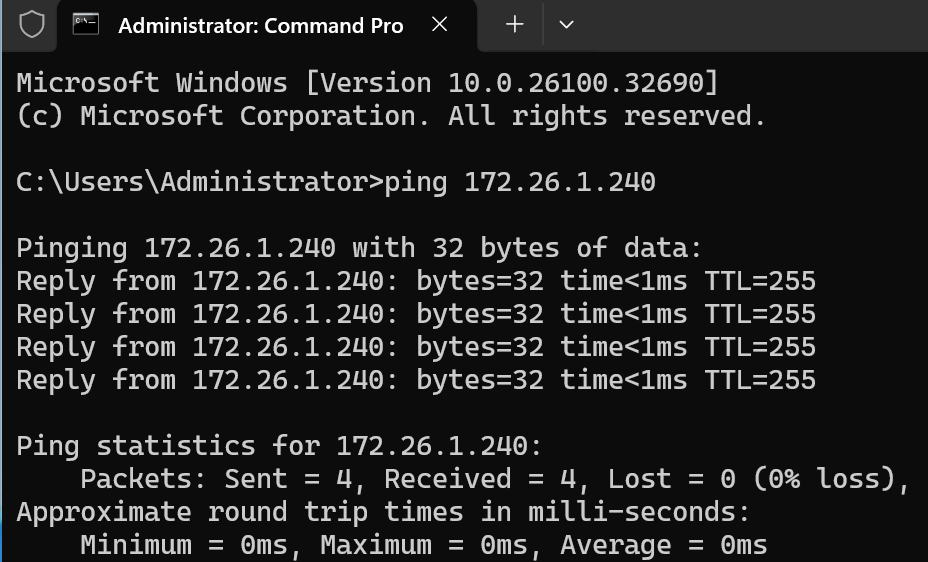
■ winsv1 → FGVM1 Ping OK
|
Those passed too! |
|
That wraps it up for today. Thanks for following along! Next time, we'll spin up another Windows VM and try routing internet traffic through the FGVM. |